![[SFxT] Moddah's Guide to Adding Customizable Colors](https://dist.tekkenmods.com/dist-cache/1920/1/posts/12/thumbnails/6be90811309a4113-1280x720.jpg)
You need to work on 4 files:
- obj.emm
- obj.emb
- color_cluster.lua
- obj.emo
Tools
- sf4 asset's explorer v0.37b:
http://sf4viewer.sourceforge.net/
- emmedit v1.2:
http://sloth85.deviantart.com/art/EMMEdit-v1-2-306325848
- text editor (notepad++, ultraedit, etc...)
- hexadecimal editor (hxd, ultraedit, etc...)
Guide
1) You can only mod parts that don't already use 3 colors. If the part already uses 3 colors, you won't be able to add a 4th.
You have to look at the part you want to mod to check if you can add color(s).
Open the obj.emm in emmedit and look at the shader's name:

If it's "SpcBumpBrushColorR", you can add 2 colors If it's "SpcBumpBrushColorRG", you can only add 1 color. If it's "SpcBumpBrushColorRGB", you can't add a color on this part.
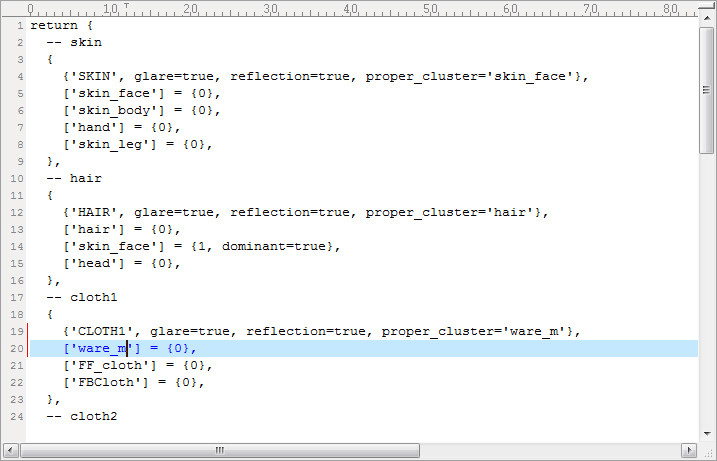
Here I selected "ware" (Ryu's upper kimono), its shader is "SpcBumpBrushColorR".
You have to rename the mesh. I rename it into "ware_m".
If you want to add 1 color , add "G" to obtain: "SpcBumpBrushColorRG" If you want to add 2 colors, add "G" and "B" to obtain: "SpcBumpBrushColorRGB". (you may find other shaders' names but it will be the same deal with R, G and B)
I want to add 2 colors so I change "SpcBumpBrushColorR" into "SpcBumpBrushColorRGB".
Now you can add the colors by clicking on "<presets" and selecting "MatCol" (twice)
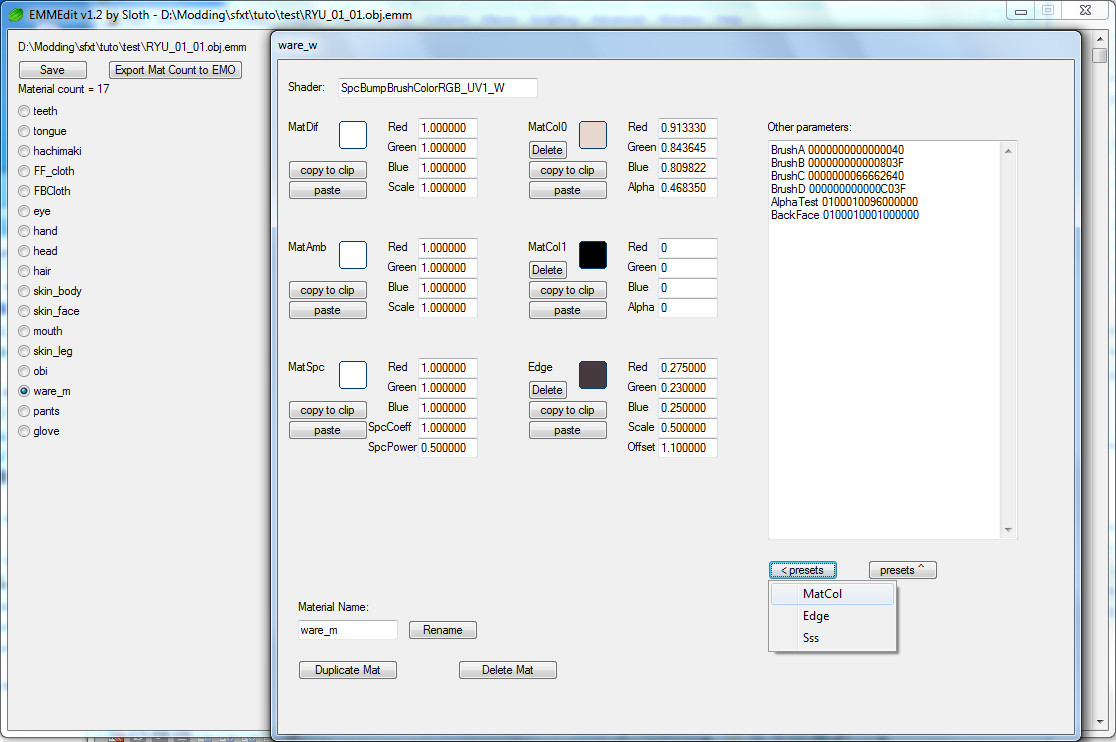
It creates 2 new slots with 0 color value (black).
Chose your colors.
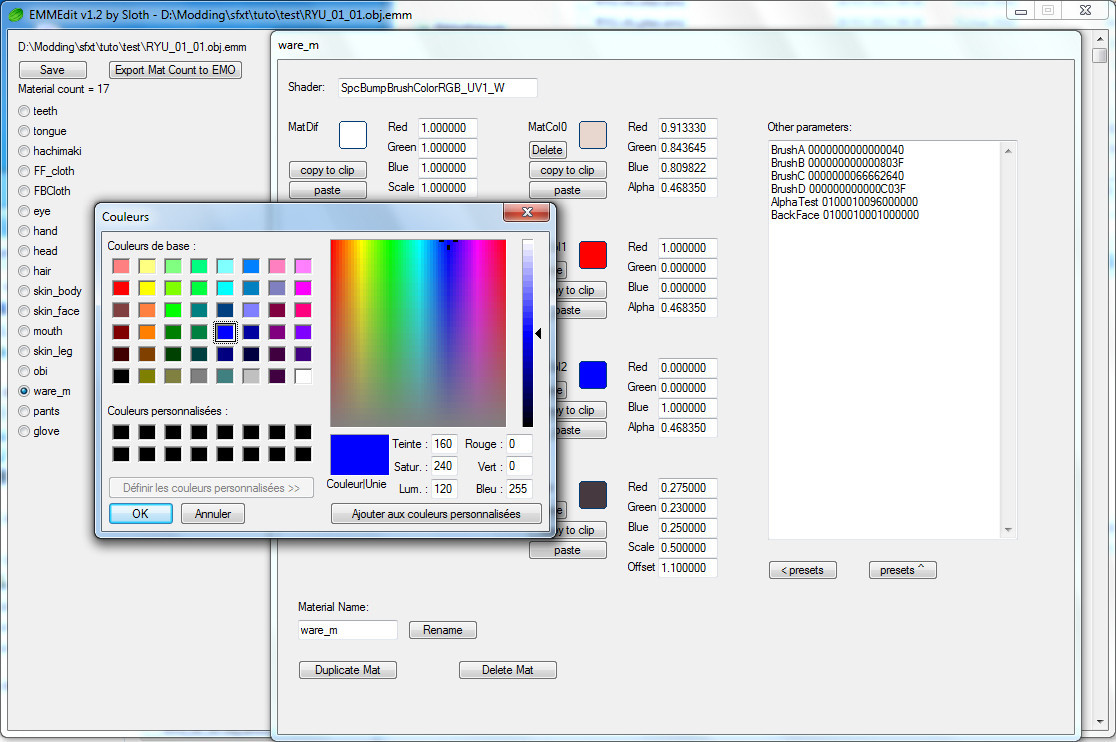 Save the obj.emm.
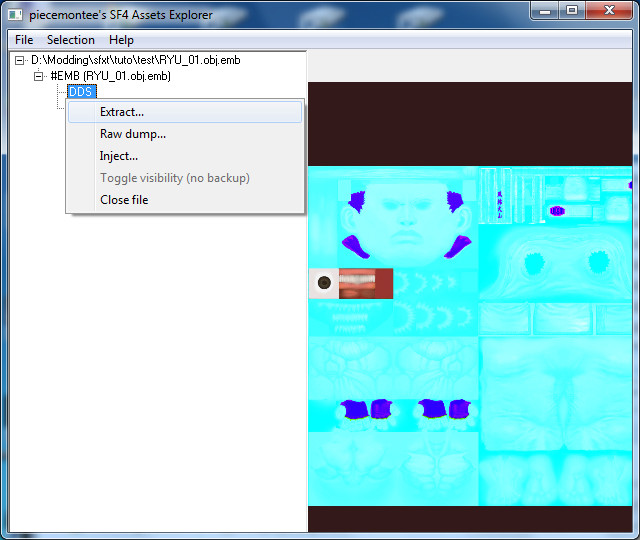
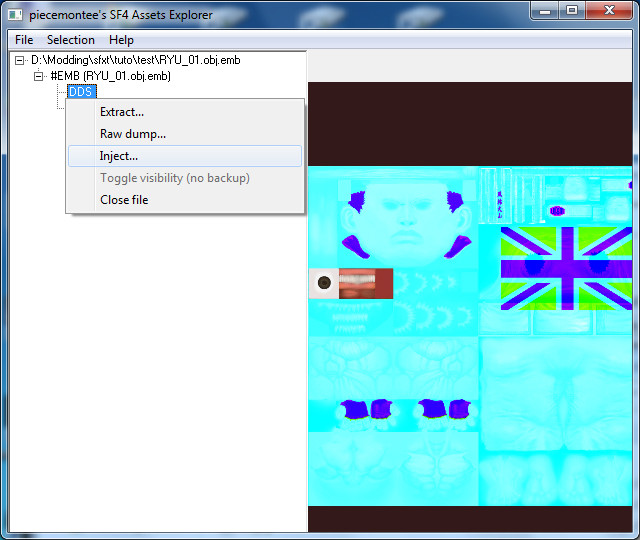
2) Open obj.emb with sf4 asset's explorer and extract the texture dds (it should be the first).
3) Open the dds in your design program (photoshop, etc...)
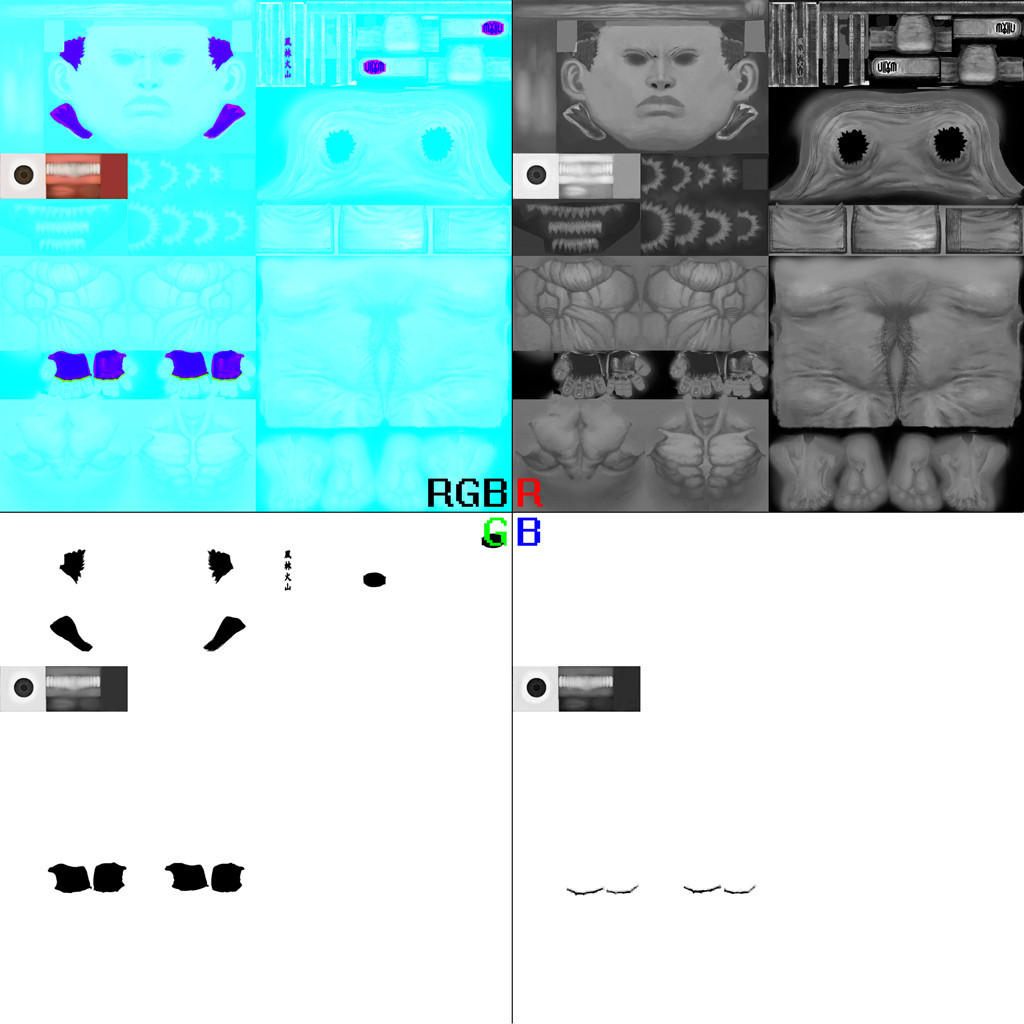
the RGB layer is the total of the 3 others: the Red layer (in black and white) is the layer that corresponds to MatCol0 the Green layer (in black and white) is the layer that corresponds to MatCol1 the Blue layer (in black and white is) the layer that corresponds to MatCol2
How it works is you "switch on" or "off" the layers: "black=on" and "white=off" (white is transparent on the Green and Blue layers)
Each layer overwrites the former but you keep the texture design of the Red layer.
Everything in black on the Green layer will have the color of MatCol1 (for the parts with a "RG" shader) Everything in white on the Green layer will have the color of MatCol0
Everything in black on the Blue layer will have the color of MatCol2 (for the parts with a "RGB" shader). Everything in white on the Blue layer will have the color of the layer used under it (MatCol0 or MatCol1).
Work your layers!
Some british inspiration:
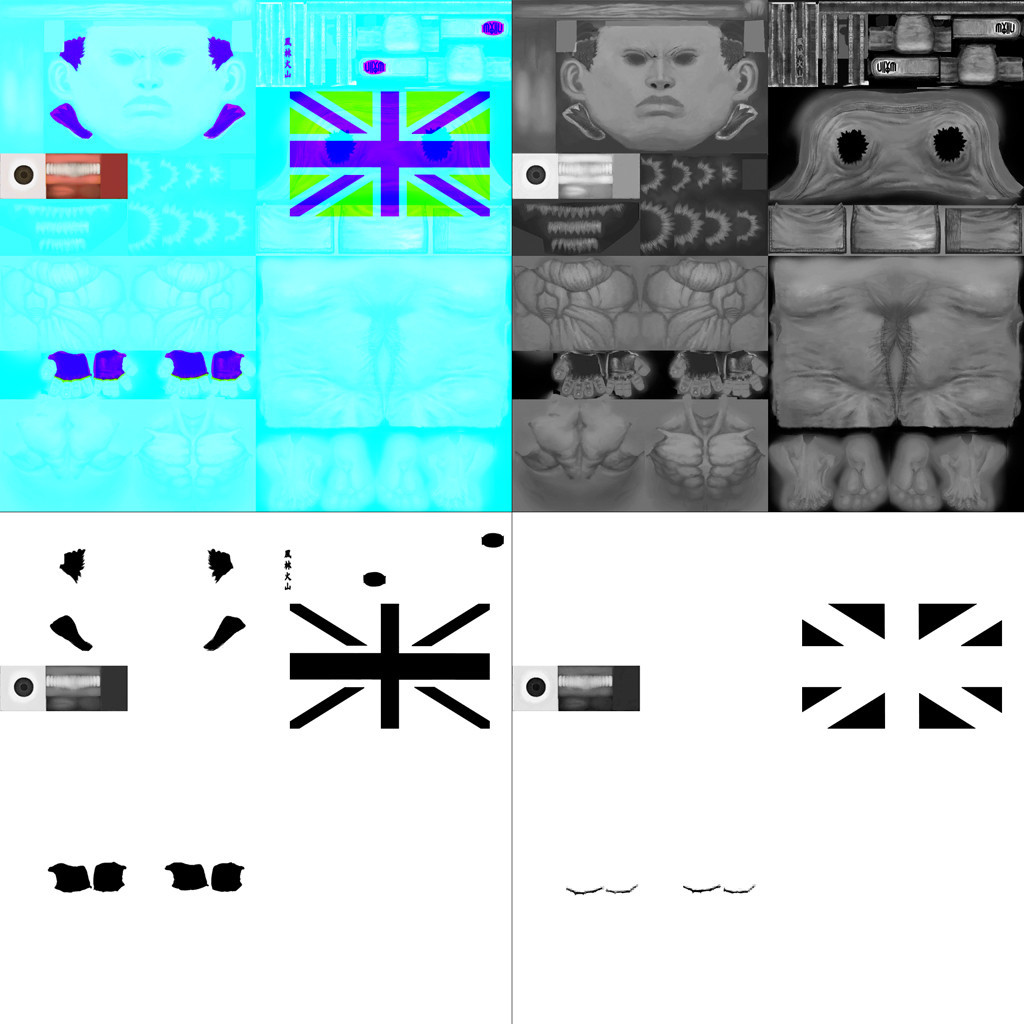
Save your dds.
4) Open obj.emb with sf4 asset's explorer and inject your dds with sf4asset's explorer.
5) Open color_cluster.lua in a text editor.
Change the mesh name wherever it appears ("ware_m" for me):
And add (with your mesh name instead of "ware_m")
['ware_m'] = {1, dominant=true},
and
['ware_m'] = {2, dominant=true},
to 2 existing color plates.
Or if you have room (10 color plates maximum) create 2 new color plates:
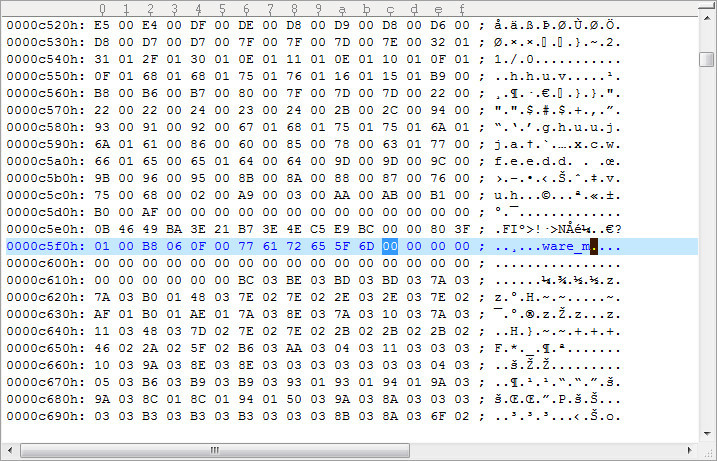
6) Open obj.emo in your hexadecimal editor and use the search on your mesh name then rename it.
I rename "ware" into "ware_m".
I now have 3 customisable colors on Ryu's shirt (yay!):