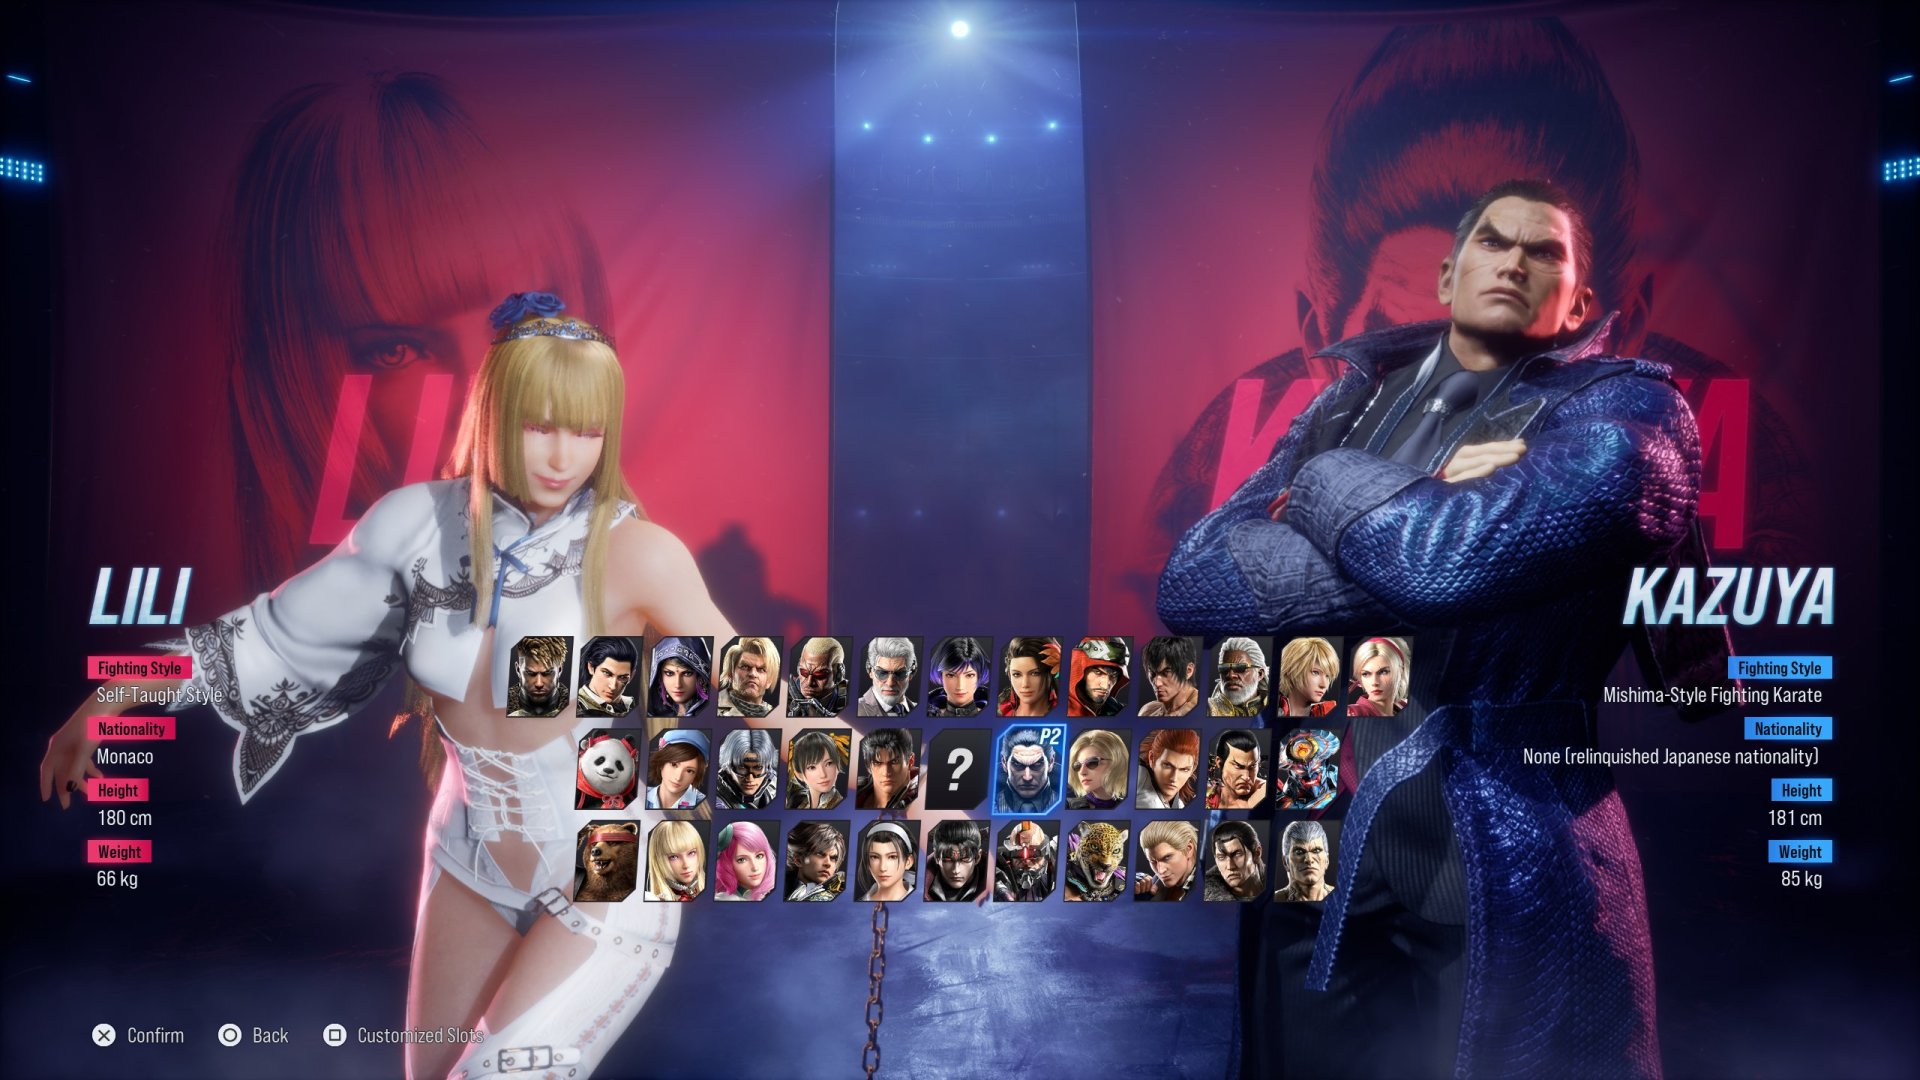
RigidBody Physics Chains for Lili Bride Costume by fertexhid
Previously in Tekken 8, if we wanted to make any item that had physics enabled, we could only use Cloth Physics. Recently I've discovered a method to set up RigidBody Physics which opens up a lot of more possibilities in what we can do with our character mods.
We'll talk about a method of setting up RigidBody Physics, this tutorial can also be used as a method of setting up all sorts of Animation Blueprint options, such as Animation Sequences, Anim Dynamics and more!
Prerequitisites
Make sure that you are using a Polaris Project, and that you have a Skeletal Mesh with your extra bones. Additionally, you should already have a Physics Assets sorted out.
Creating Our Base Item
But before we can get into setting up the Animation Blueprint associated with our RigidBody Physics we need our own Polaris Base Item. Our Polaris Base Item includes information on the mesh that gets spawned.
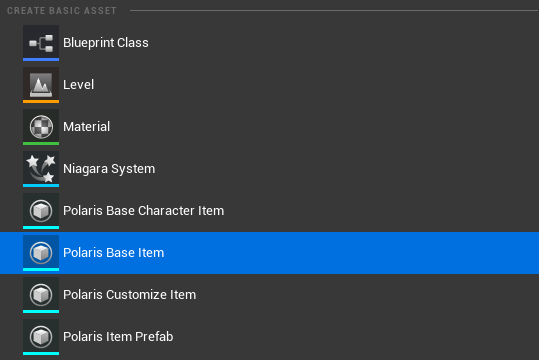
Create a new Polaris Base Item by right-clicking in the Content Drawer.
Creating and Assigning an Item Actor Blueprint
The Item Actor Blueprint is extremely important as we'll be using our own Custom Blueprint to adjust some settings within our mesh. The Blueprint gets loaded from the Base Item and the class that gets loaded is stored in the Item Base Class.
For the Blueprint to be usable here, it needs to be parented off of Polaris Item Base Actor, otherwise it won't show in the Item Base Class dropdown.
To create a new compatible blueprint find Item Base Class in your newly created Polaris Base Item and hit the plus icon to create a new one.

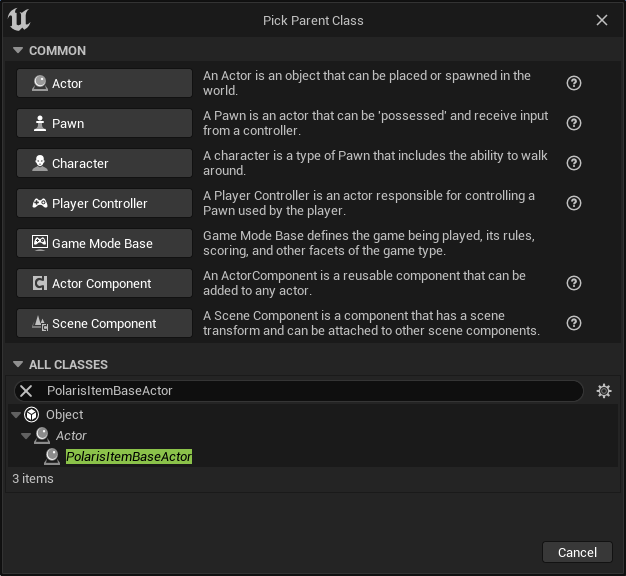
Alternatively, you can right-click on your Content Drawer, select Blueprint Class and search for PolarisItemBaseActor in your Class Search
Creating an Animation Blueprint
We need to create an Animation Blueprint that will allow us to use the RigidBody physics we have connected to our mesh. In the Content Browser, right-click on the Skeletal Mesh that you'll be modding into the game, click Create and then click Anim Blueprint.
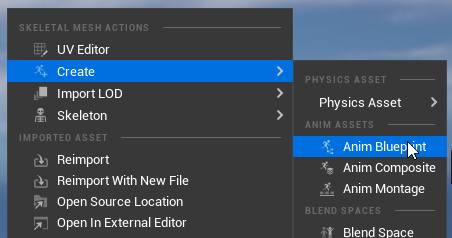
This will create an Animation Blueprint associated with our Skeletal Mesh.
Making a Copy Of Tekken's Animation Pose
Copy Pose From Mesh is crucial for anything that needs to track the Tekken Base Pose. If you're creating any physics that doesn't need to follow Tekken's Base Animation, you don't need to do this.
Additionally, Copy Pose From Mesh comes with a bit of overhead, it shouldn't be anything too crazy for Tekken, but just keep that in mind.
In the Animation Blueprint drag off of the Output Pose and search for Copy Pose From Mesh
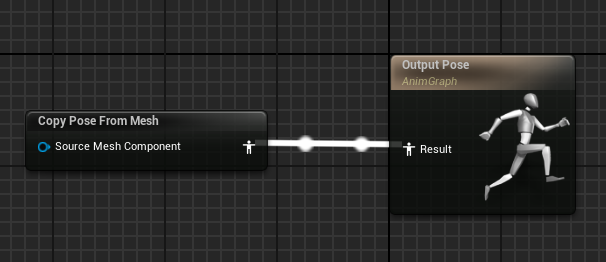
Copy Pose From Mesh does exactly what it says on the tin, it will copy our skeleton position which can then be manipulated.
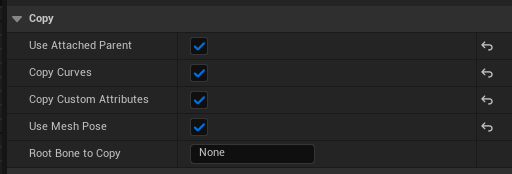
Whilst still having Copy Pose From Mesh clicked on, open the Details Panel and enable Use Attached Parent, Copy Curves, Copy Custom Attributes and Use Mesh Pose.
This will copy all the necessary information for a Tekken Pose.
Initalizing our Item Blueprint
Although we've created our Animation Blueprint, we haven't properly assigned it, and even if we do manage to assign it, our Animation Blueprint is currently being blocked off by Tekken 8's modular character setup. Let's set it up in a way to avoid that.
Return to the blueprint we created in Step 3, inside the Blueprint, we have an Event Graph that we can add... Events to. In the Event Graph window, right-click any empty space and type Mesh Created.
Add the Mesh Created event.
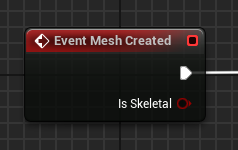
Mesh Created is an Event Function that is fired when the mesh has finished initializing in the game world. it's similar to Unreal Engine default Event BeginPlay but it's designed specifically for Tekken 8.
After creating the event, right-click anywhere in your Event Graph, filter search for GetSkeletalMeshComponent and click it.
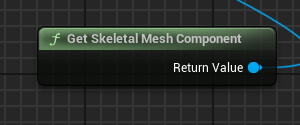
GetSkeletalMeshComponent is a direct reference to the Skeletal Mesh that is associated with the Blueprint. This is very useful as it allows an easy way for us to make direct modifications to the Mesh.
Drag off of GetSkeletalMeshComponent, search for the function SetLeaderPoseComponent, and hit enter.
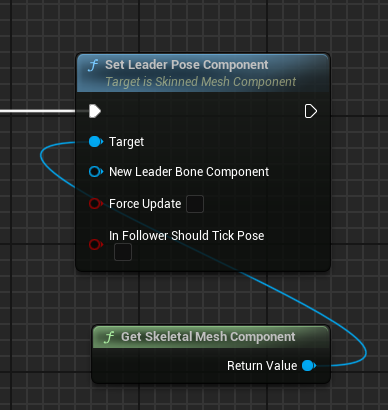
SetLeaderPoseComponent is the most important function in this execution. Tekken relies on a LeaderPose to notify all the meshes on how they should move. It works well and it's the easiest way to set up modular characters in Unreal Engine, but the major downside with following a LeaderPose is that you cannot use Bone-Based Physics (which is not an issue for Tekken as they opt for Cloth anyway).
For this function, we just want to plug in the execution pin and keep everything empty, this will set the LeaderPose to be empty allowing the Animation Blueprint to run.
Picking our RigidBody Style
From here, we have a couple of ways we can go about setting up physics, depending on your needs, what you're targeting performance-wise, etc.
Physics Asset
The traditional method of applying Physics, method requires us to do some additional setup to make sure that everything is being properly initialized.
To begin make sure your Physics Asset is set in your Skeletal Mesh.
Drag off of SkeletalMeshComponent and search for UseAttachParentBound. hit enter and tick the boolean check.
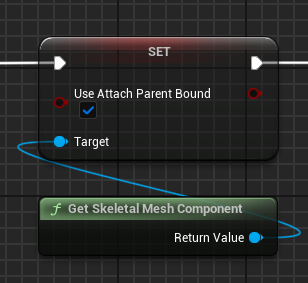
Because we're no longer following a Leader Pose, our mesh could potentially disappear if we get close to the character, enabling this makes it so we use the Bounding Box from the MasterMesh, which is what we would have followed anyway for the Leader Pose.
The main important thing is that if the Player is visible, the mesh will always be visible.
Again, drag off of SkeletalMeshComponent, search for the function SetCollisionProfileName and hit enter.
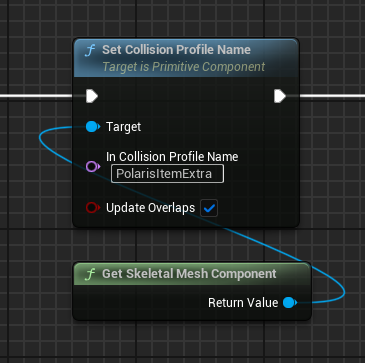
Our Collision Channel needs to be of a certain type that allows Physics to properly simulate. In the InCollisionProfileName field, type in PolarisItemExtra.
PolarisItemExtra is a collision channel designed for extra moving pieces, Bandai Namco has set it up in a way where the object will properly collide with the floor and walls as well!
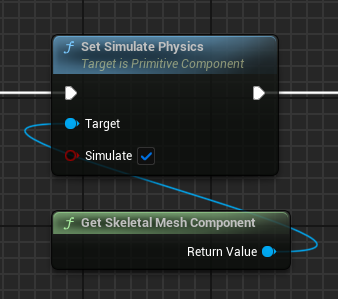
Drag off of GetSkeletalMeshComponent, search for the function SetSimulatePhysics, hit enter and enable Simulate.
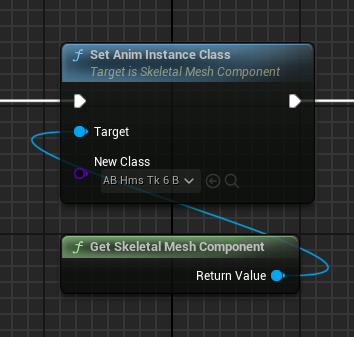
Again, drag off of GetSkeletalMeshComponent, search for the function SetAnimInstanceClass, and hit enter.
SetAnimInstanceClass will allow us to provide the Animation Blueprint we created, in the New Class field, select the Anim Blueprint we've created.
With everything set up, you should have something that looks like this.

Now Save everything Pak it all up, and test it in-game!
Congratulations, your Animation Blueprint should be running on your costume!
Post Process Animation Blueprint
Added in Unreal Engine 4.14 Post Process Animation Blueprints allow us to apply Anim Dynamics, Spring Controller and other useful nodes directly into our model. The implementation is faster to set up than the Standard Physic Method but some nodes do not work.
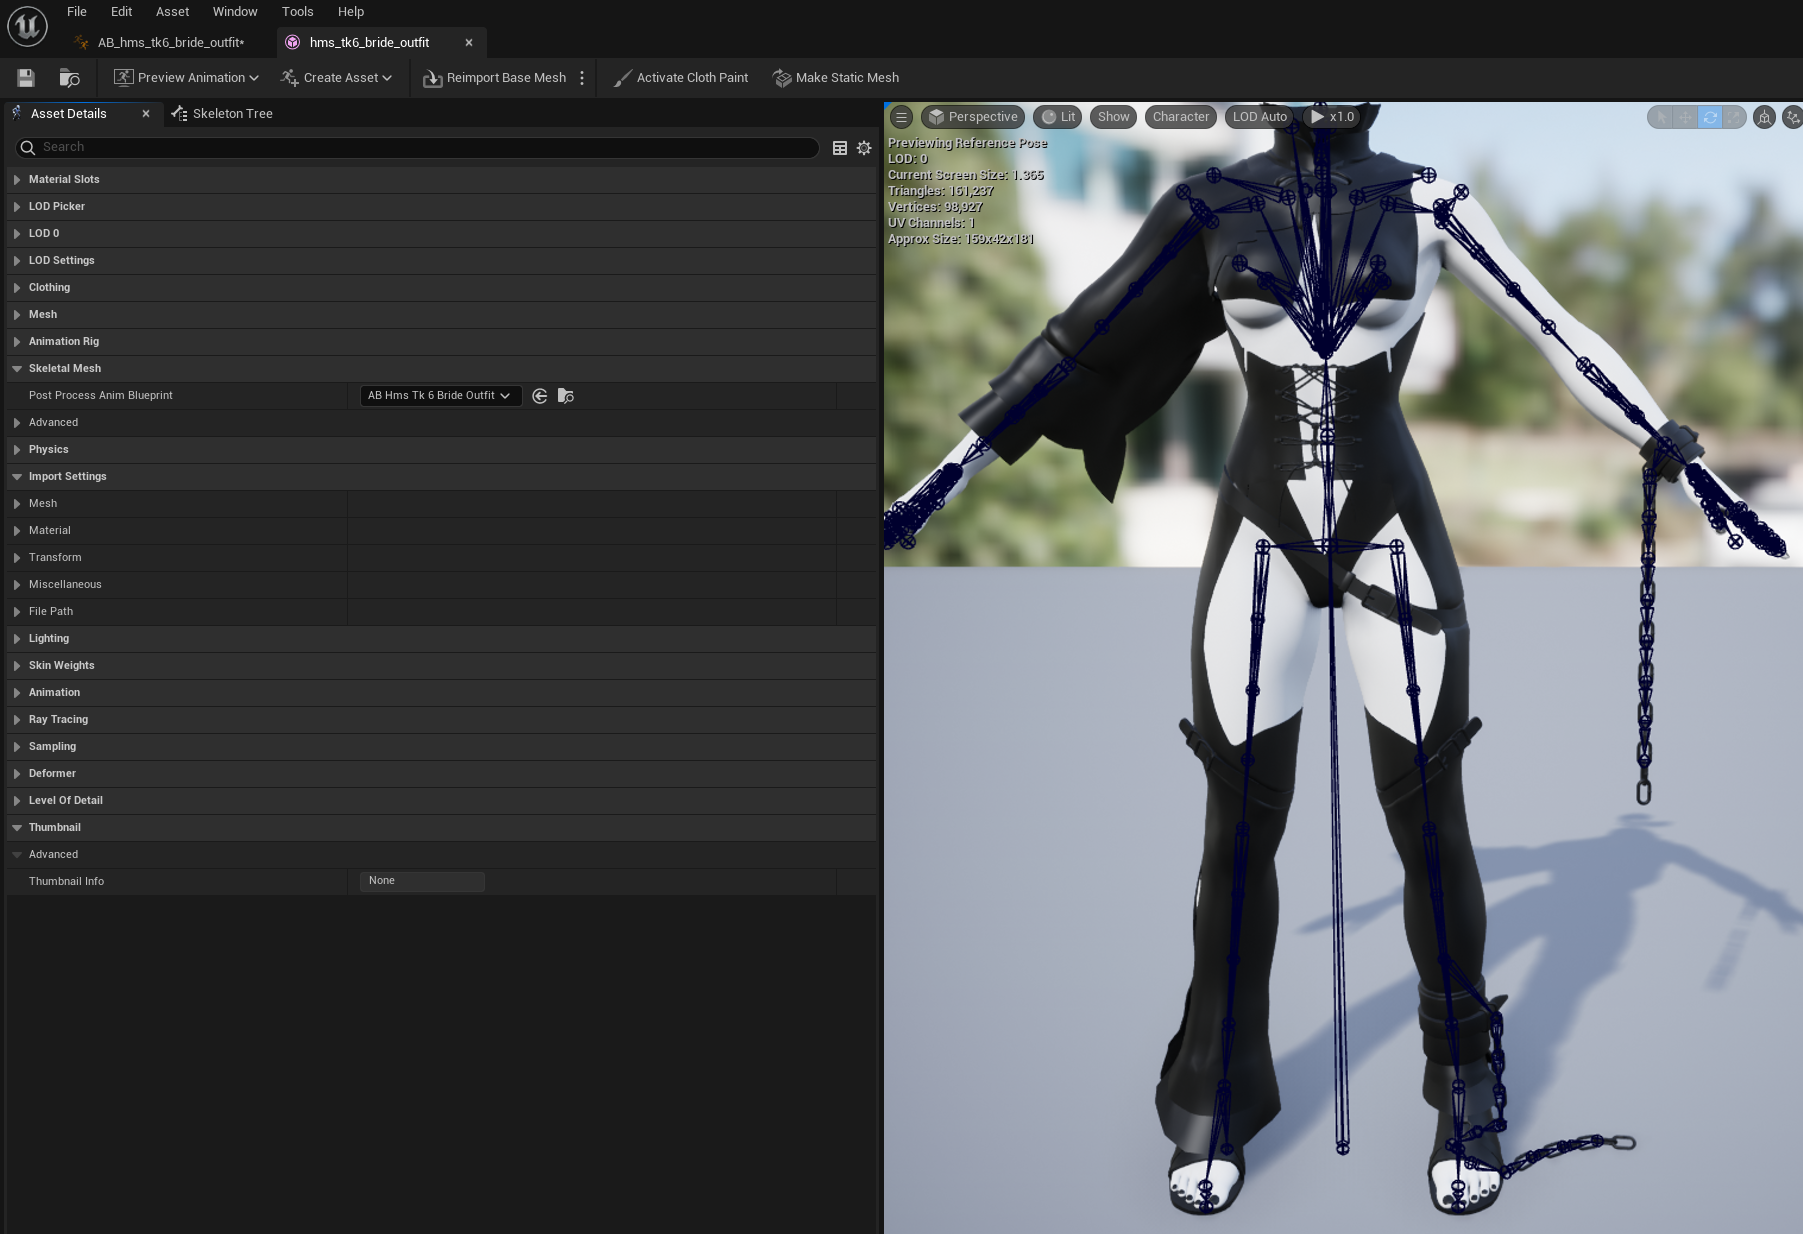
To set it up, find the Post Process Anim Blueprint variable in your Skeletal Mesh and add your Animation Blueprint.
Anim Dynamics
Anim Dynamics is a great way to apply subtle motions to objects that would be kept in place but might shuffle around due to movement, think of a backpack, a sword on a slightly loose holster, etc.
What's important to know about Anim Dynamics is that they do NOT have any Collision. So if you are looking for your Rigidbody to interact with the environment this is not recommended.
Anim Dynamics however are lightweight compared to other sim methods and provide a solution to quickly add additional movement to any object.
Type in Anim Dynamics to create an Anim Dynamics node. connecting the Anim Dynamics node to the Copy Pose From Mesh and the Output Pose will create Component To Local conversion nodes. These are required for Anim Dynamics to function as intended,
Here's a visual example of how an Anim Dynamics might be connected. In this example, two Anim Dynamics are being connected to move some chains.

Spring Controller
Adds a springiness to any Bone, useful for creating jiggly bits. In this example, two Spring Controllers are being used to create Thigh Physics similar to Street Fighter VI.
Here's a visual example of how Spring Controller might be connected.

On Your Own
The power behind Animation Blueprints is limitless, if you want to learn more, here are some resources that you can look at:
- For the basics in Animation Blueprint Graphing, see
AnimationGraphing
- For easy physics solutions, try using AnimDynamics, see:
AnimDynamics
- For playing raw animations, use Animation Sequences, see:
AnimSequences
- For playing Full Body custom animations with Animation Slots, see
AnimationSlots