
DISCLAIMER: This tutorial assumes that you're already familiar with modding TEKKEN 7 using the custom Unreal Engine 4 and that you're familiar with stage modding (umap swapping, stacking, etc.). THIS GUIDE WILL ONLY COVER IMPORTING EXISTING "IN-GAME" STATIC MESHES FROM TEKKEN 7 FOR STAGE MODDING. A GUIDE FOR IMPORTING CUSTOM MESHES FOR STAGE MODDING IS IN THE WORKS!!!!
LIMITATIONS TO REFERENCING IN-GAME STATIC MESHES FOR STAGE MODDING
- You CANNOT adjust the geometry point of the mesh.
- You CANNOT edit materials to the static mesh if you're referencing it from in-game. (this whole tutorial is about "referencing"....)
- You CAN make size changes to the referenced in-game mesh while in Engine.
- You CAN do texture edits to a referenced mesh the same way how you do so for shirts, makeup, etc. (Do not apply them to the "referenced" in-game mesh in the Unreal Engine)
Prerequites
Umodel - Used to observe and extract models from the game.
Custom UE4 for TEKKEN 7 set up and working
Blender 2.8 or above
"How to Read" Guide by DennisStanistan - For those who like to skip over sections of guides/writeups.
Extracting TEKKEN 7 assets with UModel
Begin by opening up the 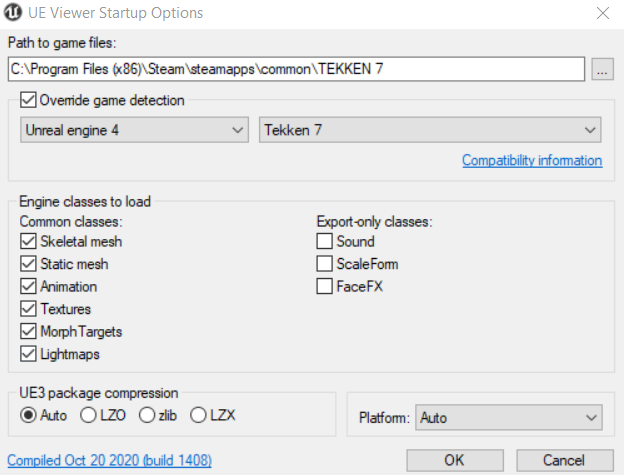
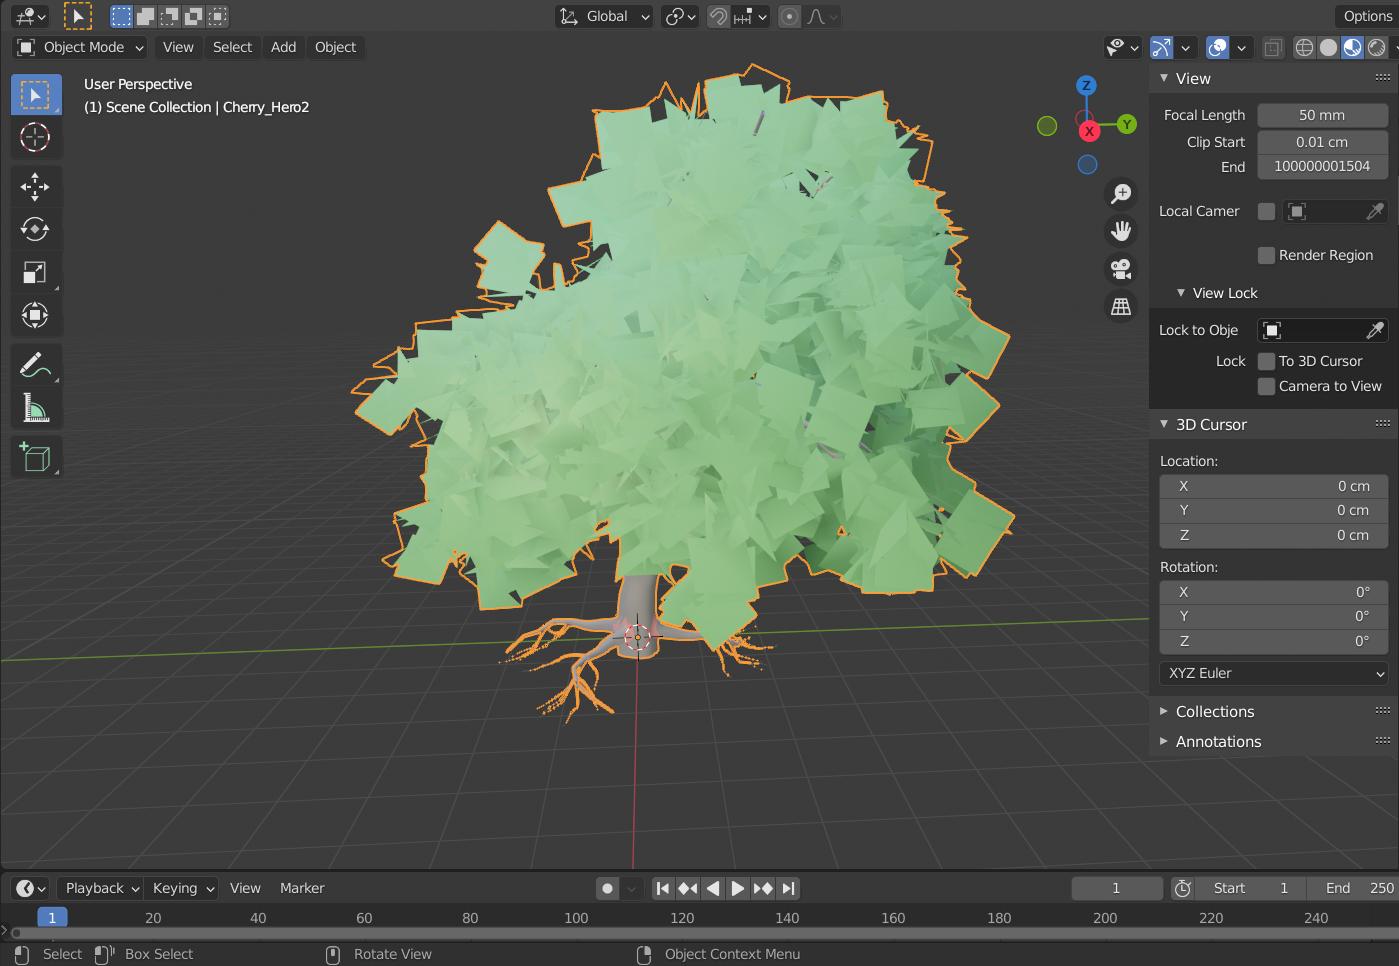
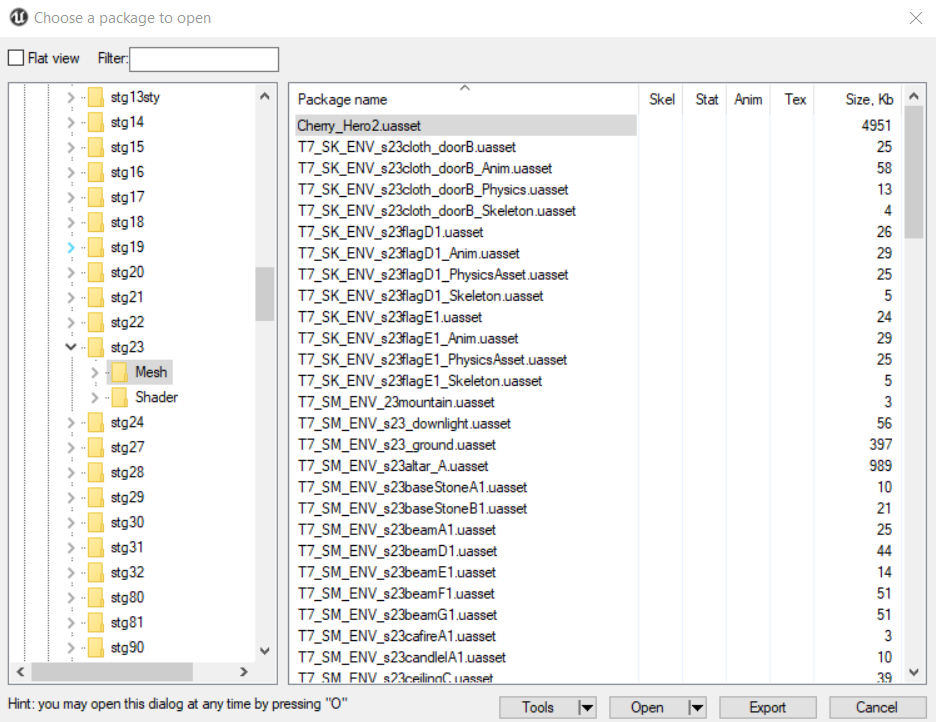
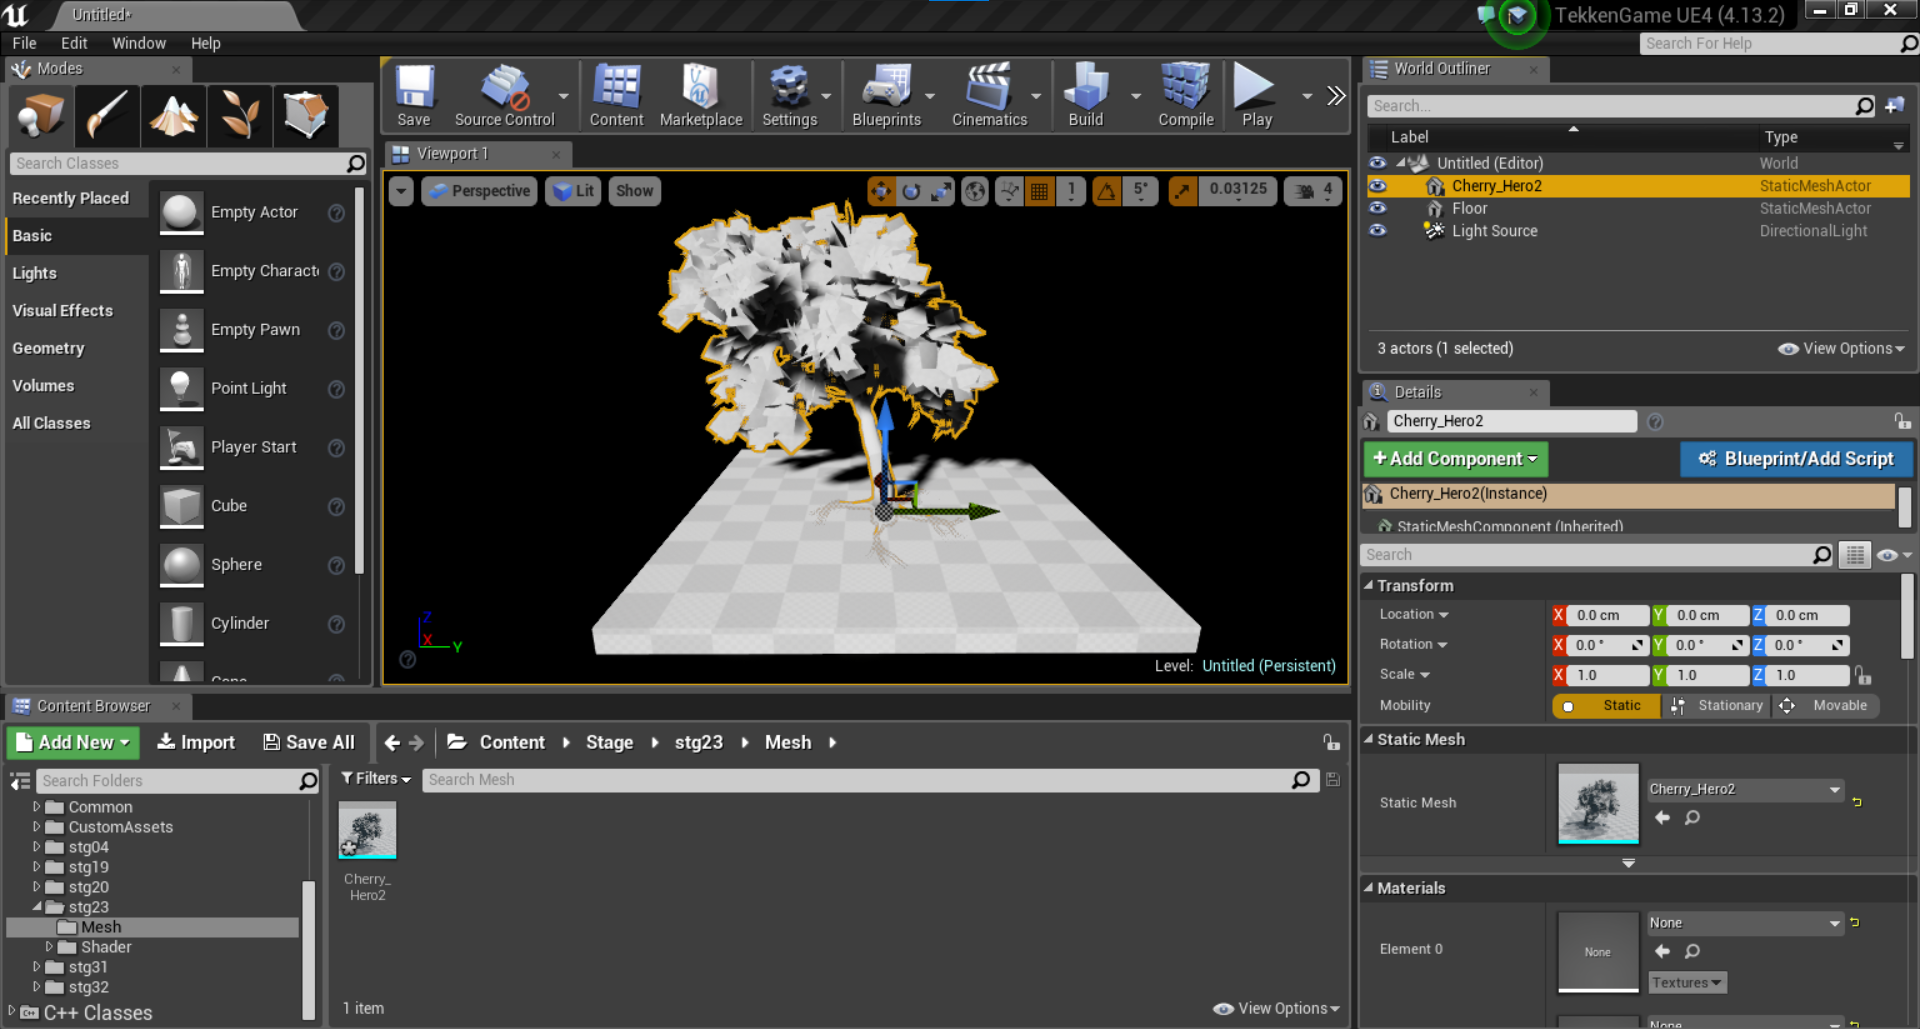
For the sake of this guide, I'll be referencing and importing a Cherry Tree from Howard Estate into Mishima Dojo, so let's navigate to Game\Stage\stg23\Meshes and open the Cherry_Hero2.uasset file. (You can use other meshes if you like)
If you would like to know which stage to extract assets from, you can visit the
For the sake of this guide, I'll be referencing and importing a Cherry Tree from Howard Estate into Mishima Dojo, so let's navigate to Game\Stage\stg23\Meshes and open the Cherry_Hero2.uasset file. (You can use other meshes if you like)
If you would like to know which stage to extract assets from, you can visit the Tekken 7 – General Information page and glance through the Stage File Prefixes.
A new screen should open where you'll be able to view the mesh.
A new screen should open where you'll be able to view the mesh.

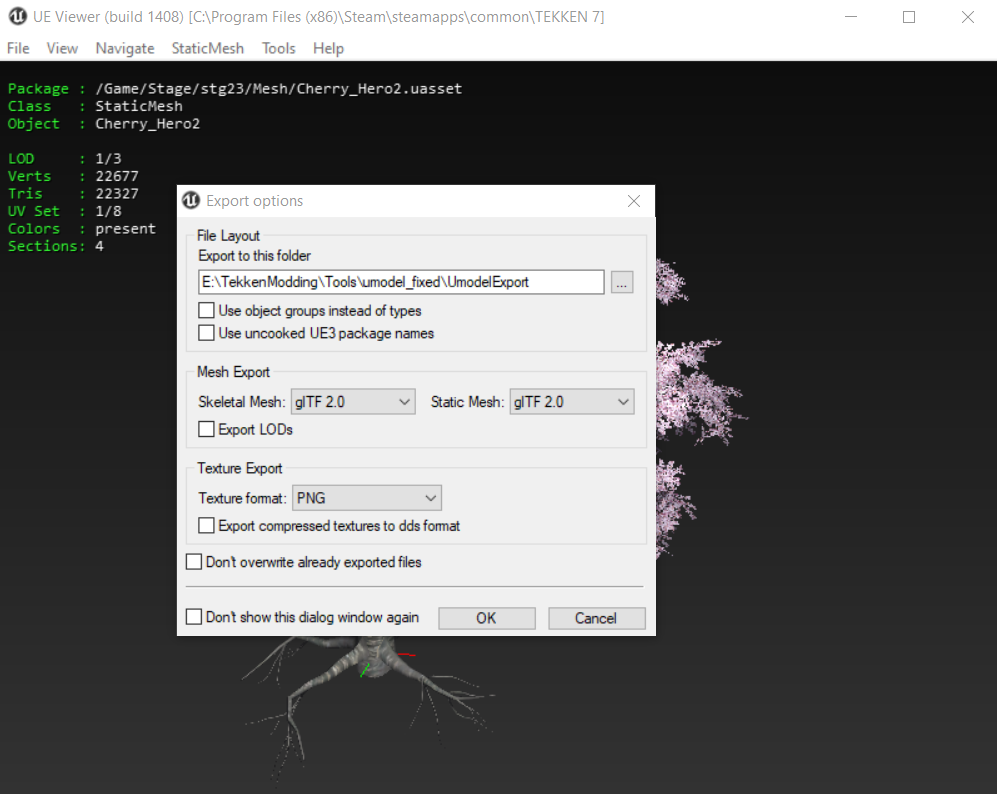
If you've happy with the mesh you chose, you can simply press CTRL+X to export the object.
Alternatively, you could navigate to Tools and select the "Export current object" option as well.
If you've happy with the mesh you chose, you can simply press CTRL+X to export the object.
Alternatively, you could navigate to Tools and select the "Export current object" option as well.
A new window should open where you'll see the export options and settings.
Begin by selecting a destination where you would like to export the mesh. (You can leave it to its default path if you wish to).
Now, set the mesh export options to gITF 2.0 and the texture format to PNG.
Once you've confirmed these options, press "OK" to export the mesh.
Preparing the mesh in Blender
Open up Blender and delete everything from your scene.
On the top left corner of Blender, navigate to "File" and hover over "Import".
Select the "glTF 2.0 (.glb/.glTF)" option and locate the mesh you've exported from 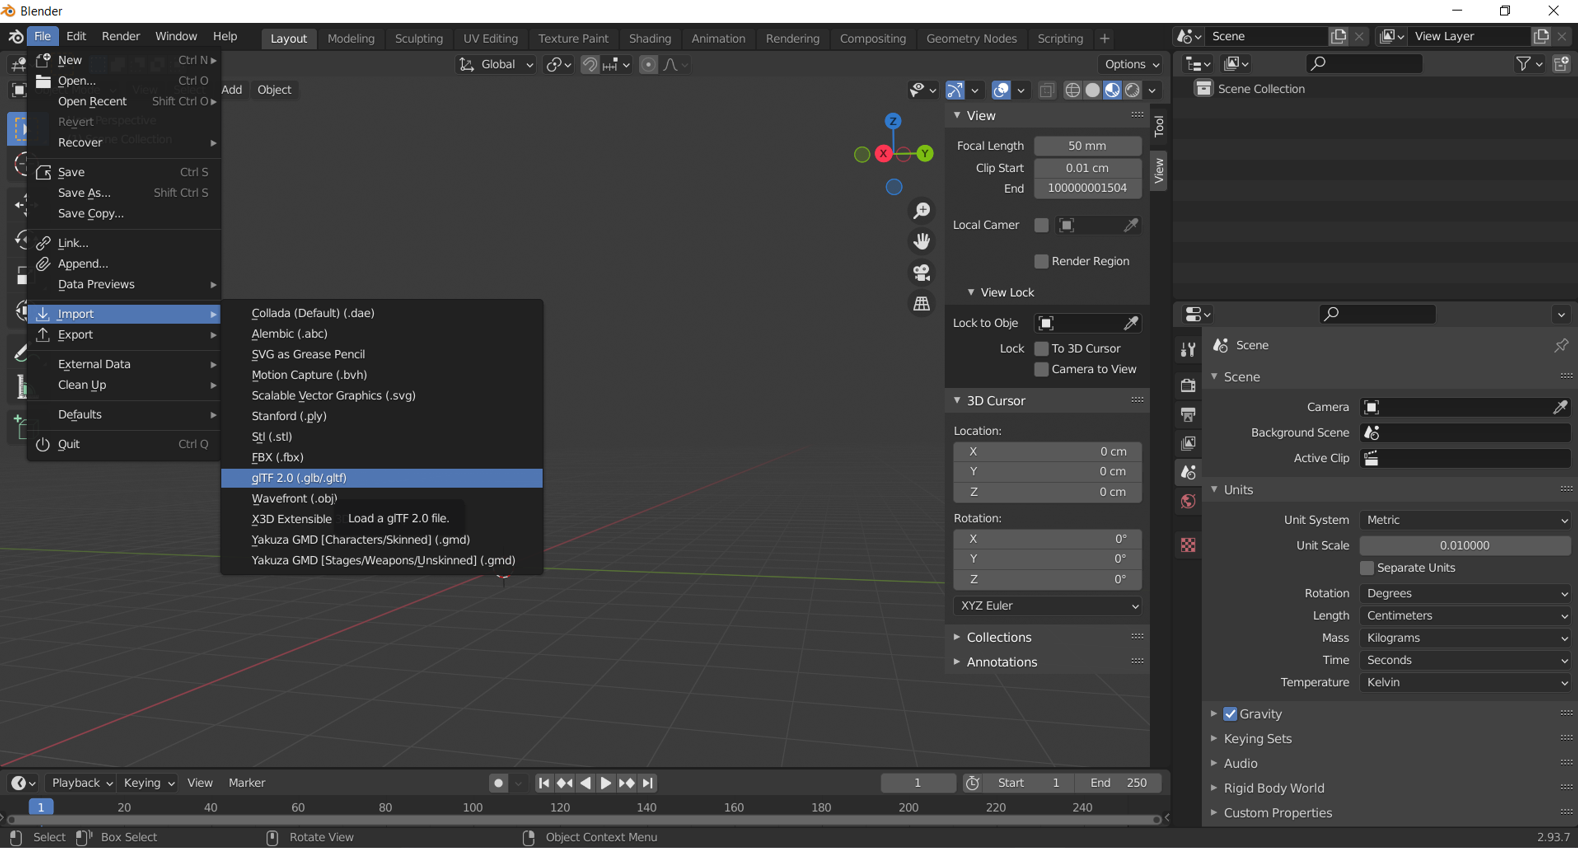
Exporting the mesh
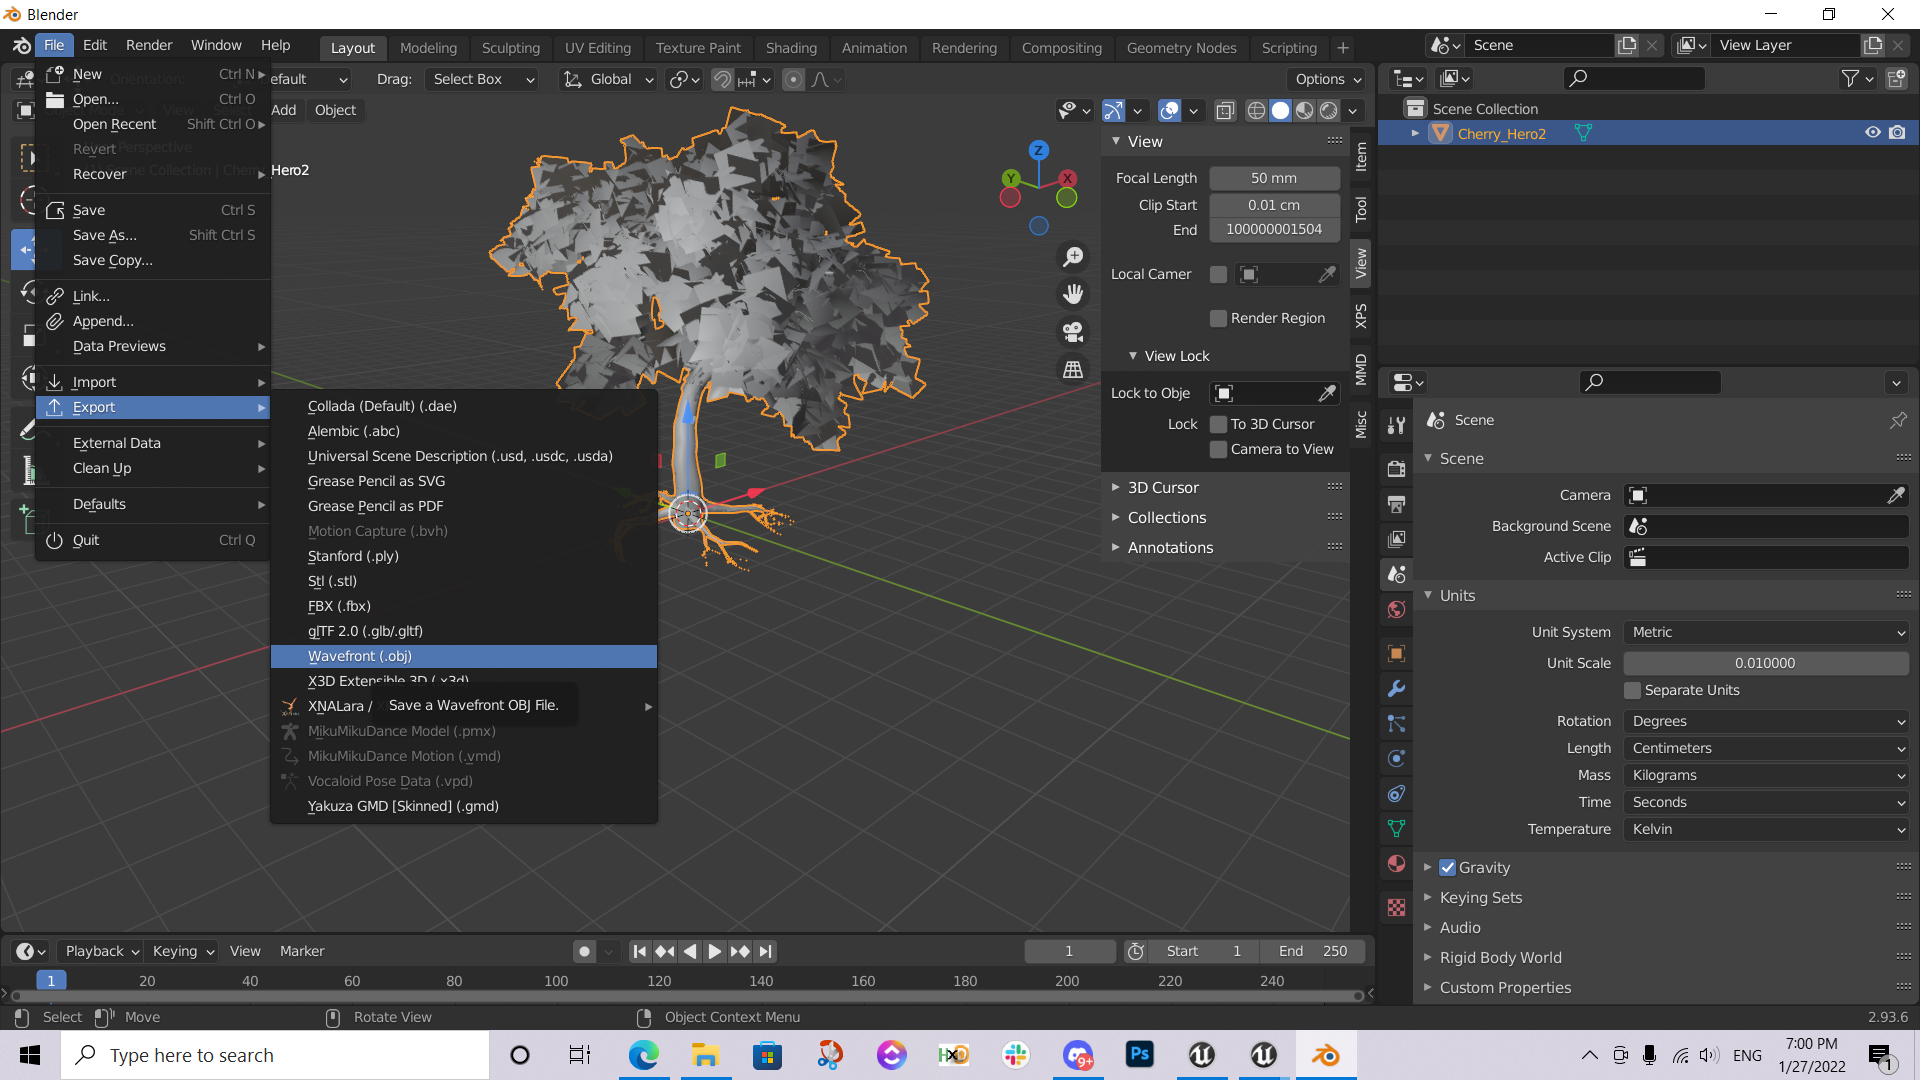
Navigate to "File" once again and hover your mouse to "Export". Be sure to select the "Wavefront (.obj)" option. After that, choose an appropriate location to export your mesh. You'll need to locate it later for the Unreal Engine. At this point, we're done working in blender.
Preparing the structure folder
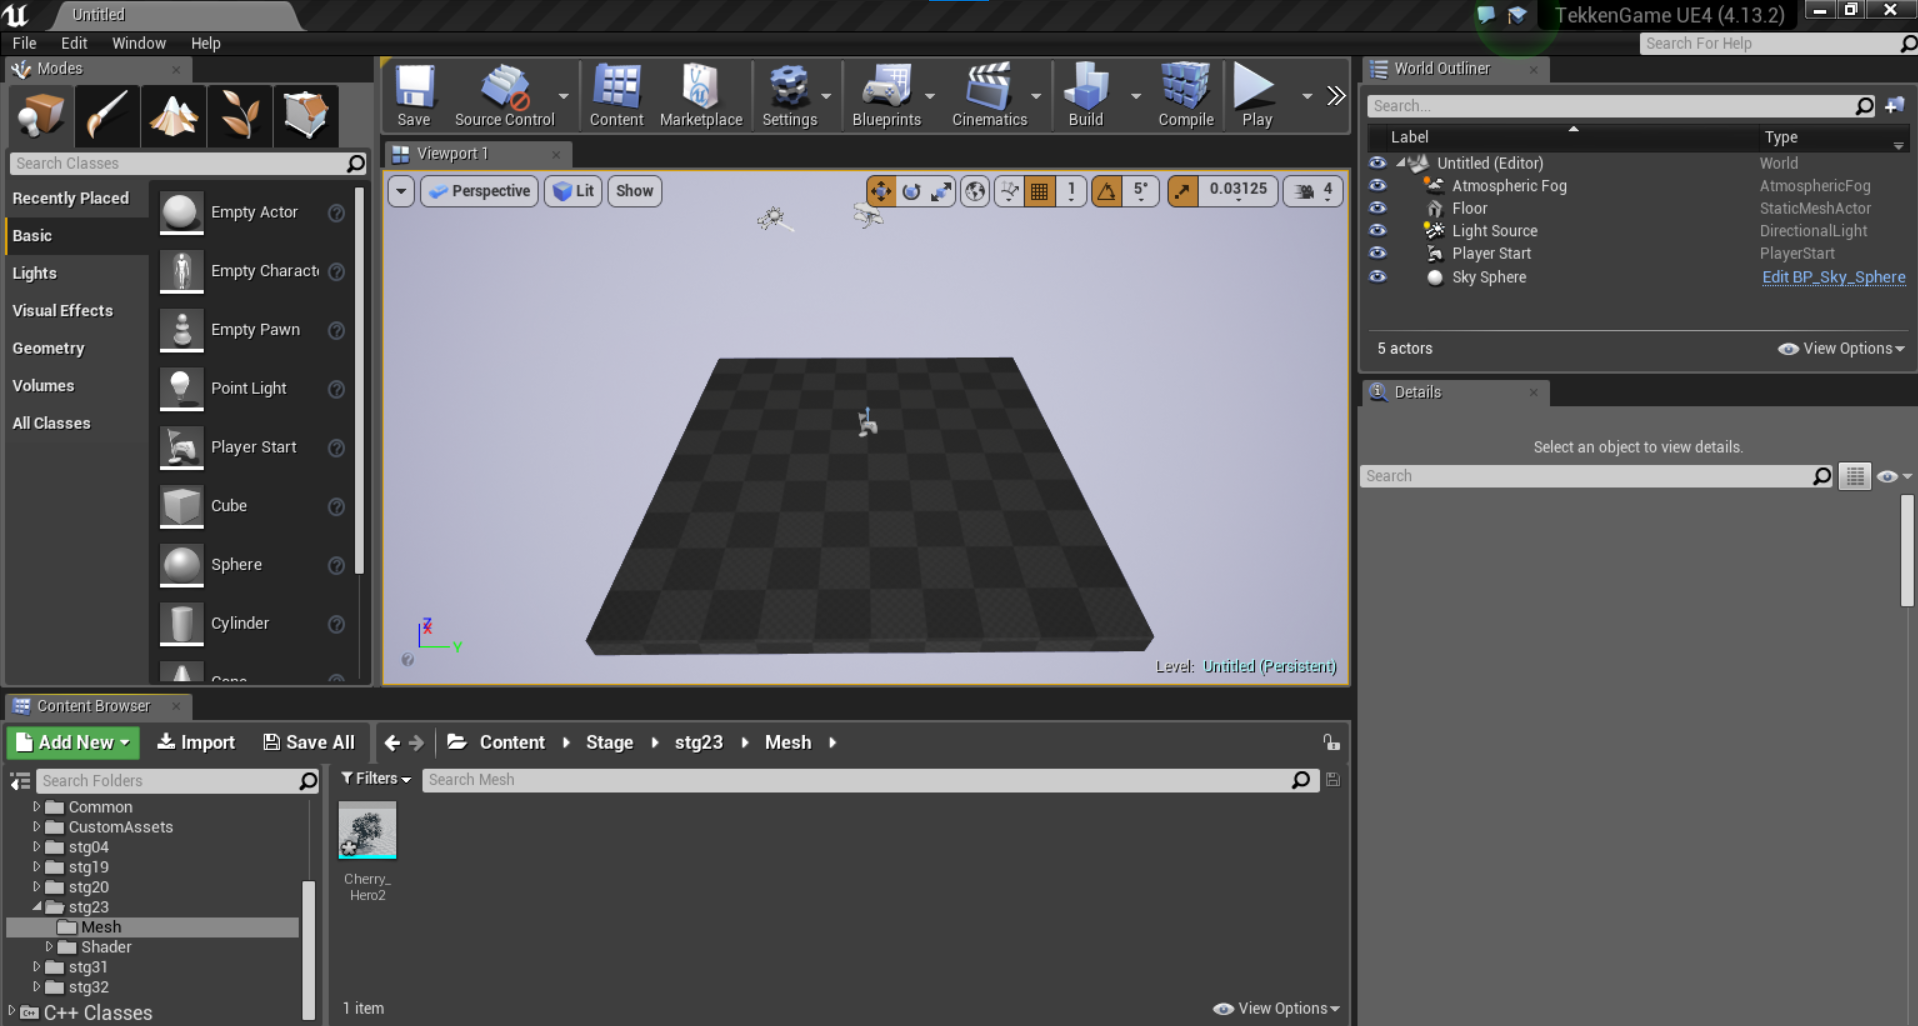
We are now transitioning to using the Unreal Engine. Once you've opened the custom Unreal Engine application, open the TekkenGame project. Once everything loads, we'll now have to recreate the folder structure to where the mesh corresponds in TEKKEN 7.
Since I've only exported the Cherry Tree mesh from the Howard Estate stage, the path destination of the mesh from Umodel was extracted from "Game\Stage\stg23\Meshes". We're going to recreate that path with a slight change in the engine. Instead of "Game", we'll use "Content". So, our path for the "Cherry Tree" mesh will be "Content\Stage\stg23\Meshes" and we'll import the mesh there.
THE CONTENT FOLDER SHOULD ALREADY EXIST IN THE CONTENT BROWSER OF THE LATEST TEKKENGAME PROJECT.

Importing the mesh (.obj)
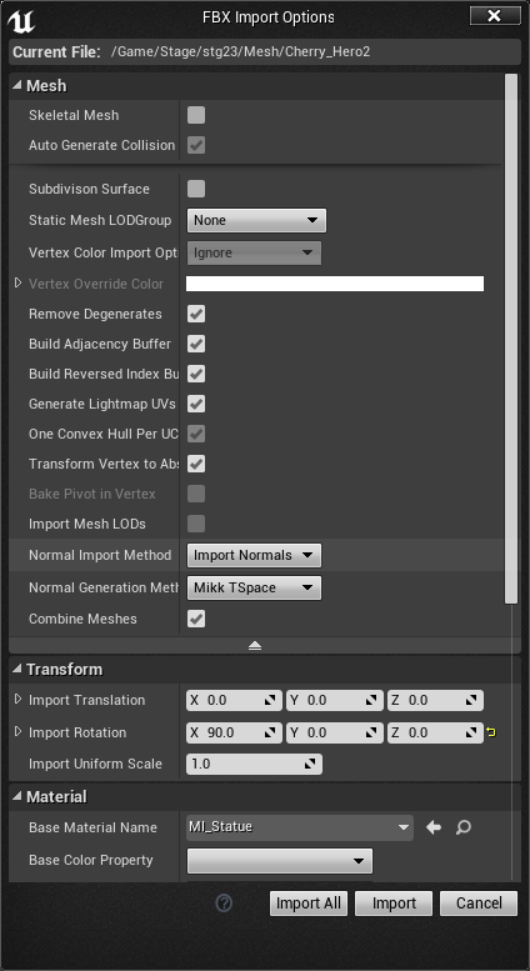
While in the content browser, click the "Import" button and locate the .obj you've exported from Blender.
A new window should appear called "FBX Import Options". Make your way down to the Transform section and rotate the X to 90°. You can now click the "Import" button after you're done.
The imported mesh and its materials should now be present in the "Meshes" folder. Select the materials that are present in the content browser and delete them. You should only be left with the static mesh. (In this case, the Cherry tree should be alone)
Placing the mesh into a level
You can now drag the static mesh into the world. You can place the mesh anywhere in the, but for the sake of this tutorial, I'll be placing the static mesh at 0/0/0 and remove everything from the World Outliner, except for the Floor and light-source items (for my preference).
If you're only building completely new stages, while referencing in-game meshes, (Like BlossomShrine), you can keep the essential items in the World Outliner. It depends on what your goal is for using these "in-game" meshes.
Saving & Cooking the level
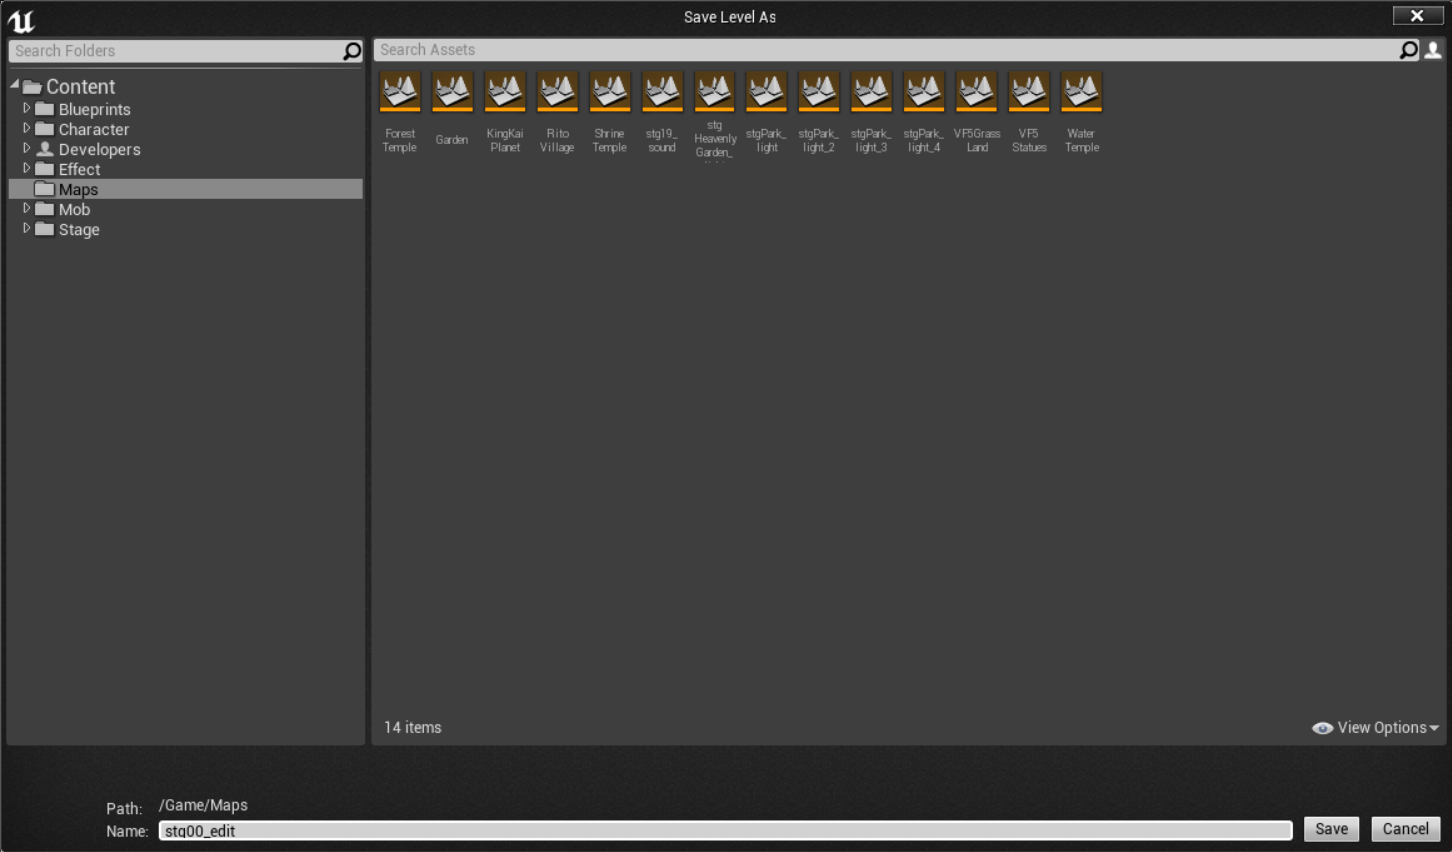
If you're finished with your work, you can now save the level as a umap which already exists in the game. I'll be saving the level for Mishima Dojo's stg00_edit in the "Maps" folder.
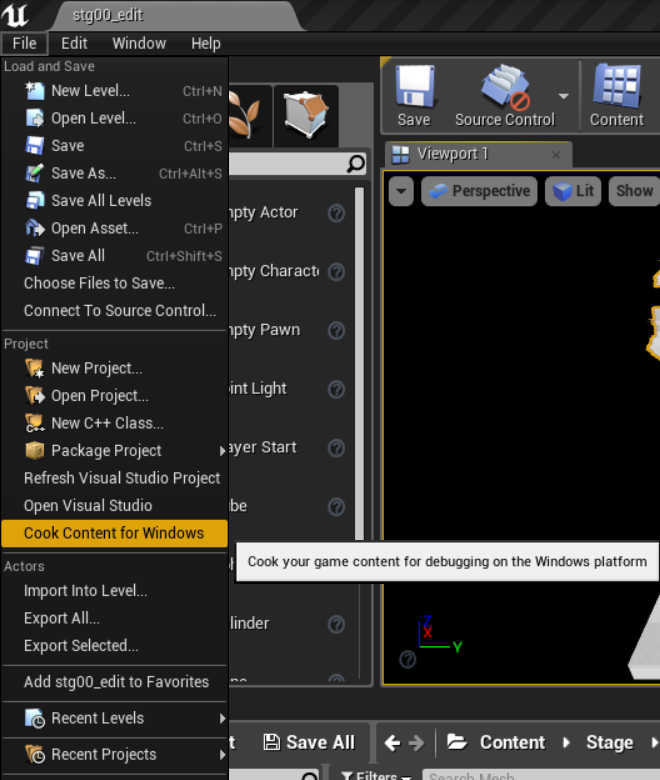
After you saved the level, you can now cook the level by clicking on "Files" and select the "Cook Content for Windows" option.
Cooking might take a while so please be patient.
Once the cooking process is done, you can now grab the generated ".umap" file from the cooked folder and create a mod with it (the dummy files are not required for this mod).
Testing & Conclusion
Open up the game and see if your referenced "in-game" mesh appears in the level.
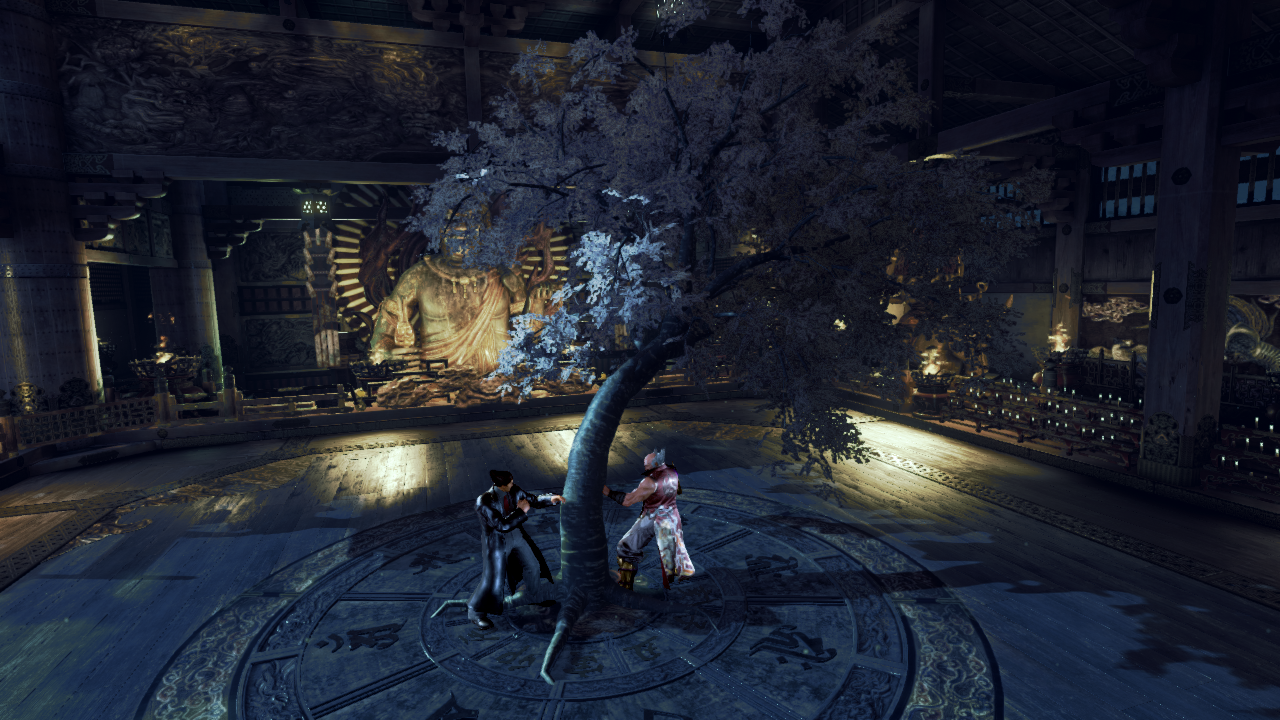
That's it! If the mesh doesn't show up in-game, make sure your folder structure in the engine, as well as in the mod folder, are correct. Enjoy and happy modding! See you in the next guide where I'll layout how to use custom meshes for stage modding. (Which is 100% times better than just referencing)