Importing Custom Meshes to Tekken 7 using Blender
This is more of a guideline than a tutorial for importing custom meshes into Tekken 7 using Unreal Engine 4 and Tekken 7.

This is more of a guideline than a tutorial for importing custom meshes into Tekken 7 using Unreal Engine 4 and Tekken 7. I assume you are somewhat experienced with blender, that you know about weights and how to work with armatures and the tutorial also assumes that you know how to use UassetRenamer. There are plenty of Blender tutorials out there and various of Tekken 7 tutorials available.
Important note: If you are a complete beginner at modding Tekken 7 then this will not be an easy tutorial/guideline/whatever to follow. I tried my best to keep this post organized, straight to the point while not making it too long and not overflowing anyone who reads this with information causing anyone who reads this to lose track completely. If you have a question or you are struggling with a specific step or you didn’t understand something then contact me and I will do my best to help you or ask in the Modding discord server but don’t expect me or anyone to do EVERYTHING from scratch for you, we expect some effort to be put on your end.
Prerequisites
Pre-Unreal Engine 4.14 set up and working
Blender 2.80/2.90 or above
umodel
UassetRenamer
A hex editor (HxD)
Getting Ready
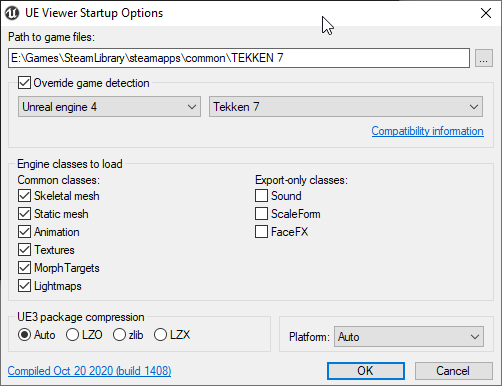
Start up umodel and open up Tekken 7’s files
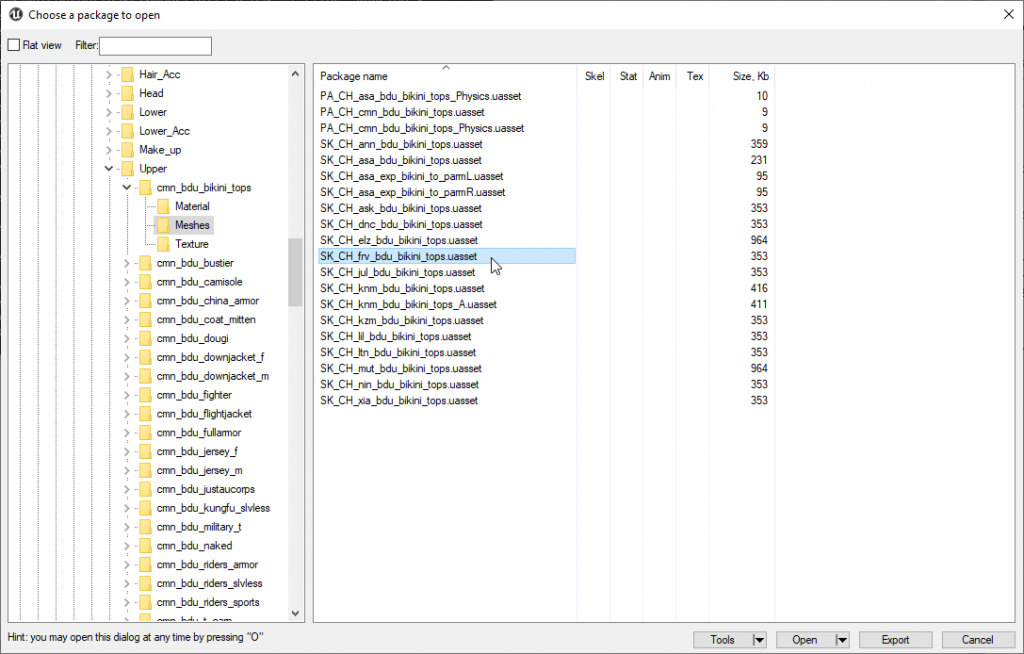
We will replace Master Raven’s bikini upper as a base for our custom mesh so we’ll navigate to Game\Character\Item\Meshes\cmn\Upper\cmn_bdu_bikini_tops\Meshes and open SK_CH_frv_bdu_bikini_tops.uasset
 Press M and let’s take a look at the materials:
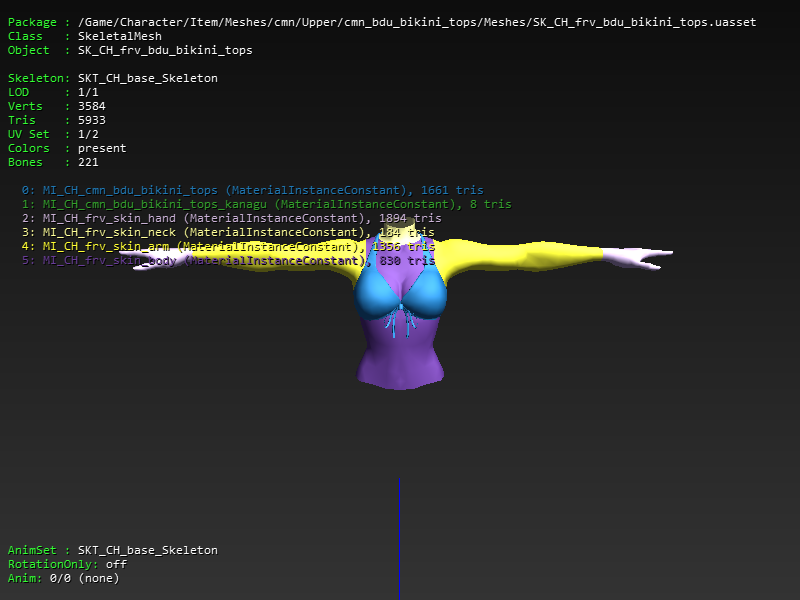 We don’t care about the first two materials since we will remove them in Blender, if we click on “MI_CH_frv_skin_hand” umodel will redirect us to the material property viewer
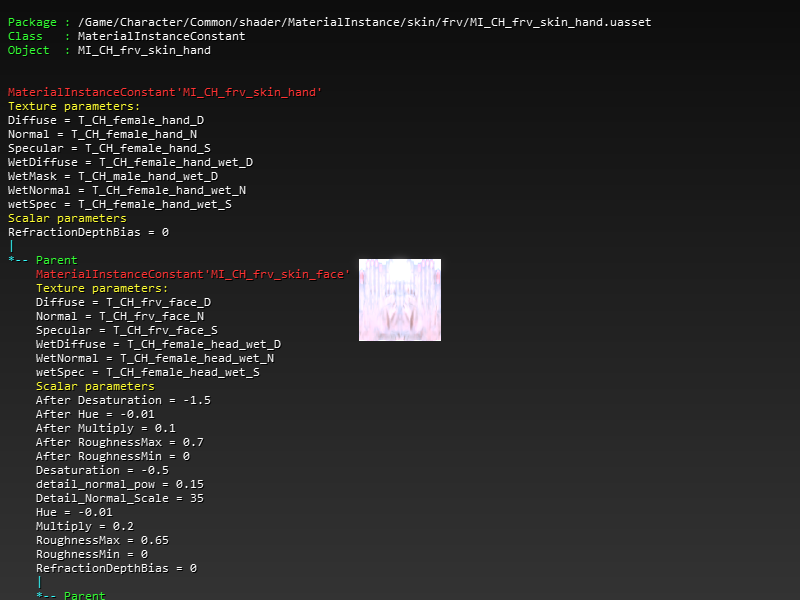 We can see that MI_CH_frv_skin_hand is a MaterialInstance constant that inherits from MI_CH_frv_skin_face now if we will click on MI_CH_frv_skin_face
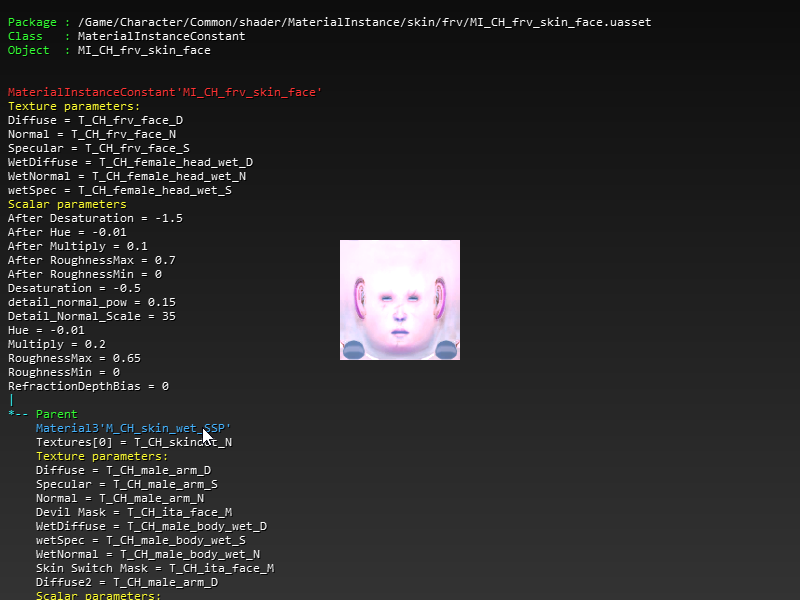 MI_CH_frv_skin_face is a MaterialInstance that inherits from a material called “M_CH_skin_wet_SSP”. All the skin materials for this mesh inherit from MI_CH_frv_skin_face.
Write down the hierarchy along with their package paths and save it for later because we’ll need it when we are in Unreal Engine 4:
- Character\Common\shader\Material:
M_CH_skin_wet_SSP (Material)
- Character\Common\shader\MaterialInstance\skin\frv:
- MI_CH_frv_skin_face (MaterialInstance):
- MI_CH_frv_skin_hand (MaterialInstance Instance)
- MI_CH_frv_skin_neck (MaterialInstance Instance)
- MI_CH_frv_skin_arm (MaterialInstance Instance)
- MI_CH_frv_skin_body (MaterialInstance Instance)
- Character\Common\shader\MaterialInstance\skin\frv:
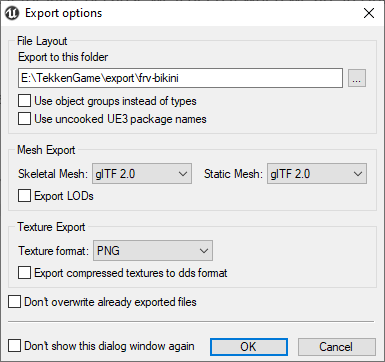
Let’s export the mesh now by clicking on Tools and then “Export current object” or just press Ctrl+X
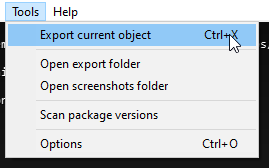
Set the mesh export to gITF 2.0 and the texture format to PNG and hit OK
Working in Blender
Before you start, when you export an fbx file in Blender it creates a root bone that has the armature’s name. We don’t want that so we will need to edit a single file to change that behavior. Go to where you installed Blender, in my case it’s C:\Program Files\Blender Foundation\Blender 2.90 and navigate to 2.90\scripts\addons\io_scene_fbx. You will see a file there called export_fbx_bin.py. Open it with a text editor.
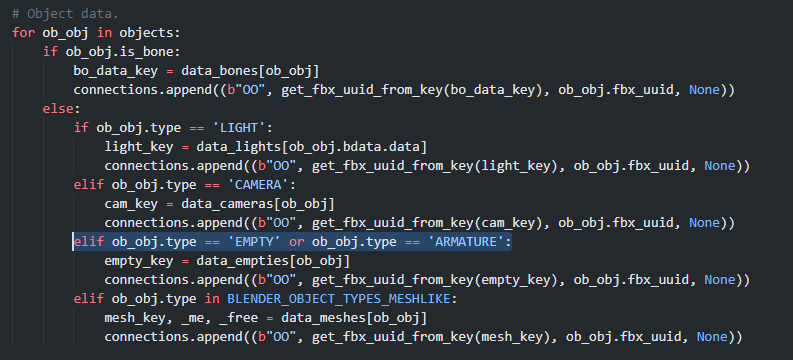
Search for:
elif ob_obj.type == 'EMPTY' or ob_obj.type == 'ARMATURE':
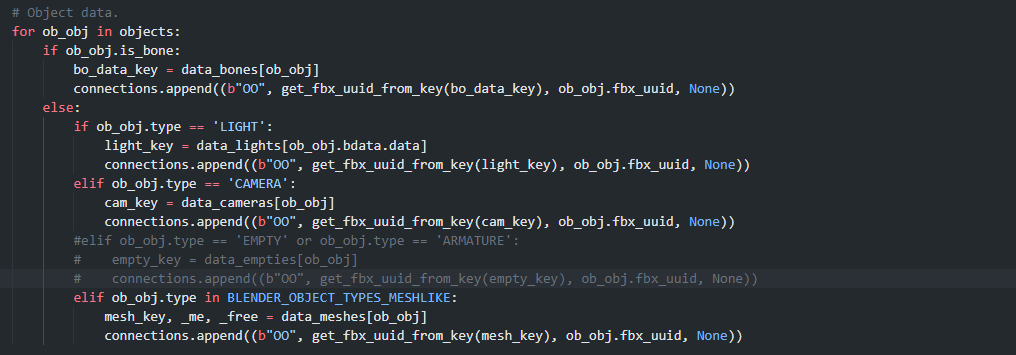
 Now comment out that line and the next two lines after it by appending # before them it so it will be:
#elif ob_obj.type == 'EMPTY' or ob_obj.type == 'ARMATURE':
#    empty_key = data_empties[ob_obj]
#    connections.append((b"OO", get_fbx_uuid_from_key(empty_key), ob_obj.fbx_uuid, None))
 Now you can save the file and close it.
Important scene setup
Now open Blender and delete everything from the scene.
 Now this the important part: Select the scene properties tab
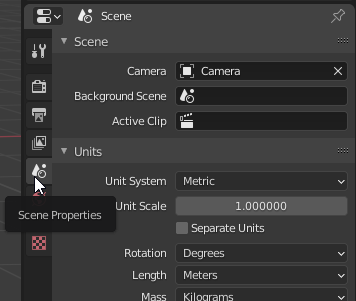 And set the unit scales to these values:
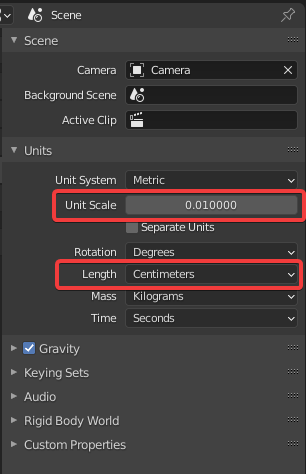 The unit scale should be 0.01 and the length should be set to Centimetres
Preparing our body base
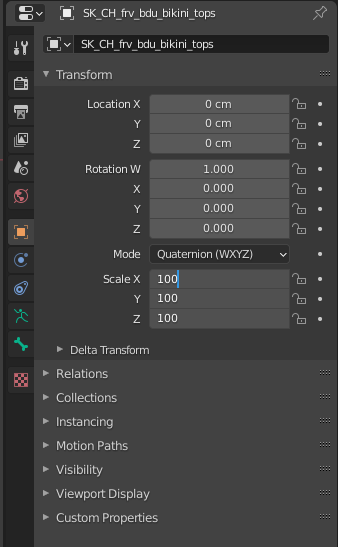
Now import the gITF file you’ve exported from umodel, set the armature scale to 100
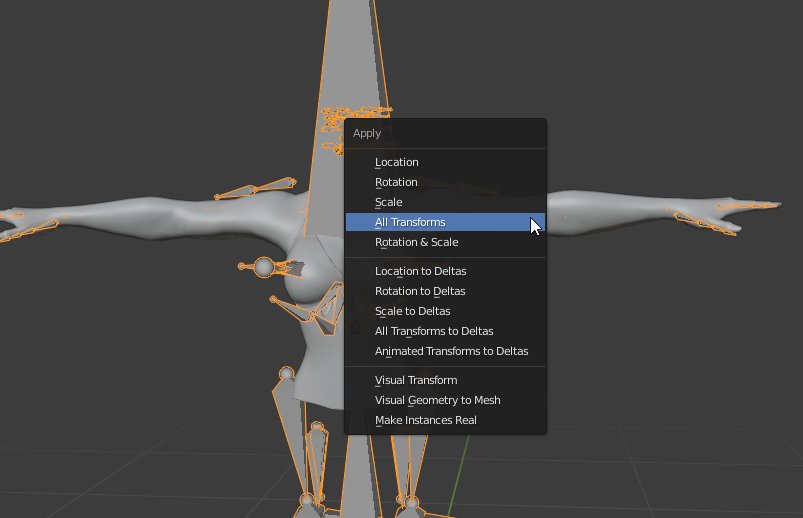
 Select the armature, press Ctrl+A and hit “All Transforms” this will set the armature’s transforms as the default.
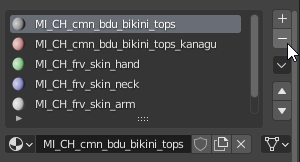
 Select Raven’s body mesh and enter edit mode by pressing TAB. Go to the object’s materials tab and select the first material and then press the “Select” button
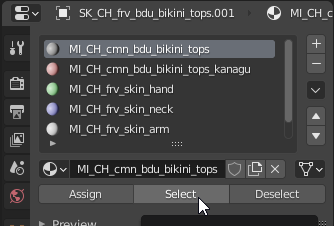
 This will select the bikini in edit mode, now press Delete and then click on “Vertices”. Do the same to the second material.
Now remove the two materials by clicking on them and pressing the minus button near the list
Blender workflow
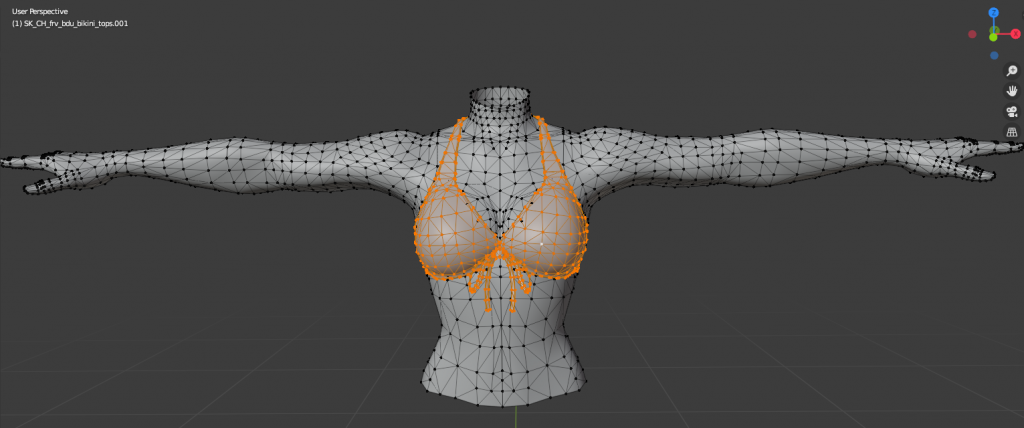
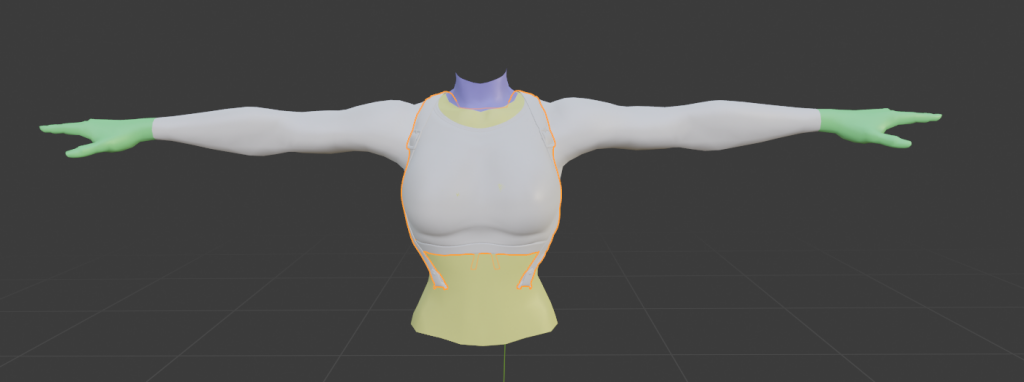
Now this is where you import your model and adjust the mesh to the body and set/convert the weights. I already have a mesh that I adjusted to Master Raven’s upper body.
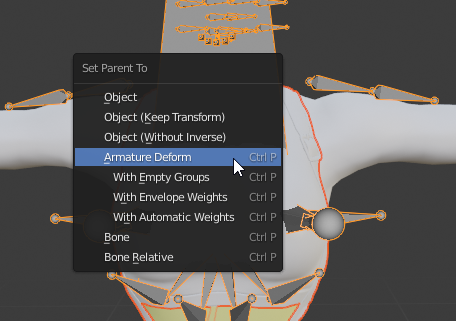
 I select the armature, hold Shift, select the mesh and hit “Ctrl+P”. Since I already converted the weights to the M.Raven’s skeleton I can just select “Armature Deform”.
 After you are done adjusting your mesh and painting/converting weights, select every mesh that is attached to the armature and apply the transforms like we did earlier.
Exporting
Now go to File -> Export -> FBX and take a look at the exporter settings
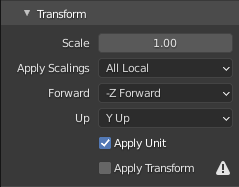
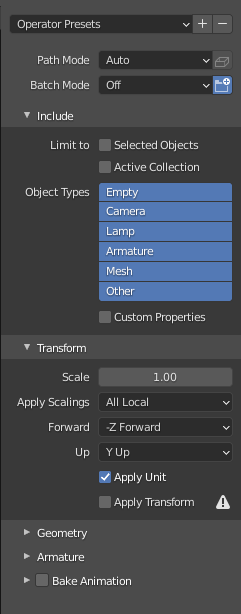 In the Transform panel: Set forward to
 -Z Foward and up to Y Up and make sure that Apply Unit is toggled on and Apply Transform toggled off.
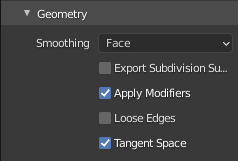
 Geometry panel:
Smoothing should be set to
Geometry panel:
Smoothing should be set to Face, toggle apply modifiers and tangent spaces on.
 The gITF format is a bit funky with bone orientation and since we exported our body base in gITF we need to set the primary bone to
 X Axis and the secondary bone to -Y Axis
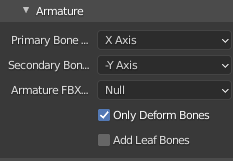 Bake animation should be toggled off
 Save it as a preset so you can just select it when you export instead of changing the settings over and over again.
Unreal Engine
Setting up the materials
Let’s set up the material references in Unreal Engine now. Pull up the hierarchy list you wrote and let’s start from the parent material. Open the project and navigate to Content\Character\Common\shader\Material and create a material called M_CH_skin_wet_SSP.
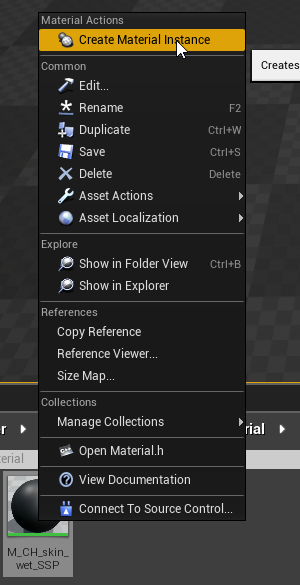
 Now right click on
 M_CH_skin_wet_SSP and create a material instance from it.
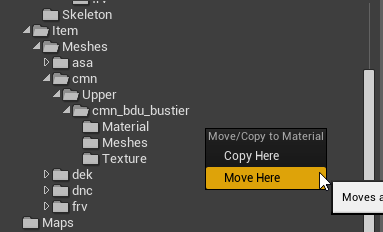
 Move
Move MI_CH_frv_skin_face to Character\Common\shader\MaterialInstance\skin\frv
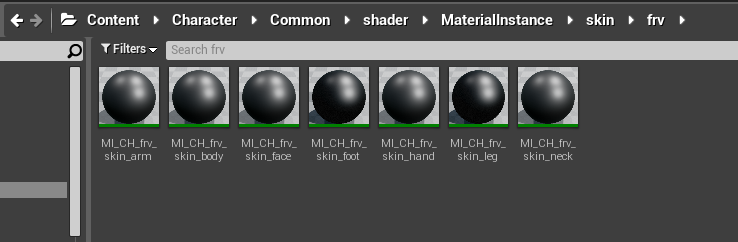
Now right click MI_CH_frv_skin_face and create a material instance for every material instance that inherits from MI_CH_frv_skin_face. In our case we need: MI_CH_frv_skin_hand, MI_CH_frv_skin_neck, MI_CH_frv_skin_arm & MI_CH_frv_skin_body.

Importing the mesh and textures
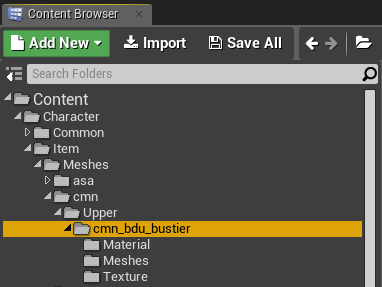
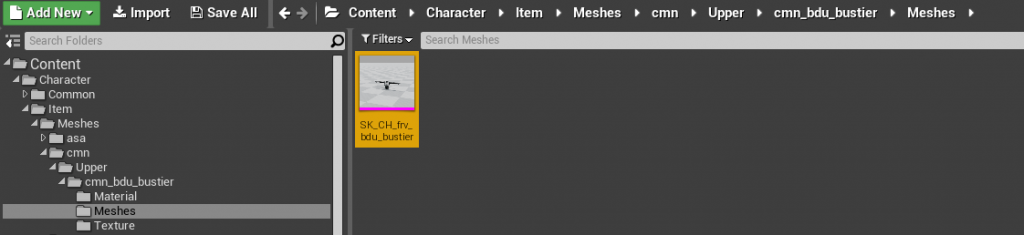
I wanted to replace M.Raven’s bustier so I created the path Content\Character\Item\Meshes\cmn\Upper\cmn_bdu_bustier and created there three folders: Material, Meshes and Texture. you don’t have to replace the bustier upper. Use whatever upper you want.
 Now go to the
 Meshes folder in UE4 and import your fbx file by dragging it into the content browser. The FBX import options window will open.
M.Raven uses a base skeleton so select “SKT_CH_base_Skeleton“. At the mesh tab click on the arrow below the skeleton dropdown to expand the advanced options.
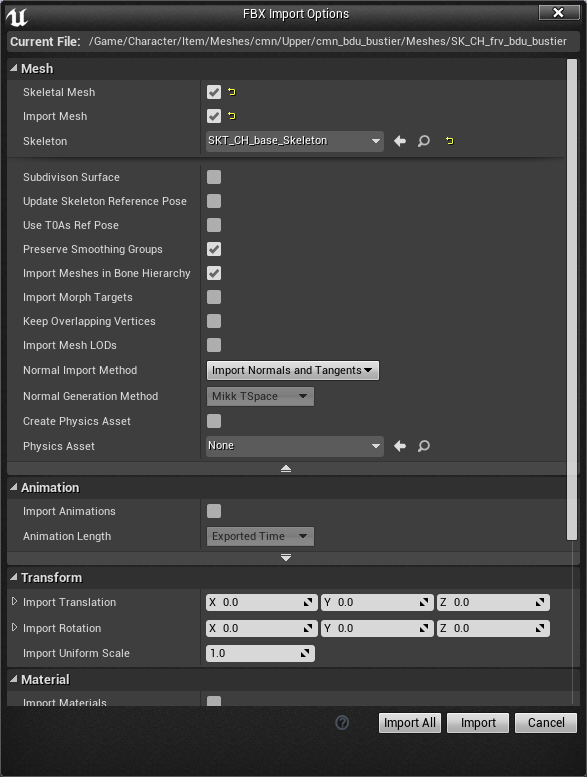 Set the Normal Import Method to
 Import Normals and Tangents and untoggle “Create Physics Asset” unless you are familiar with Physics Assets and want your mesh to have physics.
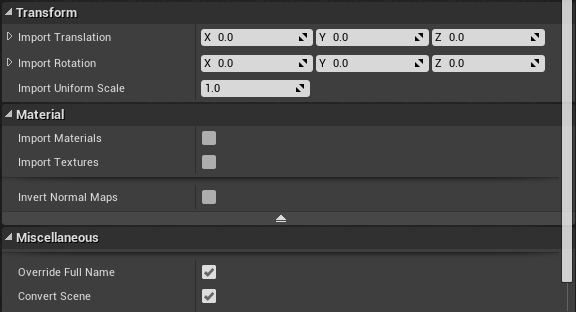
The uniform scale is 1.0 and toggle off Import Materials and Import Textures.
Now click on the imported mesh file and rename it to the SK mesh you want to replace. Since I replaced M.Raven’s bustier I renamed it to SK_CH_frv_bdu_bustier.
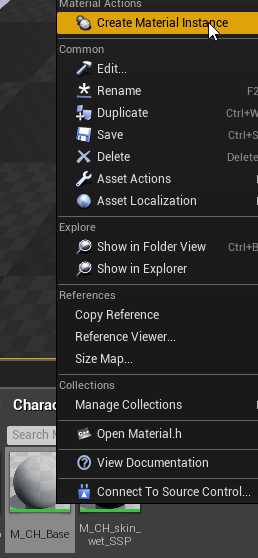
Now in the editor navigate to Content\Character\Common\shader\Material, right click on M_CH_Base and create a new material instance from it.
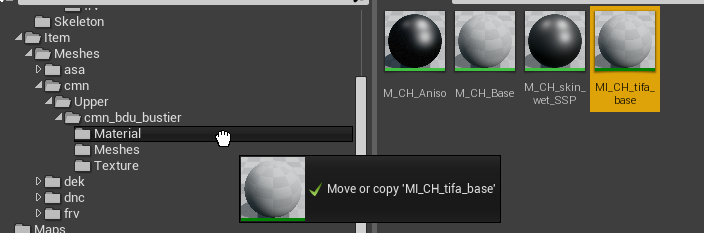
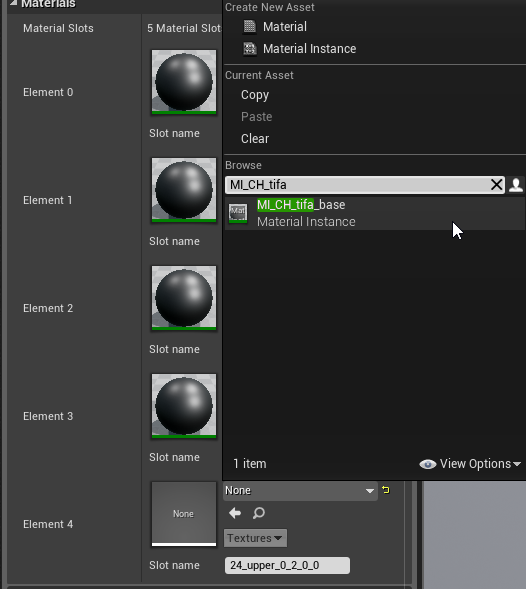
Name the material whatever you want but make sure it’s not any longer than the meshes original material name. M.Raven’s bustier uses the material: MI_CH_cmn_bdu_bustier (21 characters) so make sure your material name isn’t longer than the amount of characters the original material has. I named the material: MI_CH_tifa_base (15 characters). (Spaces in file names count as characters too in case you are wondering).
We’ll drag the material instance to our Material folder.
 Now go back to the Meshes folder and double click on the mesh you’ve imported. The skeletal mesh window should open.
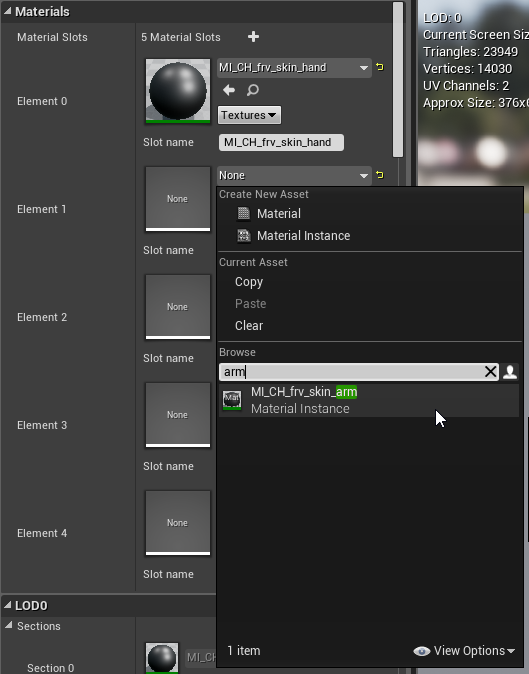
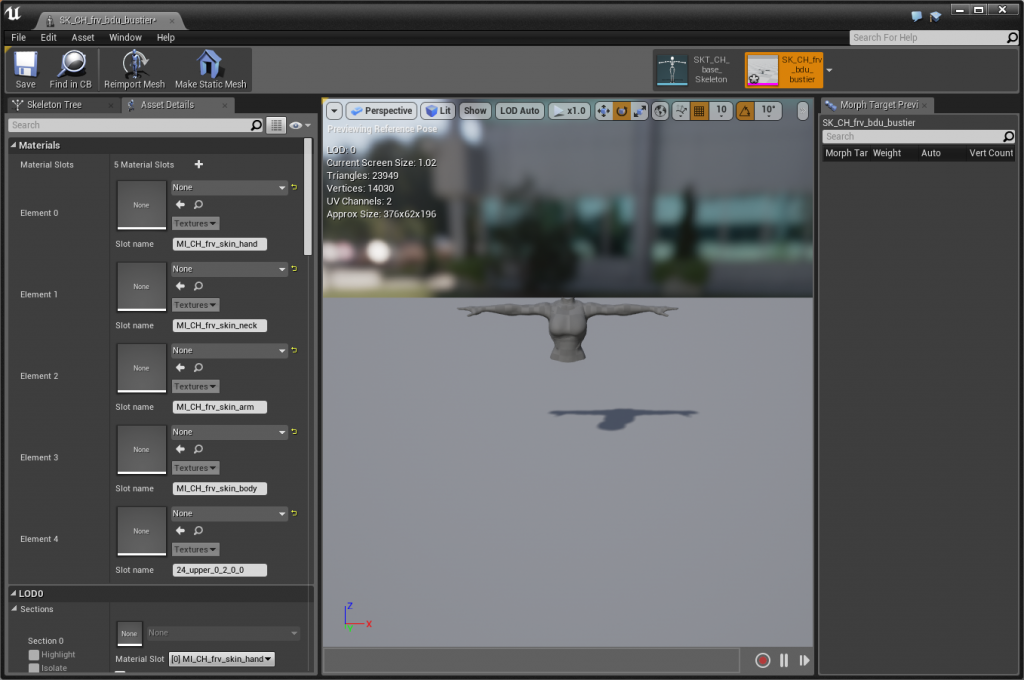 Start applying the proper materials there, Use the slot name to figure out what material you need to give your mesh.
 Now import your texture to the
 Texture folder. I called it T_CH_tifa_base.
![]() And you’re done. Click on Save All.
And you’re done. Click on Save All.
Cooking
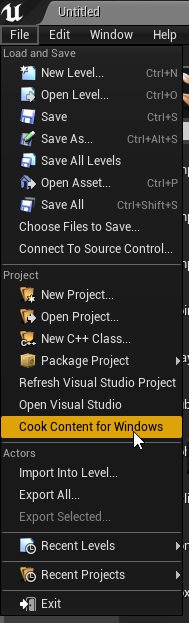
 At the top of the editor, click on
 File and Cook Content for Windows.
 Wait for it to cook the content.
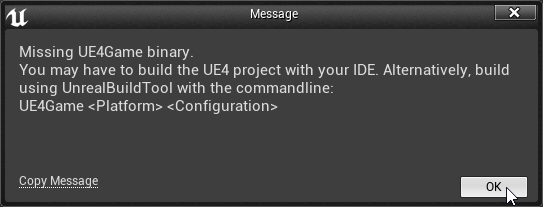
 When it’s done cooking you should see an error that says that the UE4Game binary is missing, it’s fine and this is exactly what we want. Click on OK.