The Modders Folder, Custom CCI, and Preset Editing
This guide will teach you how to finally stop replacing the bearded man's suit and knight helmet!!!


This guide will teach you how to create the Modders folder in UE4, which is useful for both placing your mod into a preset, and to stop you from having to replace in game assets.
**NOTE*** This guide assumes you are very familiar with the ins and outs of all programs used. If you aren't comfortable modding with Unreal 4, CompareIt, and HxD this guide will not be of use to you.
Prerequisites
 UassetRenamer
The Modders Folder
Create a folder named “Modders” in UE4 under “Content”
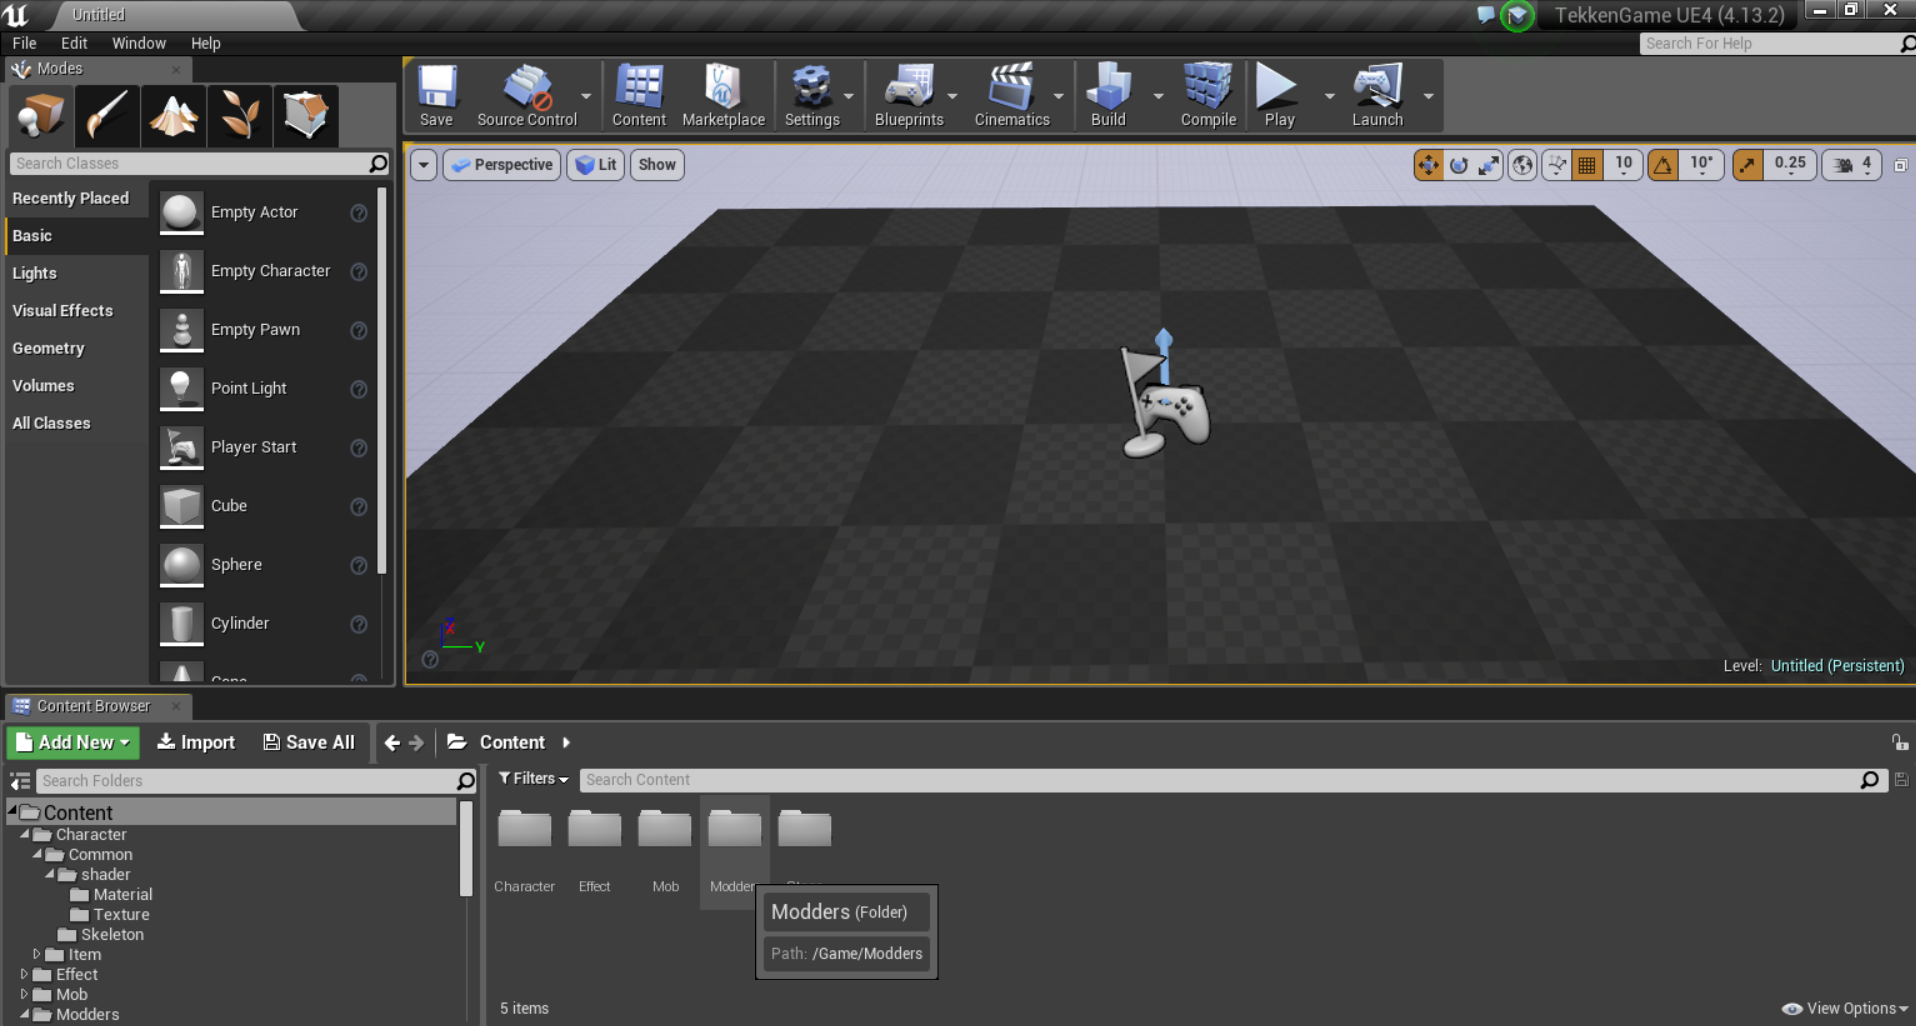
In this Modders folder, create another folder with your name
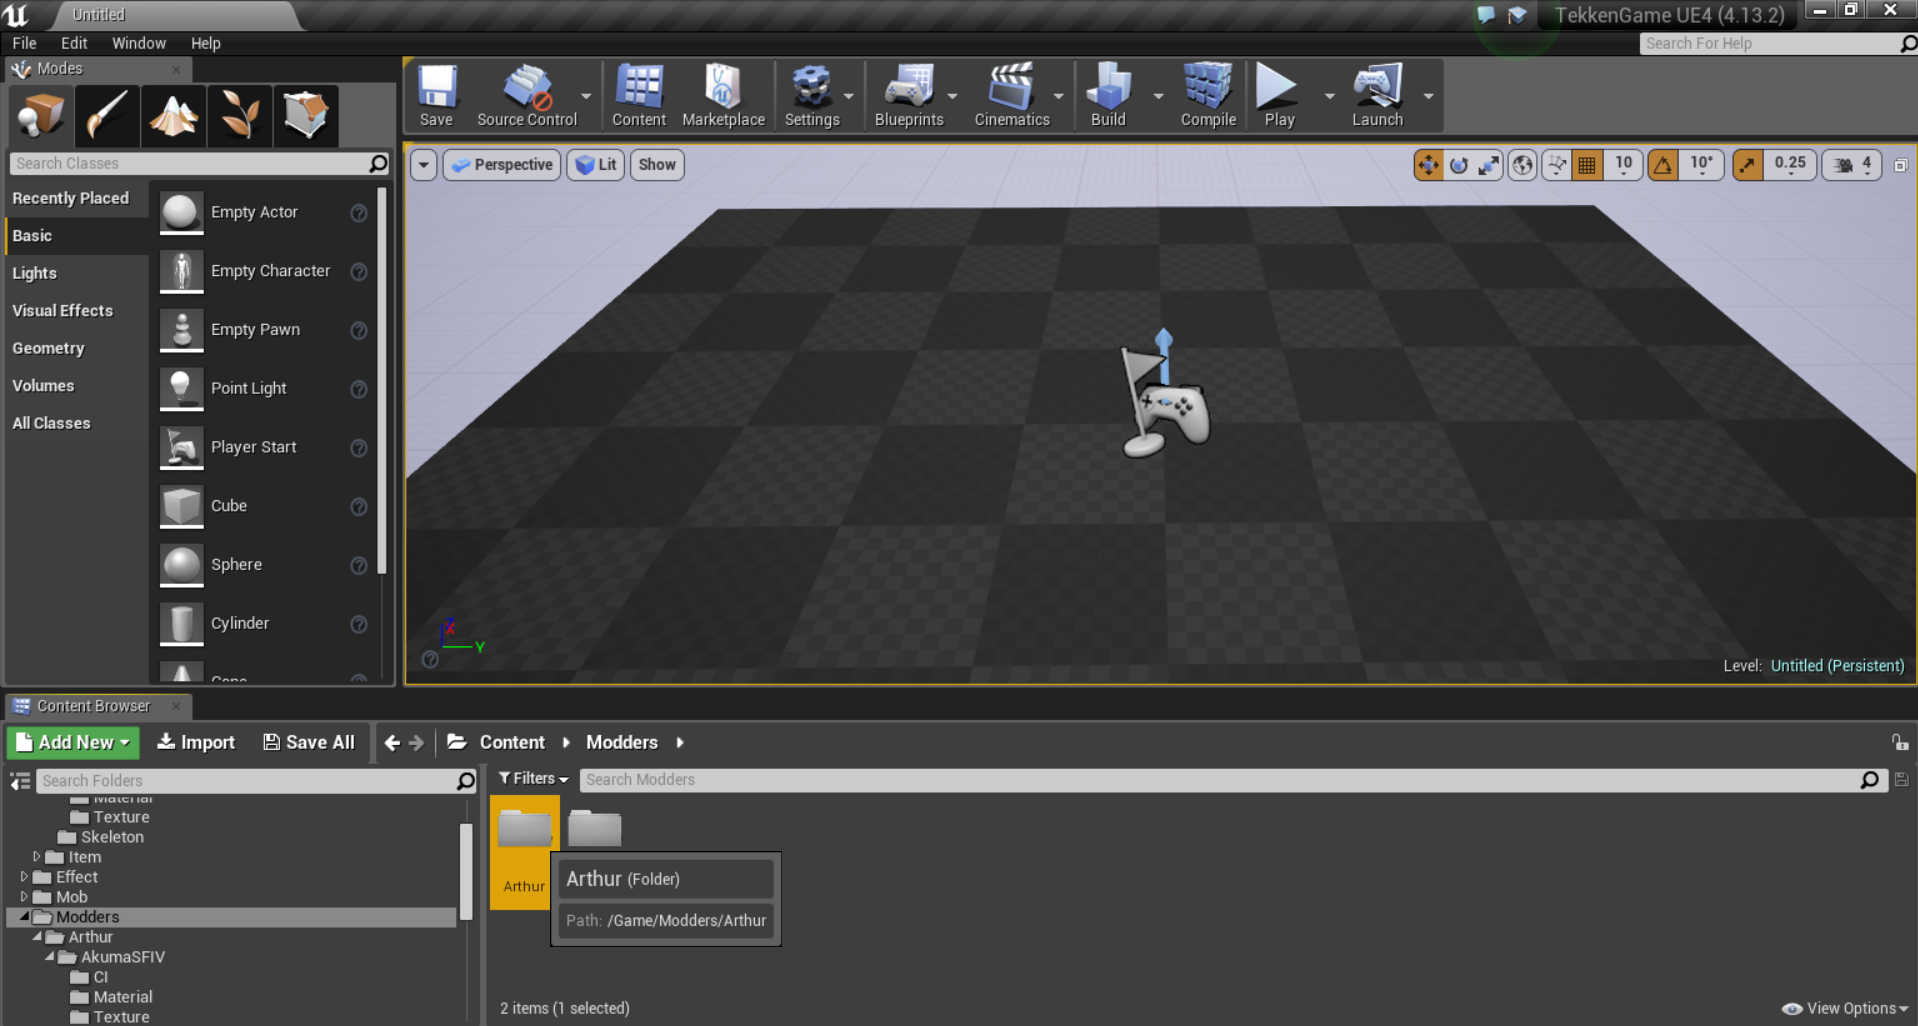
Then you would create ANOTHER folder for each project, name it whatever you want
Each time you create a new project, you will need three folders:
- CI
- Material
- Texture
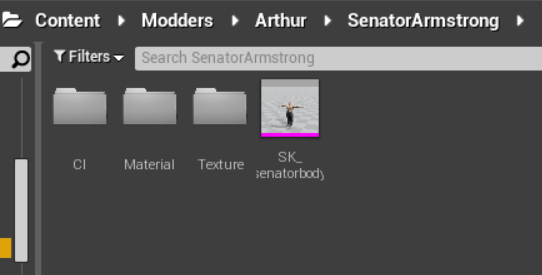
Alongside these folders, but not inside them, place any meshes for your mod. The project folder should look like so:
CUSTOM CI
In the “CI” folder, right click. In the drop down menu that appears, under “Create Basic Assets”, look for “Character Item”. We will create the CI first, and then the CCI.
 The parameters to pay attention to here are :
- Character: The ID for whatever character you are modding. Character IDs can be found here:
The parameters to pay attention to here are :
- Character: The ID for whatever character you are modding. Character IDs can be found here: https://tekkenmods.com/guide/5/tekken-7-general-information
- Item Position: The slot your custom mesh takes up
- Source Skeletal Mesh: Your mesh itself
All of the other fields can be left as is.
Custom CCI
After creating your custom CI, then we need to create the CCI. This is what we will be swapping into our preset later in the guide.
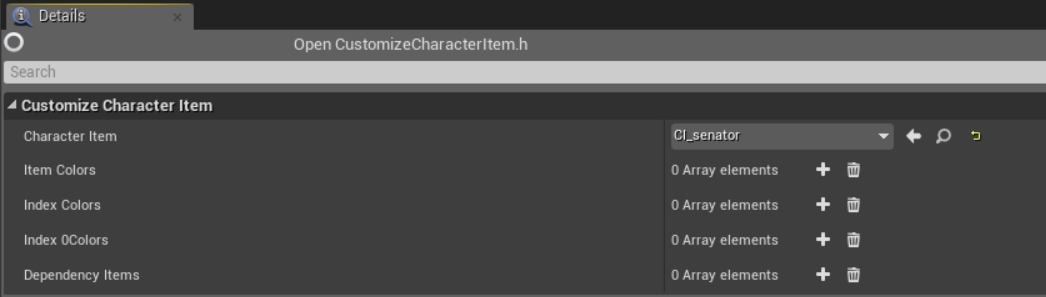 For a simple mesh swap, all you do is select the CI we just made into the first field. The other parameters don’t matter for now.
CUSTOM PRESET FILES
After the mod is successfully cooked, we need to get it into a preset.
Go into the extracted Tekken assets, and find whatever preset you’d like to replace. In this instance, we will be using Marduk’s last preset.
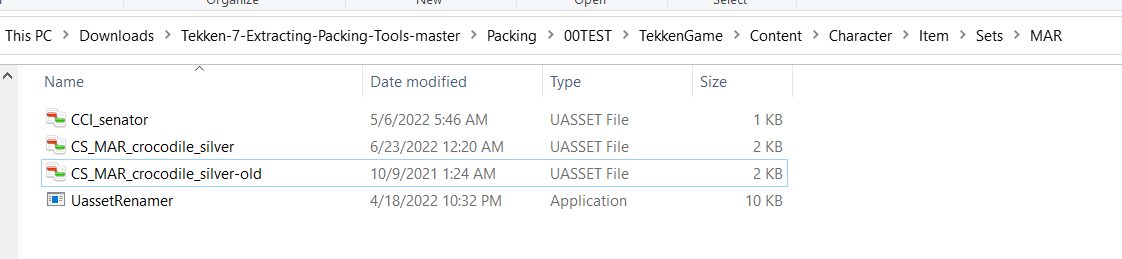
Preset files are located in Character -> Item -> Sets -> (character ID) and should all start with the prefix CS_
Mimic this file path for your mod folder, and place your CS_file inside.
Also inside this folder, place uassetrenamer, and your custom CCI (NOT CI).

Now, open the preset file with CompareIt
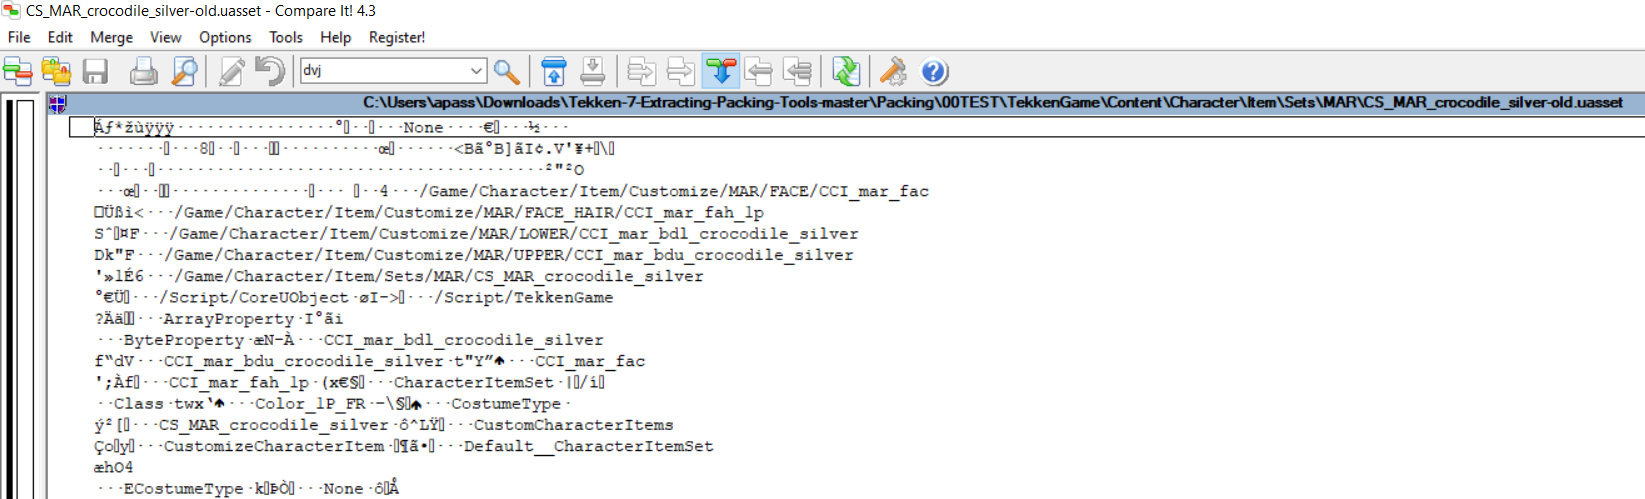
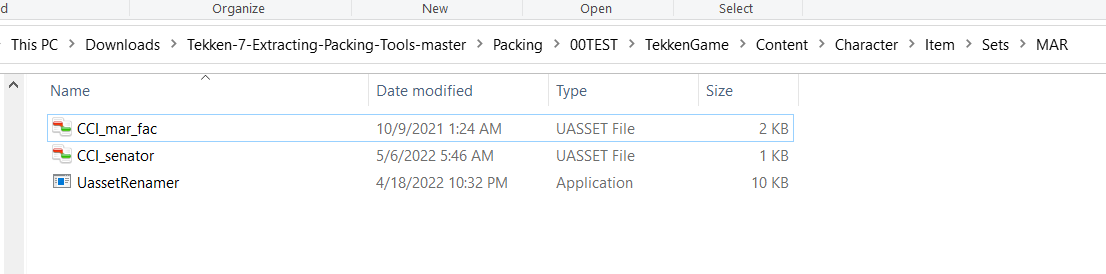
Highlight over the name of the first CCI in the preset file, in this case: “CCI_mar_fac”, and copy it. Then go into your SETS folder and rename the preset file to the name you just copied.
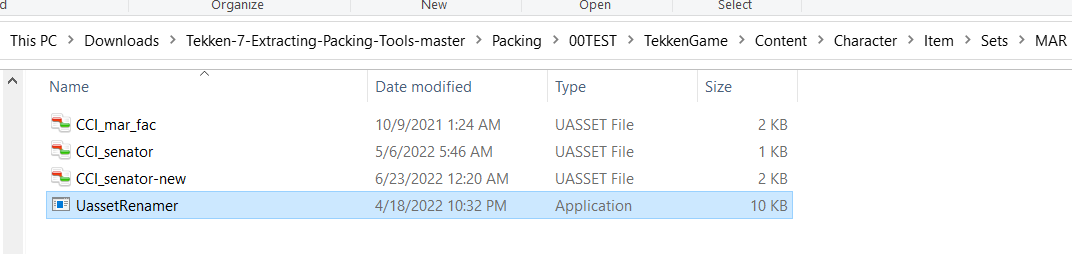
Click on UassetRenamer, select your custom CCI first **and select the newly renamed preset file **second. This should result in your custom CCI being copied with the suffix -new with a size of 2 KB.
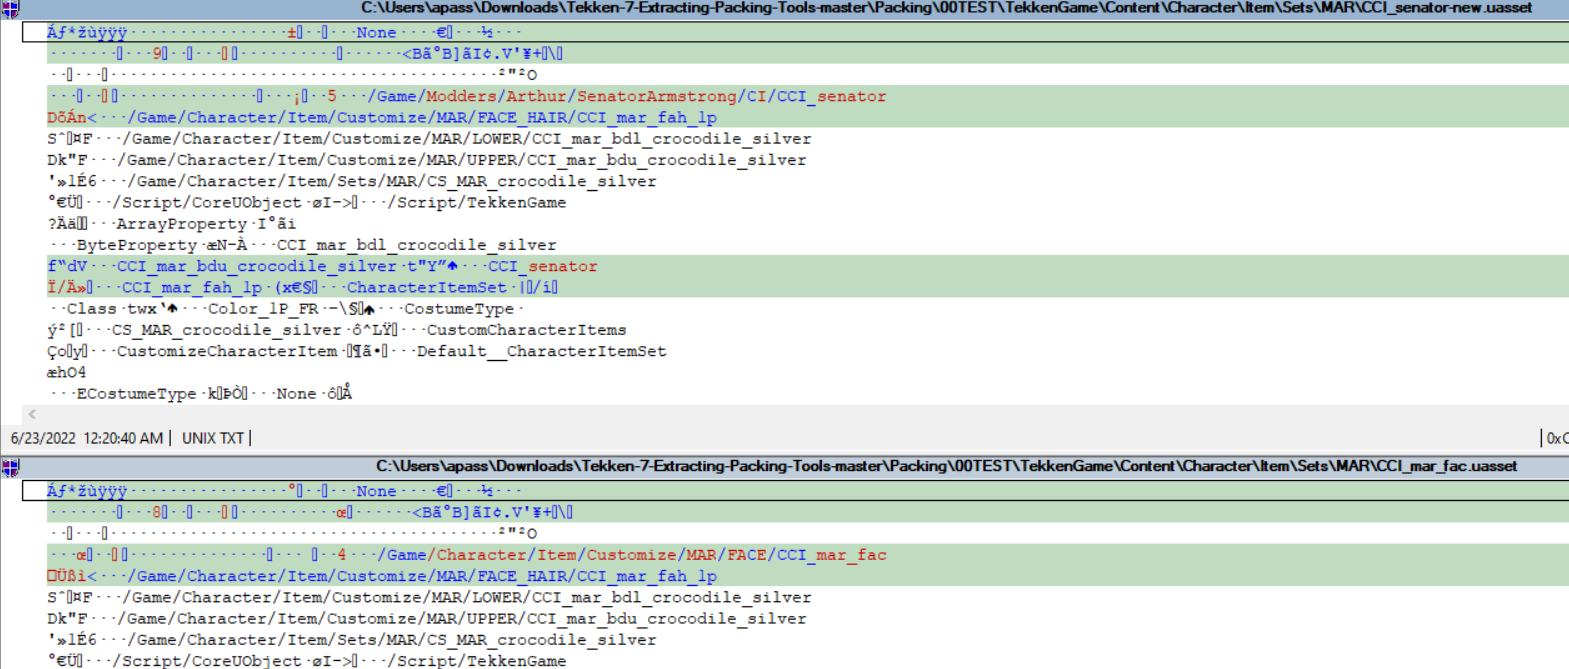
To make sure everything was swapped correctly, compare your new preset (CCI_whatever-new) and your old preset (whatever you just renamed) in CompareIt.
If your mod contains more items, then just continue to go down the line in the preset file swapping just like we did. Once everything is swapped properly, rename the fully swapped preset to match the name of the original preset; in this case it would be “CS_MAR_crocodile_silver”. I also recommend keeping a copy of the untouched preset and renaming it the same with something added at the end, like “-old”. This is just for a backup in case there are any problems with your swap.
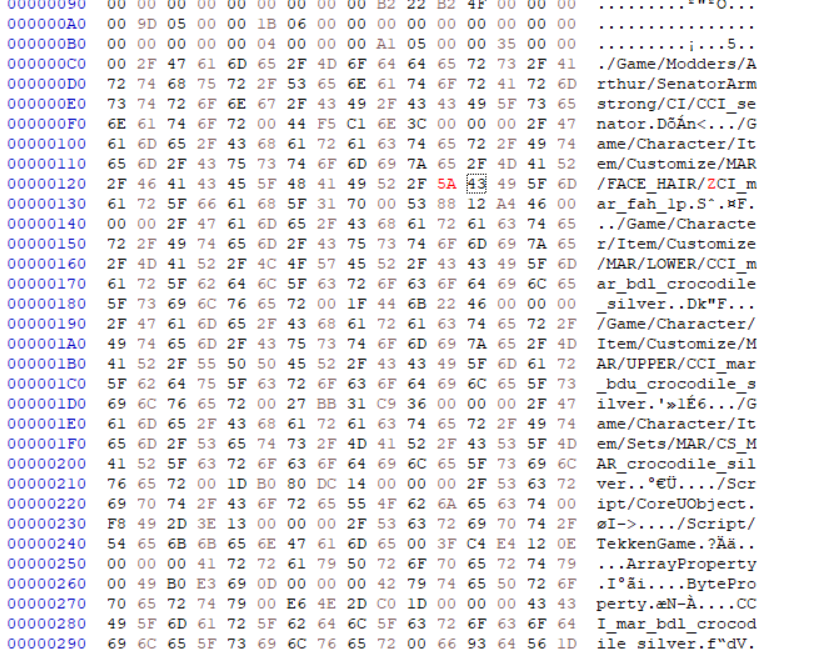
Once complete, we need to open the preset in HxD to remove any additional items we don’t want to load in. Drag the new preset file into HxD, and look for any times the hex references a CCI.
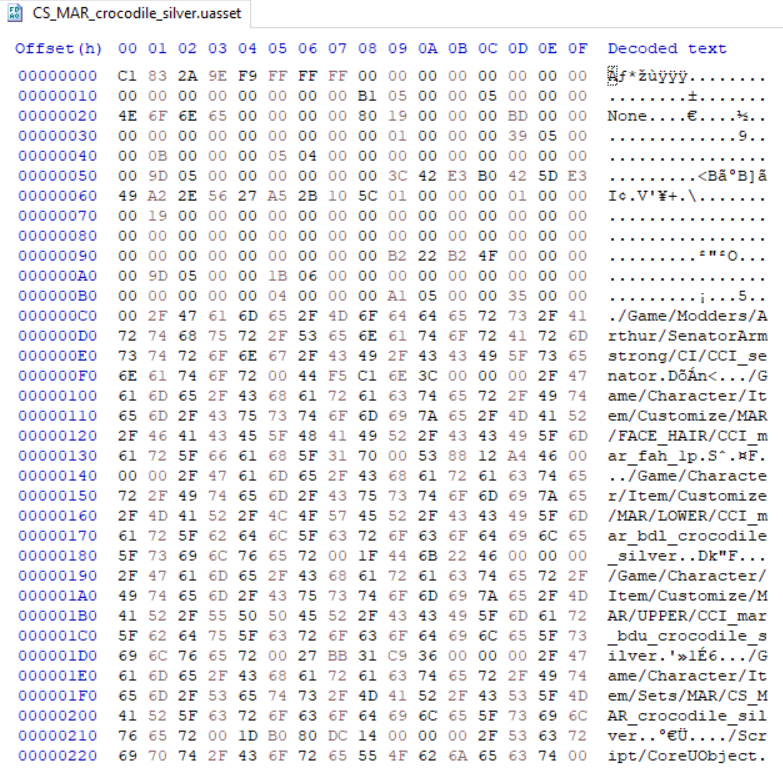
In order to remove the items that we don’t want from the preset, we need to change the CCI prefix of ALL of these items to something else so the game won’t recognize them.
Place your cursor **BEFORE **the first letter of CCI, and change it to a Z. The character you use shouldn’t matter, but just to be safe use Z.
Be sure not to change any hex referencing your custom CCI file.
Do **NOT **change the name of the CS file at all.
Continue doing this until you reach the end of the hex. Save the file and you’re done!
NOTE This guide does not cover replacing the thumbnail for the preset. Follow the same instructions given here: https://tekkenmods.com/guide/27/custom-item-thumbnail-tutorial