Ultimate Tekken 7 Skin Material Tutorial (Updated - 12/8/2023)
This tutorial is more like an in-depth guideline to understand how Tekken 7 Skin Material works.
DISCLAIMER: This tutorial is for advanced users whose familiar with Unreal Engine 4 and Tekken 7 modding in general. I assume you are somewhat familiar with how Unreal Engine 4 Material works in general and knows how to use photo editing software.
MUST KNOW: This guide may not be a use or difficult to understand for beginners. I'll also try to cover that as simple as possible.
Prerequisites
My Emulated Skin Material
- Extracted Character Assets using
this tool
- (RECOMMENDED)
UE Viewer, also known as Umodel
- (RECOMMENDED)
UAssetGUI
Getting Started
Before we get into Tekken 7 Skin Material, let's talk about about how skin texture works. The list below will tell you what these are and what is contained inside of them.
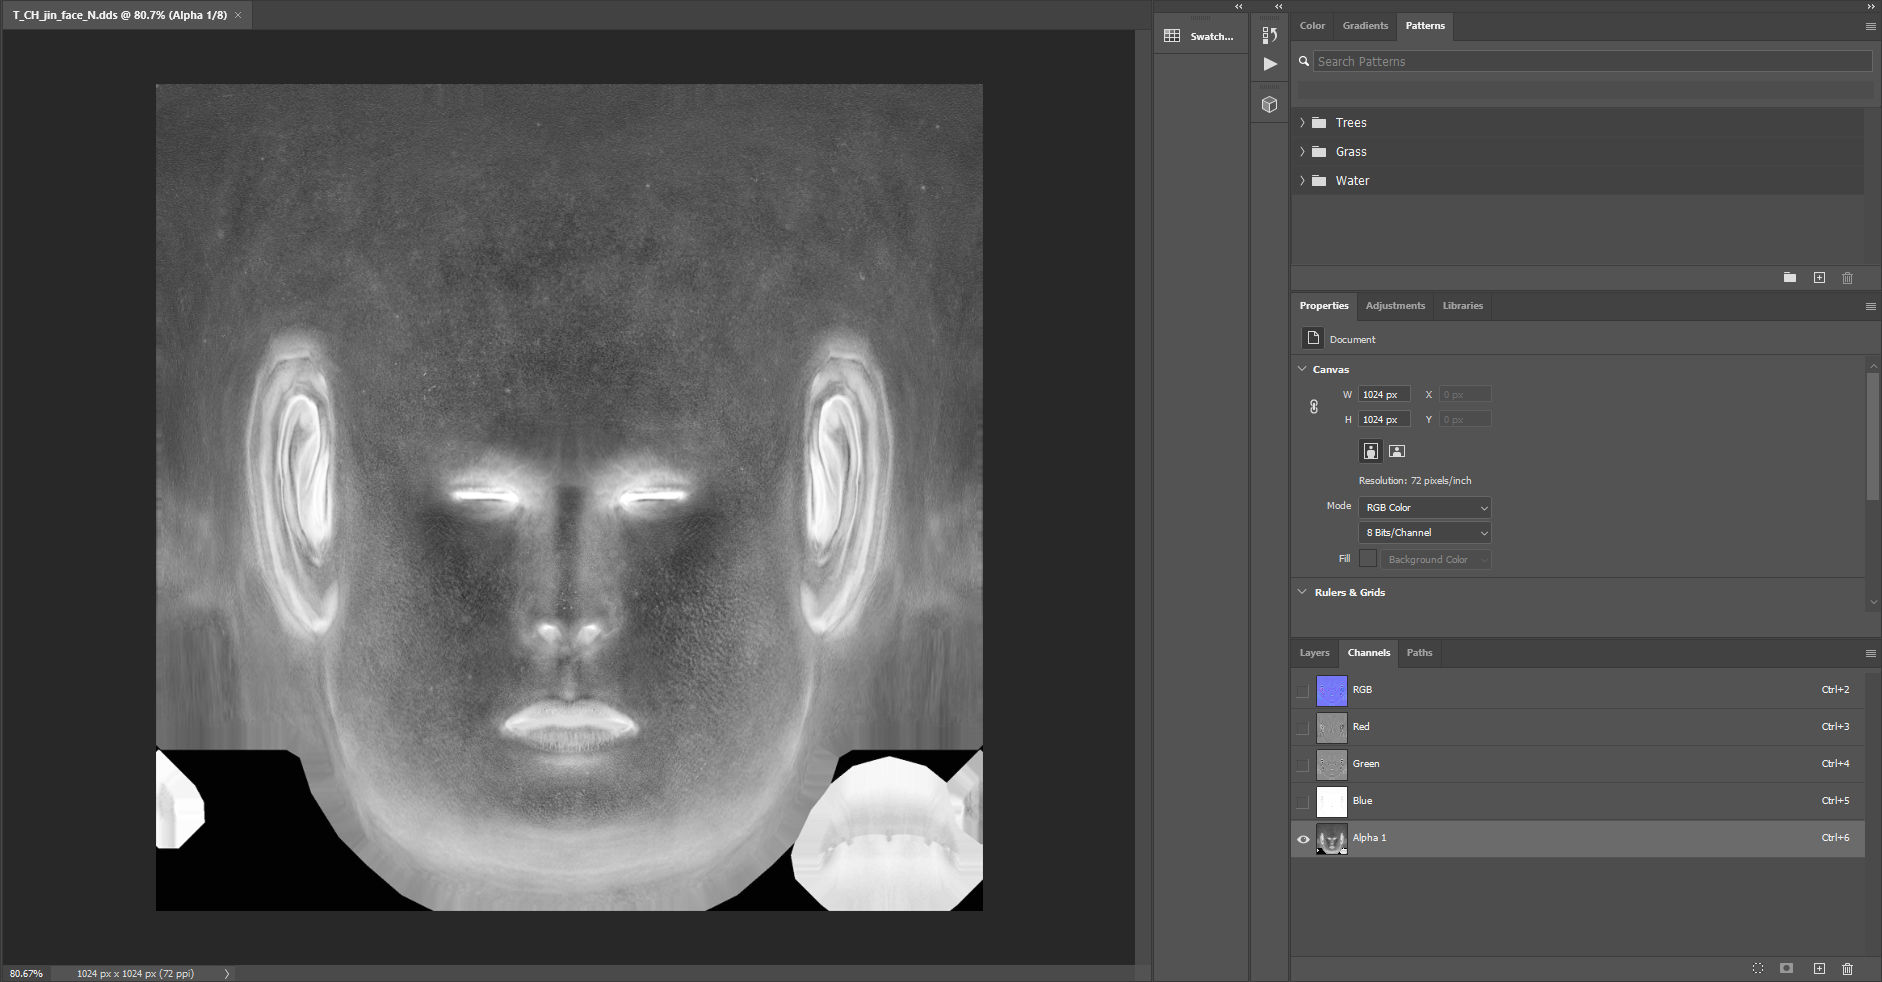
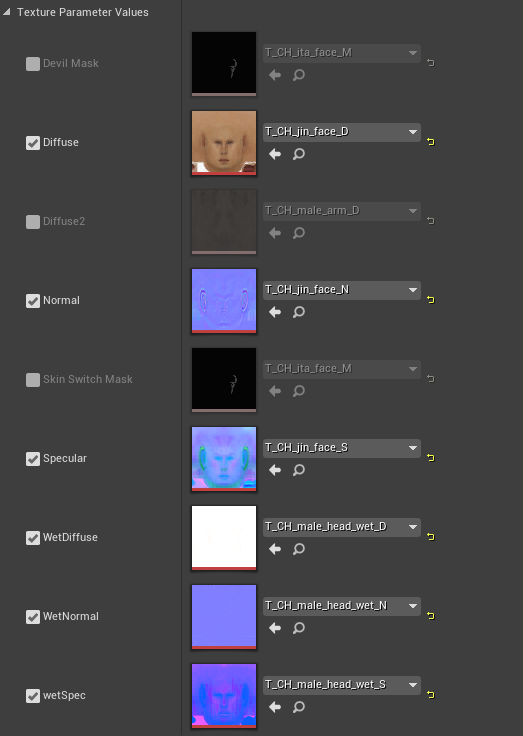
TEXTURE
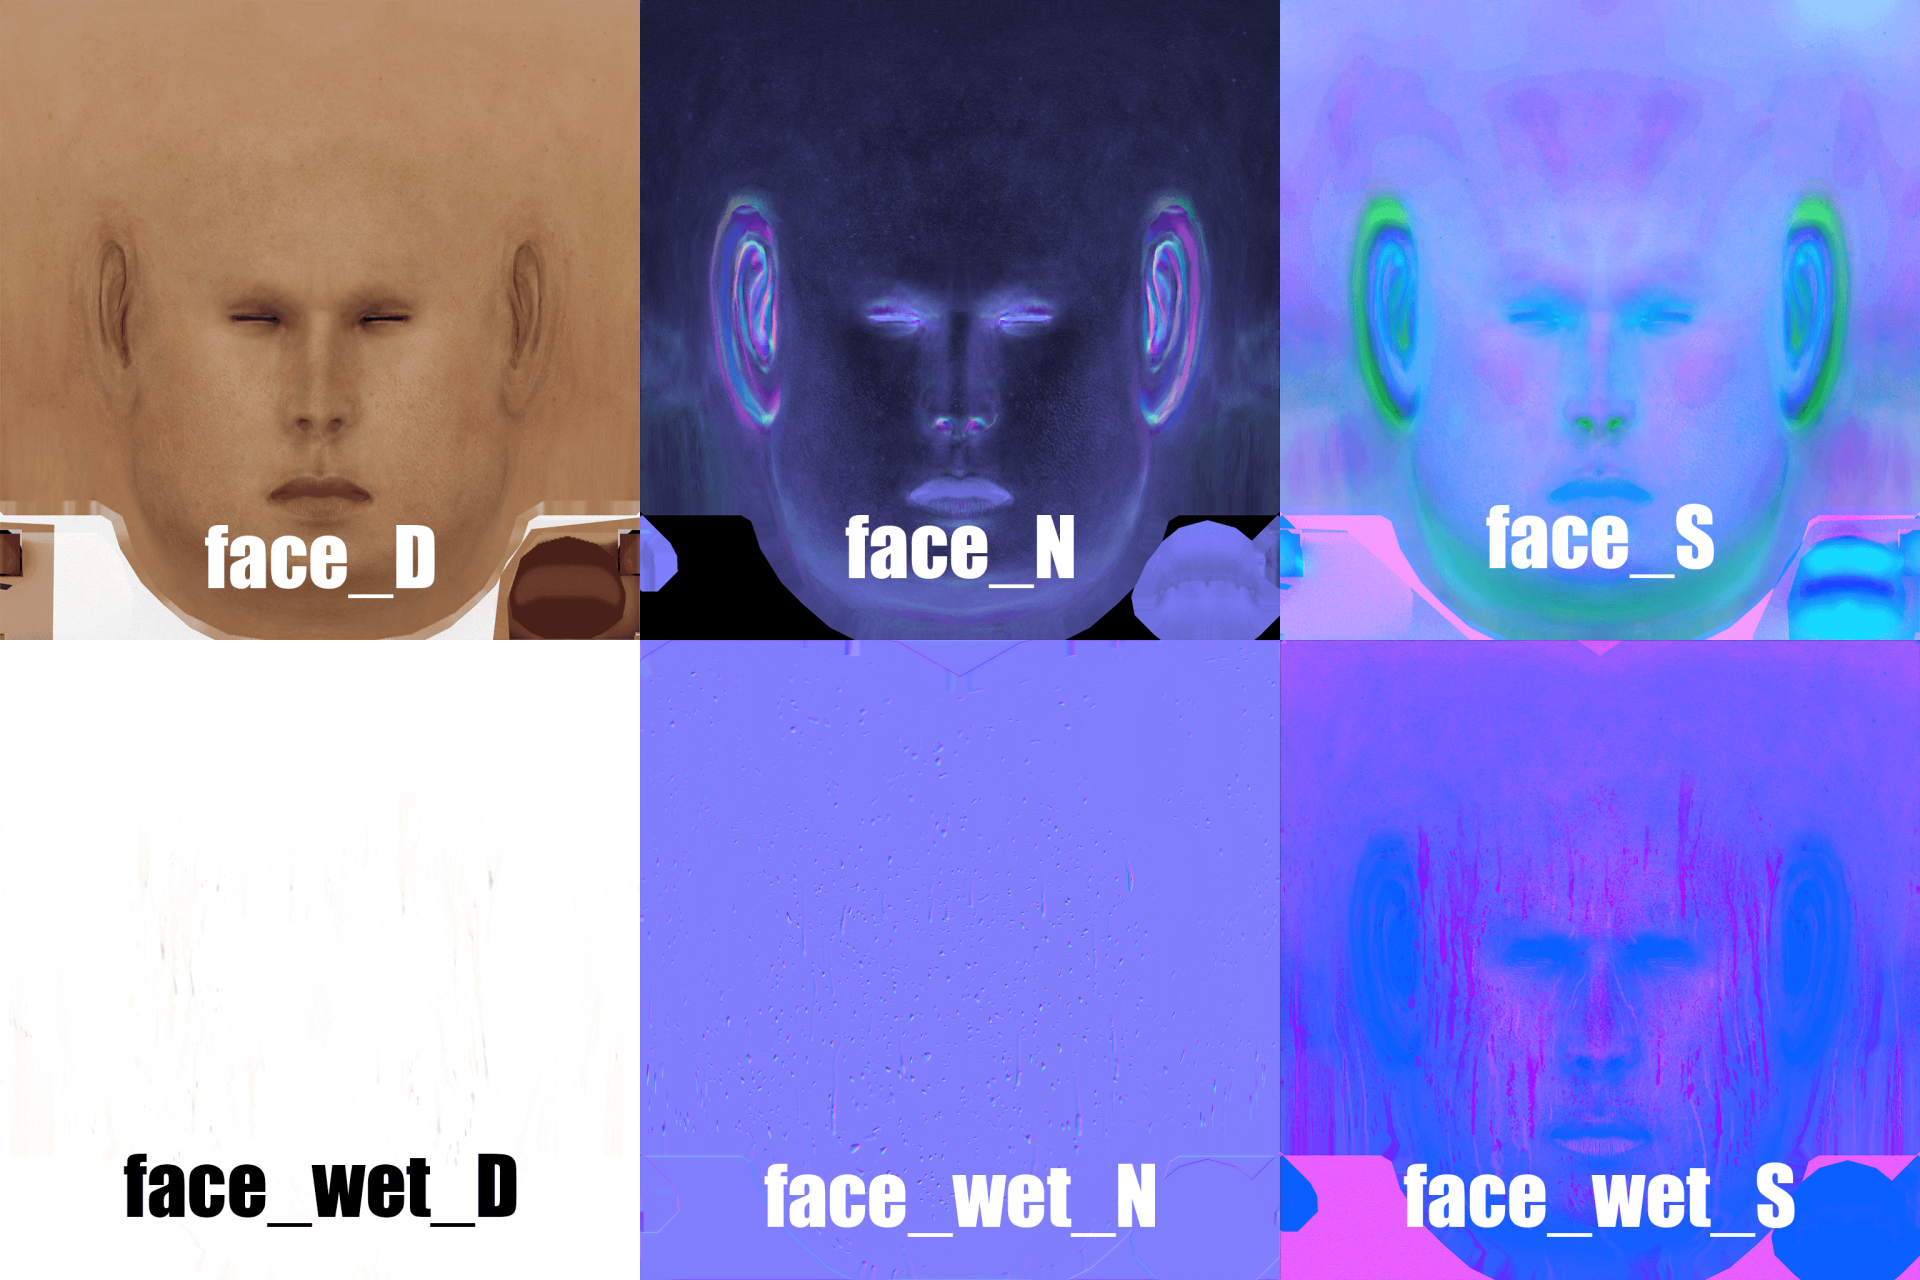
_D - Diffuse Texture, this is the base texture. _N - Normalmap. This game uses Linear Color mode for the Normal Map to support the alpha channel which contains the roughness map. _S - Specular, but it's not just regular specular. It's a texture container. Each color channel contains specific map that we will get into that later. _wet_D - Wet Diffuse, used for sweat variation. It has white as a mask. Meaning; White Area wont be applied on character diffuse when they're sweating. _wet_N - Wet Normal, used for sweat variation, except it doesn't have Roughness Map. This texture is on Normalmap compression mode on Unreal Engine 4. _wet_S - Wet Specular. Same as _S but for sweat variation.
Working with textures
Now that you know what's contained in each textures, this section will tell you how to work with the important maps and import it into Tekken 7.
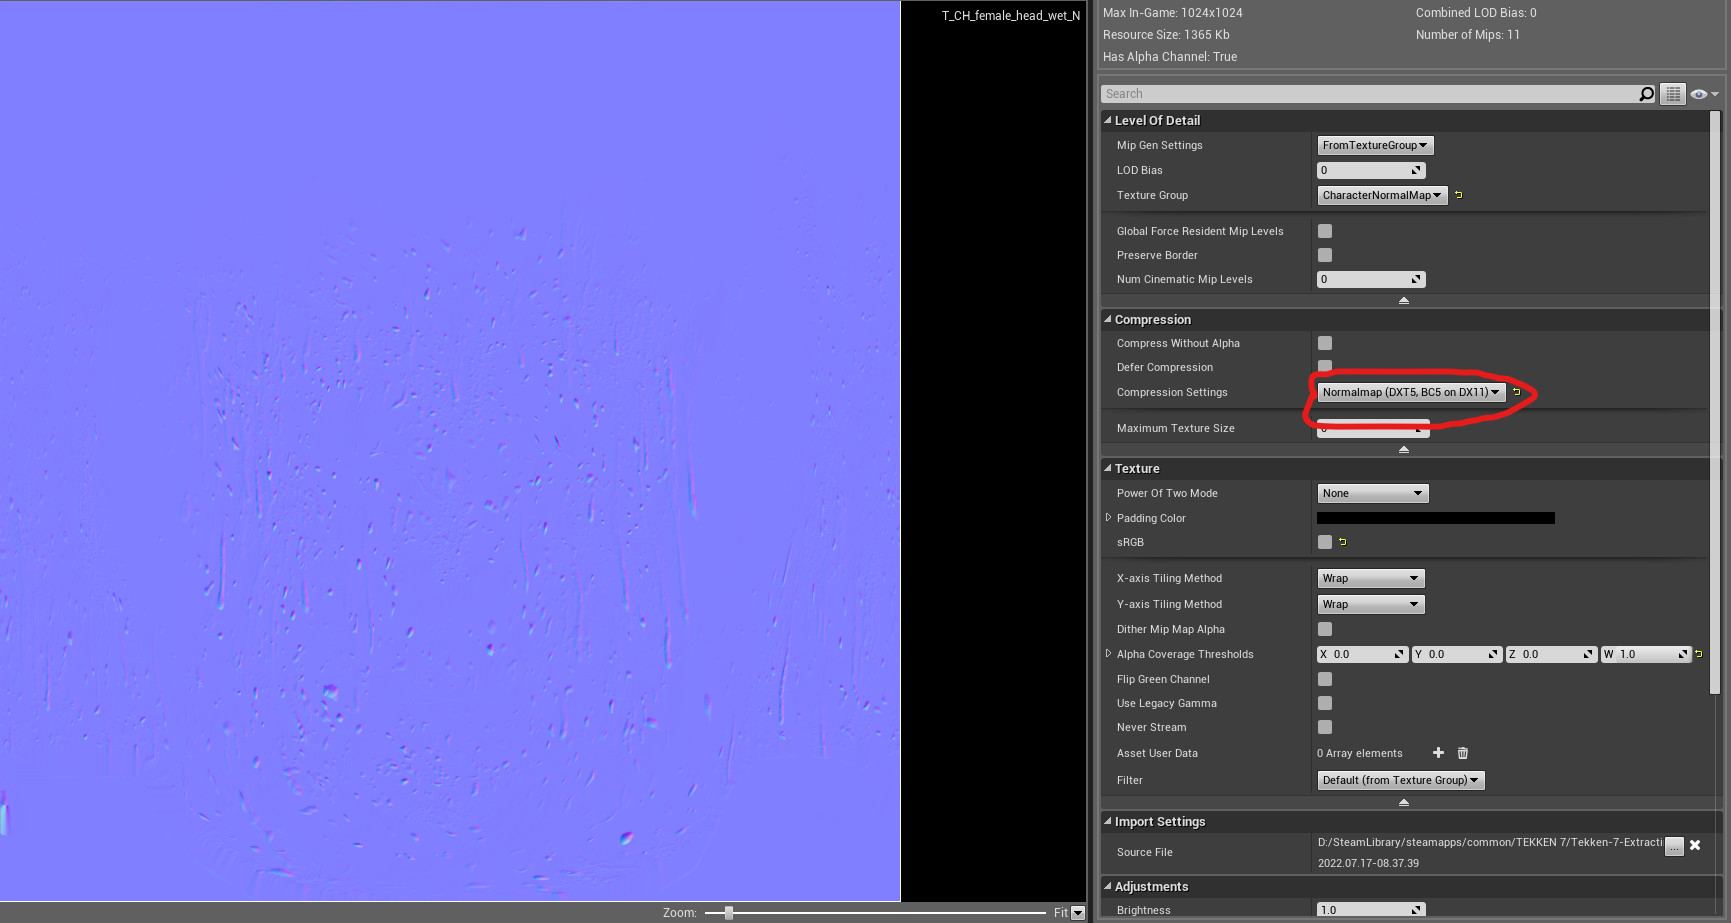
Normal Map For this map, you need to work with it like any other Unreal Engine 4 games with two exception: - Blue channel does matter. It must be a bluish normal map instead of green normal map. Unlike other UE4 games where blue and alpha channel has been disposed. - The texture has alpha channel which contains Roughness Map. You can copy&paste the roughness map there and then save your texture as TGA. If you have no roughness map, you can just set it white and then mess around with parameters on Unreal Engine 4 later.
Specular Map As I mention before, the Specular Map has each textures contains in each color channels. Sweat variation works the same as normal variation. Here is the list of information for each channel:
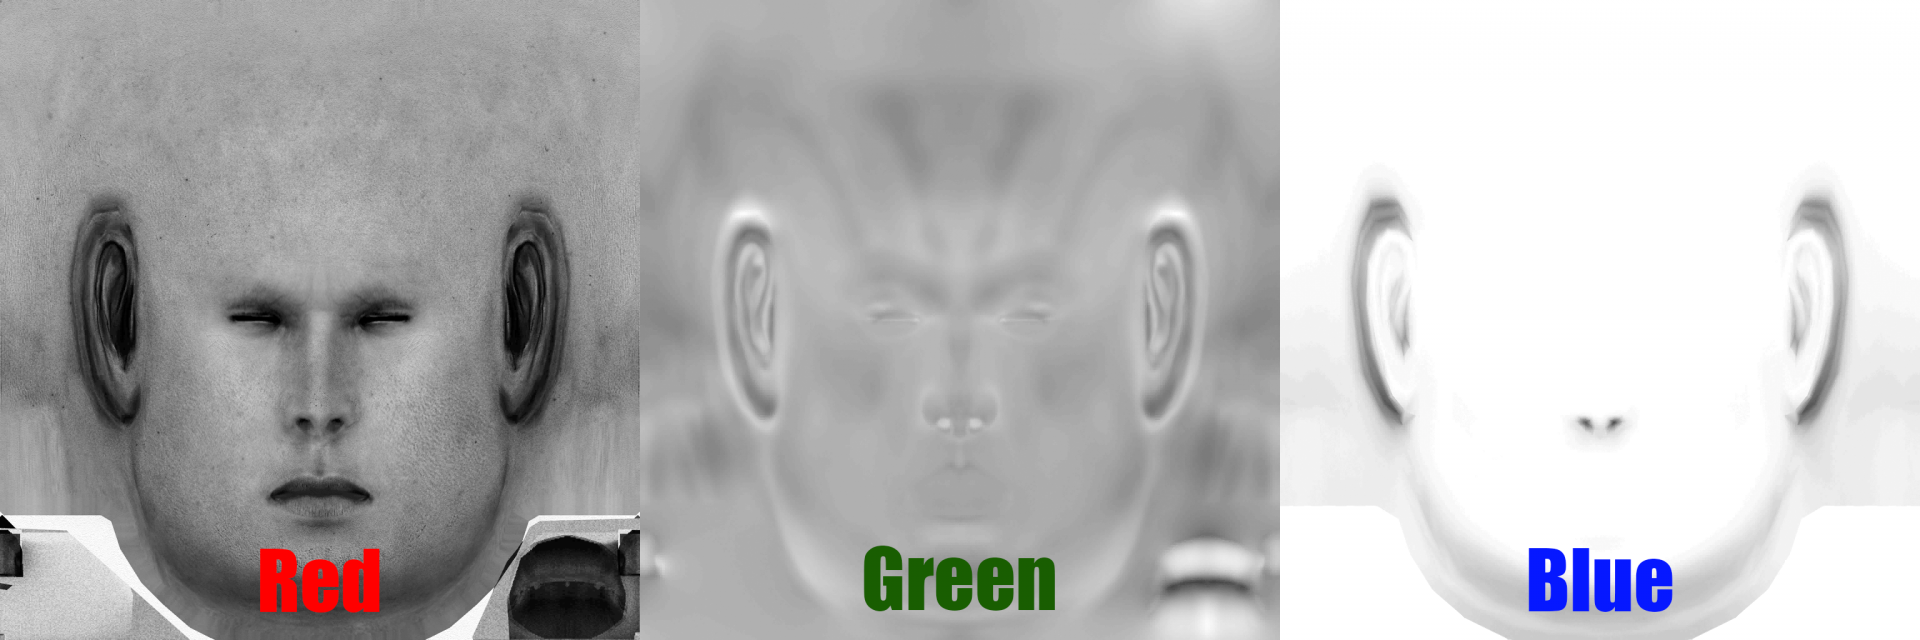
Red - Base Specular Map. The way Tekken is using so-called "Specular" is simply using Glossiness texture for it which is just inverted Roughness, thanks to how UE4 Specular and Roughness work...
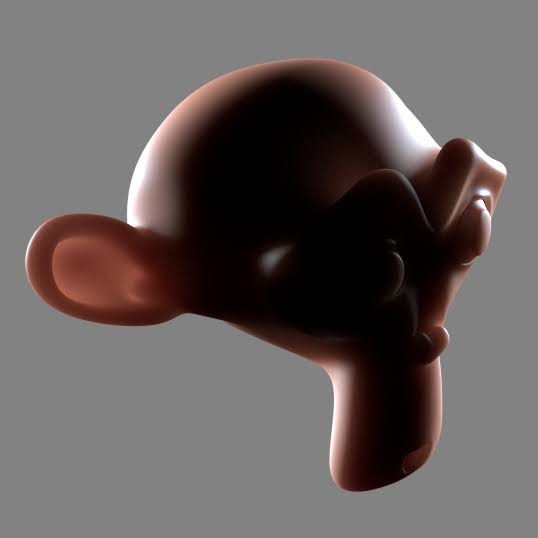
Green - Subsurface Scattering. This is used to enhance some leak lights details that appears on human skins when the light approaches closely. If you don't use it, just make it white. Lighter area means less approaching lights. Darker means more approaching lights. Example Picture:
 For WetSpec, Green is used for Roughness instead.
Blue - Ambient Occlusion. This is used to darken some areas of the surface, despite of how bright the lights are.
AO on Tekken 7 is STATIC and non-dynamic. The dark area gets multiplied to the diffuse texture.
For WetSpec, Green is used for Roughness instead.
Blue - Ambient Occlusion. This is used to darken some areas of the surface, despite of how bright the lights are.
AO on Tekken 7 is STATIC and non-dynamic. The dark area gets multiplied to the diffuse texture.
Material
MUST KNOW: Some function may not work correctly without referencing properly.
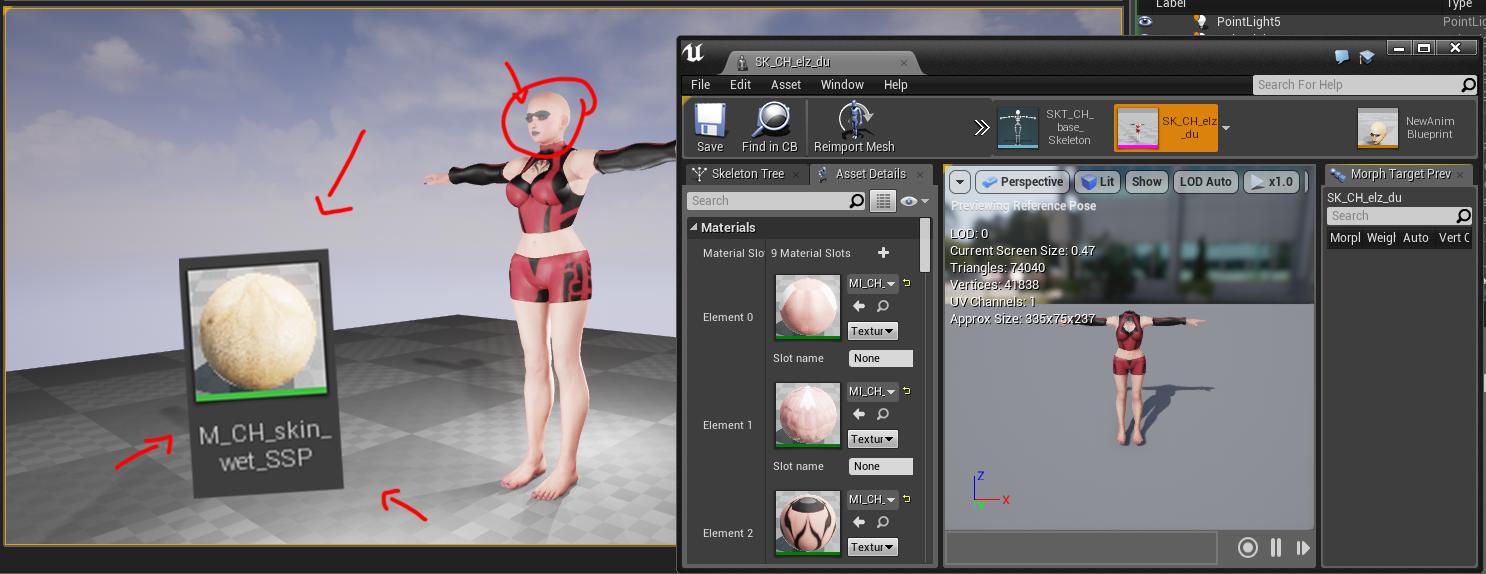
Starting with the basic, we will import those textures we've made and apply them onto Material Instance
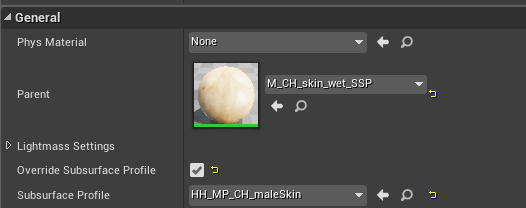
First, create Material Instance out of the M_CH_skin_wet_SSP

Place that Material to anywhere you want Then import the textures. These are must know compression settings for the textures for the game to read them properly
Base Normal and Specular - Default, SRGB disabled
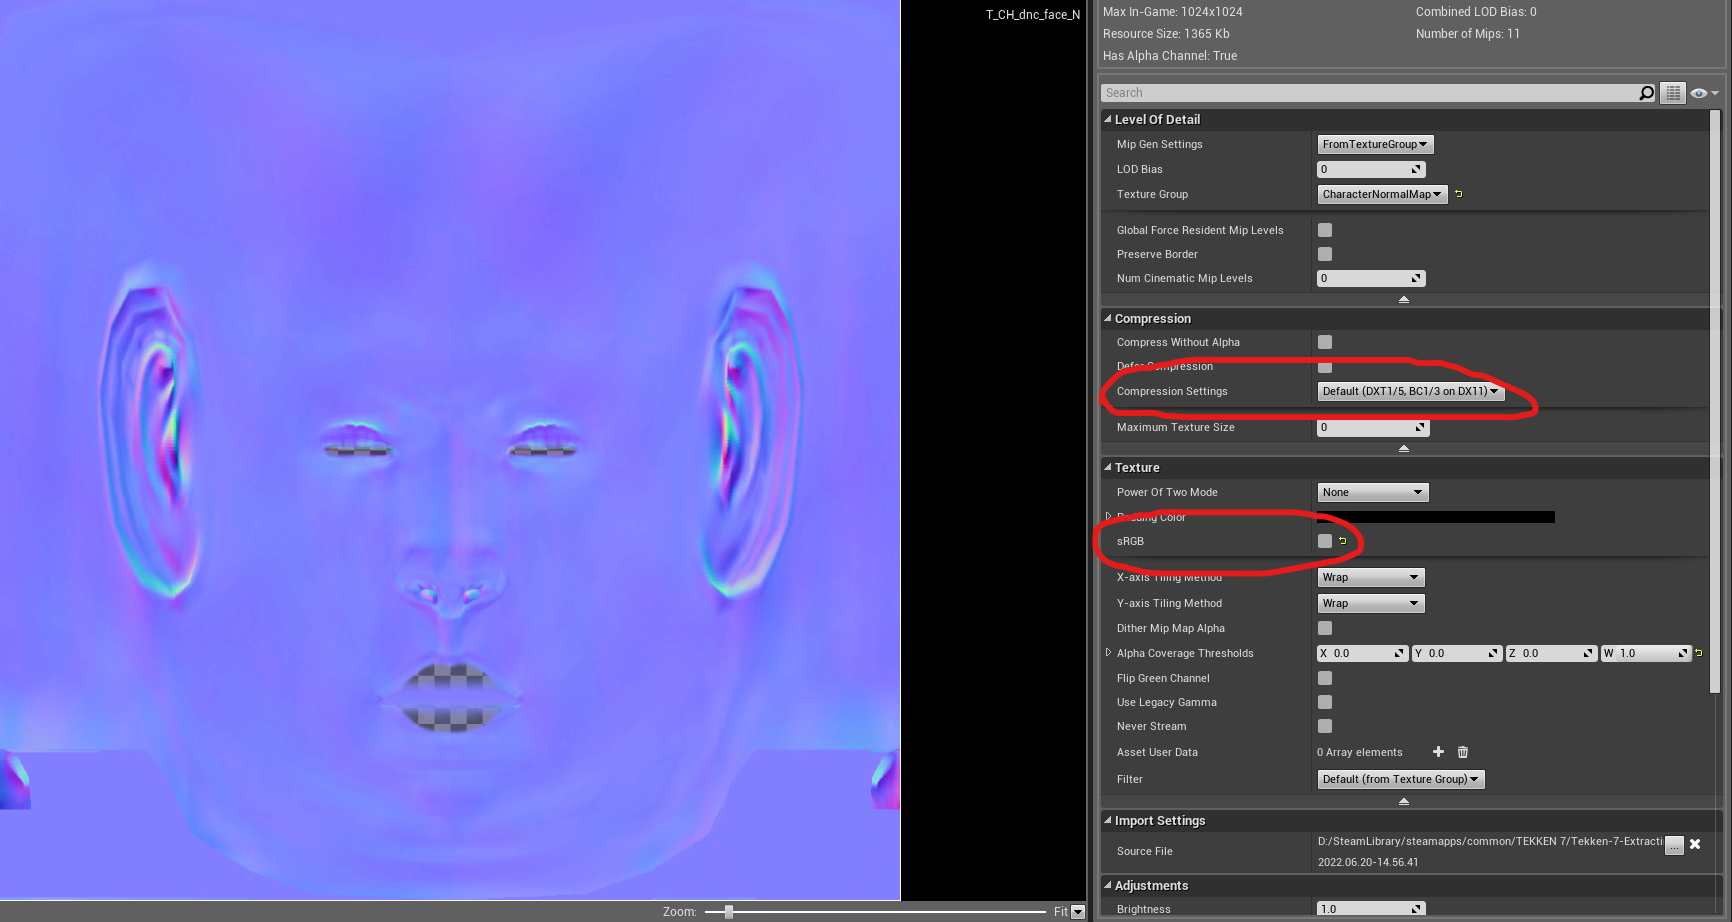
Wet Diffuse - Default, SRGB enabled
Wet Normal Map - Normalmap. For some reason, the sampler in the material of this texture is set to Normal instead of Linear Color. Other compression will result in game not reading it properly.
Now apply them onto the Material Instance, and you may move to the next section
You may apply Subsurface Profile for extra details.
Parameters
You may skip this if you know what you're doing.
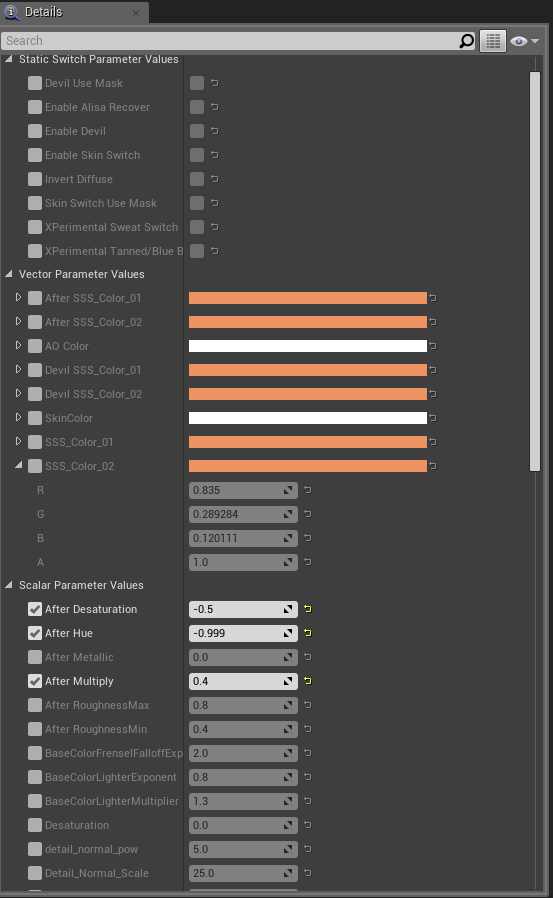
Static Bool Parameters and Static Switch Parameters
Static Bool Parameters Enable Alisa Recover - Used on Alisa for the parts recovery animation. Enable Devil - Used on Kazuya and Claudio for their Devil variations. Enable Skin Switch - Tanned characters/Blue Bryan variation.
Static Switch Parameters Invert Diffuse - Invert the texture color. I believe it's only used for in-dev debug purpose. Devil Use Mask - Used on Claudio to not affect the whole skin like Kazuya. Skin Switch Use Mask - Used on Tanned Claudio (for his Skin Switch Mask to work with tanned variation)
Vector Parameters
Skin Color - as the name suggests, it changes your skin color. Used on some characters like Anna. You can also make a literal Shrek with it.
AO Color - it was supposed to change your AO color, but do not touch this ever.
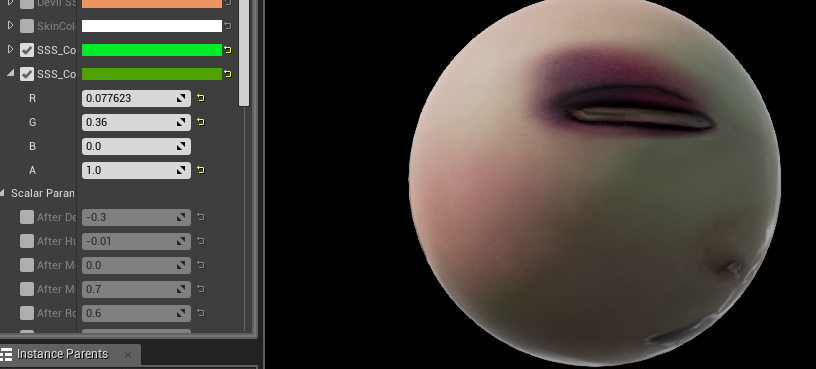
SSS_Color_01, SSS_Color_02 - changes the lights color for Subsurface Scattering when light approaches closely. **This param only works with Subsurface Shading Model, more infomation after this section.
Scalar Parameters
Hue - Hueshift on your diffuse. You can make character a literal Shrek with this. Multiply - Determines how dark your skin diffuse is. Lower value means darker. Used on most of characters. Especially heavily used on dark-skinned character (e.g. Eddy, Josie, Katarina, Leroy) Desaturation - Desaturates your diffuse color. Roughness Min/Max - Determines how rough your skin surface is. Also depends on the Roughness Map that is featuring on your Normal Map. Specular - Controls how strong the Specular is. Normal_Power - Intensity of your Normal Map. Detail_Normal_Scale - Scale for the pores Normal overlay. detail_normal_pow - intensity of the pores Normal overlay. You can disable pores by changing this to 0. BaseColorFresnelExponent, BaseColorLighterExponent, BaseColorLighterMultiplier - these are used to mimic characters rim lights, I don't recommend you to mess with it. Metallic - Metalness of the surface, used on Kazuya for some reason. SS Value - Controls how strong will the Subsurface Scattering texture affect the material. Not recommended to touch. Diffuse Switch - Switch to Negan's bald head which replaces Diffuse2 Texture Parameters.
Dynamic Enable Alisa Recover - Enable Alisa Recover for that part, required static parameter "Enable Alisa Recover". Set value to 1 to enable. Is Alisa Head - Enable Alisa Recover for her head, required static parameter "Enable Alisa Recover". Set value to 1 to enable. Is Alisa Left Arm - Enable Alisa Recover for her arms (including right arm), required static parameter "Enable Alisa Recover". Set value to 1 to enable.
"After (paramname)" - Tanned/Blue Bryan variation. "Devil (paramname)" - Devil variation for Kazuya and Claudio.
Additional useful tricks for Materials
This may be the most important part as it will get you the best looking result and working properly. As I've mentioned before, some params only works with referencing. The reason being is Unreal Engine 4 writes Material Instance based on what the OG Material parameters has to offer. Here are the example for each cases:
Case 1
You want Claudio's devil tattoo functions and perhaps other functions from Kazuya and Alisa, but it doesn't work as you intended:
The reason this happens is because the current material has no needed Static Parameters enabled. The game cannot read the needed information and we need to enable them. But we cannot enable it directly because it will force the engine to cook that as Material instead and it will crash the game.
So to do this, you need to make a reference of that Material Instance.
To do that, right click on the M_CH_skin_wet_SSP. Then click on Create Material Instance
Name it exactly like Claudio's skin MI name
Place it to the appropriate folder, respect the original file path. Then enable all the needed static parameters.
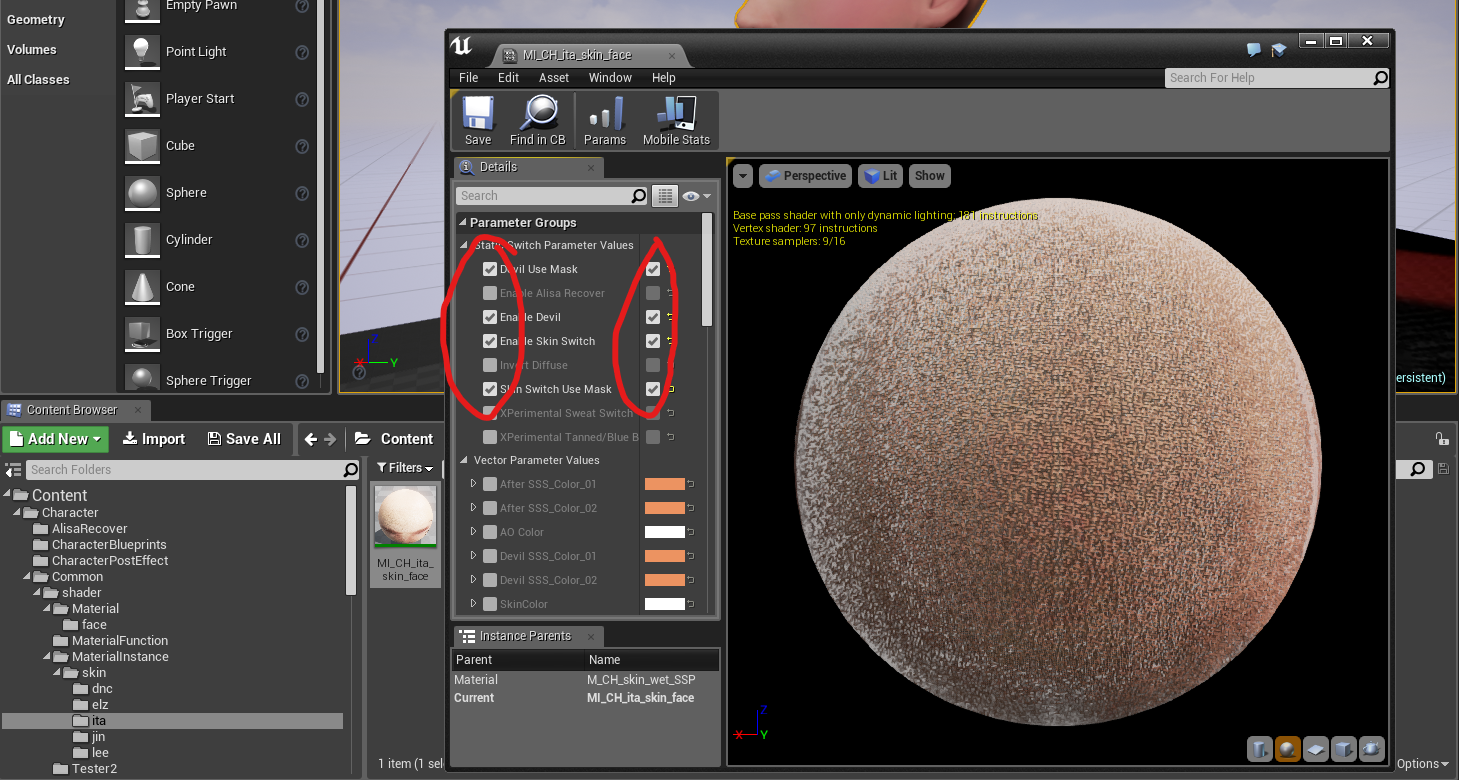
You may also match the values up that can be found on UE Viewer like me.
Now make another Material Instance out of Claudio's face MI.

You will now use this newly made Material Instance as your material. Same principle applies to Alisa and Kazuya. When packing the mod, only include your own Material Instance. The reference has done its job and you don't need their Material Instance.
Case 2
You want to use Subsurface Shading Mode with SSS_Color instead of Subsurface Profile, but it doesn't work. Same reason as Case 1, but you need to override some Material Properties. You will not be able to see which Material Instance has BasePropertyOverrides with UE Viewer, but you can find it out by yourself with UAssetGUI.
Every character has the BasePropertyOverrides, but if you're interested then feel free to follow the steps.
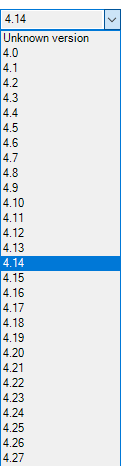
First, open UAssetGUI up, make sure you set your version as 4.14
Click on File -> Open -> Your Extracted Character Assets .uasset file
It may pop up "Failed to maintain binary equally!". This is normal, you can click OK and move on.
Go to Export Data -> Export 1 -> MaterialInstanceConstant -> BasePropertyOverrides
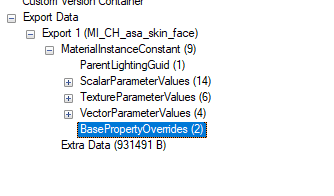 You will see that the property has indeed been overridden

Now follow the same principle as Case 1. Override the Material Properties on that referenced Material Instance
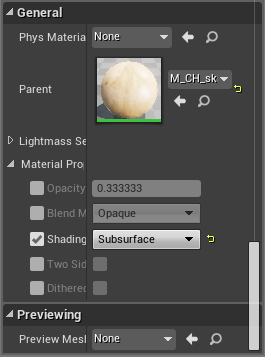
Make a Material Instance out of that referenced MI, just like Case 1

And there you have it, your Material Instance with SSS_Color parameters!
P.S. I've already done all of those jobs for you, all you need to do is create a new Material Instance from any of them. "rav" folder seems to be unused ingame so you can take that if you don't want any of these params to affect your diffuse color. Only thing you need to change is Multiply, change it to 1 and you're good to go. UPDATE 4/13/2023: This material is using different skin material, a rather outdated one, and you should not use that as a base. This is a mistake on my end and I apologize.
That should be all covered. Thank you for reading and happy modding as always!
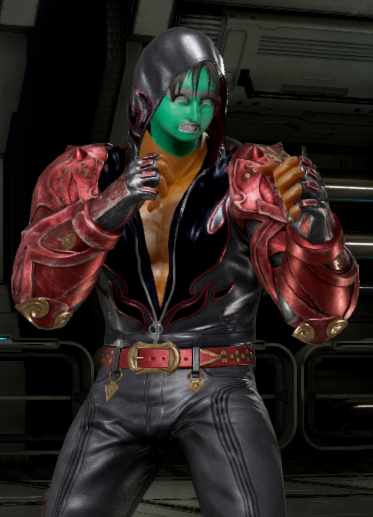
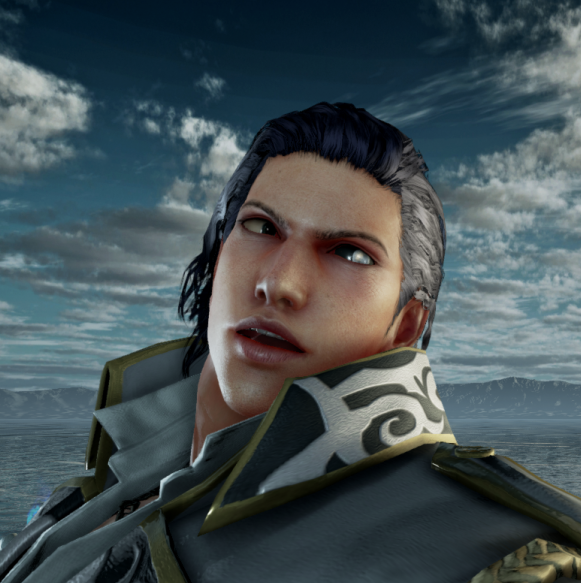
Have some funny cursed test Jin picture as an appetizer