Using APEX Clothing to make Cloth Physics on Tekken 7
This guide will give you glimpse on how to work with cloth physics, using NVIDIA'S Apex Clothing, with the usage of new custom engine based on 4.13.2

This guide will give you glimpse on how to work with cloth physics, using NVIDIA'S Apex Clothing, with the usage of new custom engine based on 4.13.2
Therefore, it wasn't possible to use APEX Clothing to make cloth physics any smoother but thanks to DennisStanistan and
WistfulHopes' hard works for making them possible. This guide wouldn't make it to the surface.
DISCLAIMER: This guide will not be easy for the beginner. I assume that you're somewhat familiar with how Unreal Engine 4 works and at least had an experience with Tekken 7 Model Modding.
You DON'T need NVIDIA GPU to get it working, as all the simulation calculations are on CPU side.
Prerequisites
NEW Custom Engine *Instruction is in the link as well as the source code.
TekkenGameNative Project
Blender 2.80 or above
APEX SDK 1.3.2 *May require login. Don't worry, it's free.
(Alternative Option #1)
APEX SDK 1.3.1
(Alternative Option #2

Migration
Before working with APEX, you must install the new custom engine and new project. We will get to the migration first so you don't have to abandon your old project. Be sure to backup your project first before doing so
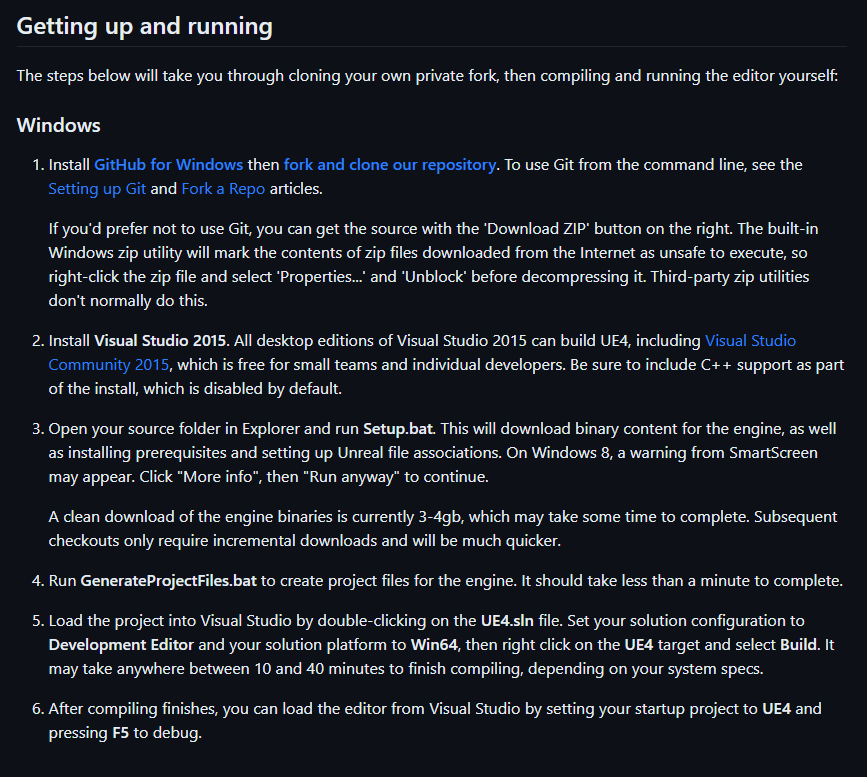
First you need to download and compile new custom engine first from the link above. Follow the instruction provided in README.md
 You can skip after this if you're going to use new TekkenGame project.
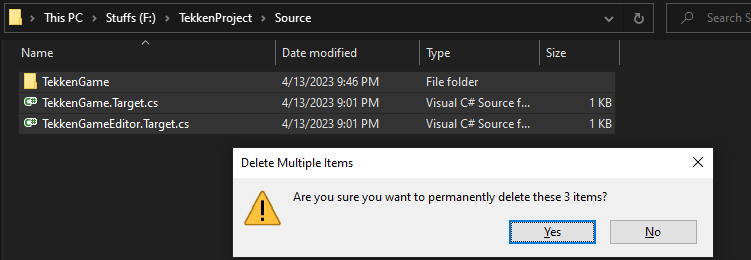
Get the new TekkenGameNative project first, then navigate to your project file and enter the "Source" Folder
Delete all the contents inside the Source folder. Don't delete the whole folder
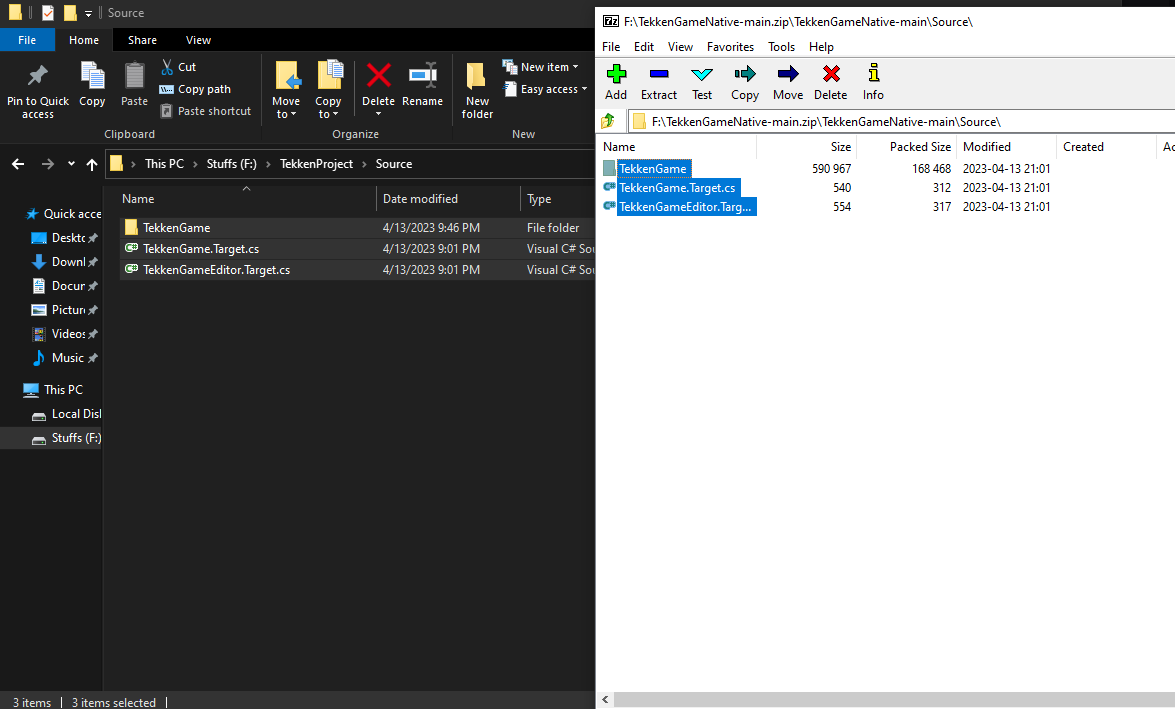
 Extract the content inside TekkenGameNative's archive, then you need to copy all the content of the "Source" folder from there into it.
 Do the same thing for Config folder
Paste the "Plugins" folder that you found inside the zip file onto your project's root folder, then delete the following folder that is highlighted below
Do the same thing for Config folder
Paste the "Plugins" folder that you found inside the zip file onto your project's root folder, then delete the following folder that is highlighted below
 You can also paste some Content as well as they have provided new things, such as Template and Sound blueprint.
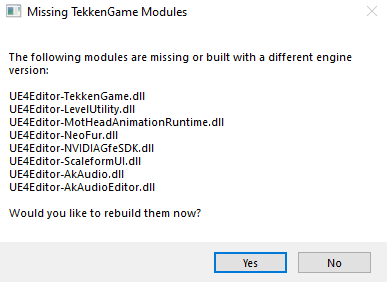
Open the project as usual. You will then get a prompt. Click OK and wait till it's done.
You can also paste some Content as well as they have provided new things, such as Template and Sound blueprint.
Open the project as usual. You will then get a prompt. Click OK and wait till it's done.
 Then you're ready to go!
Working on Blender
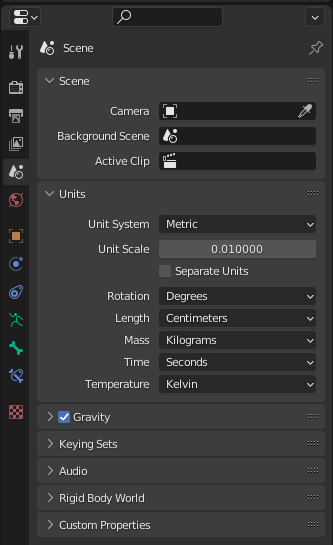
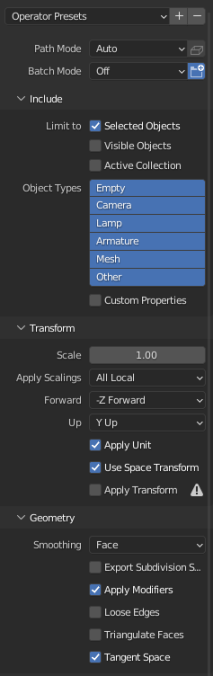
Before you do anything on Blender, make sure you have the correct unit settings before importing anything
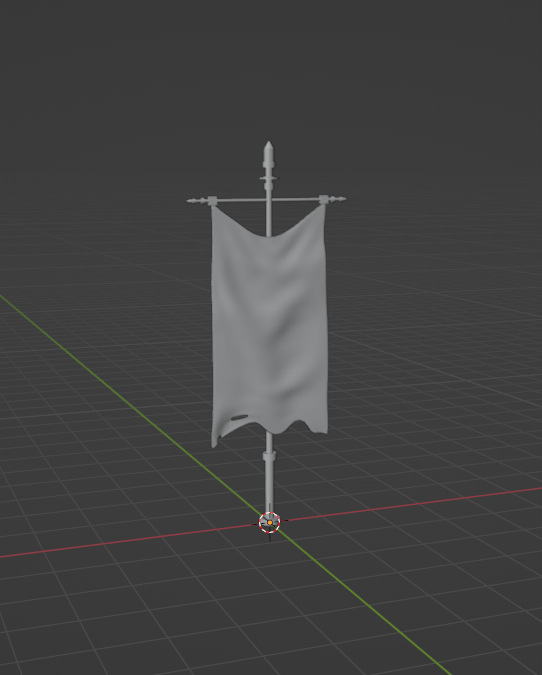
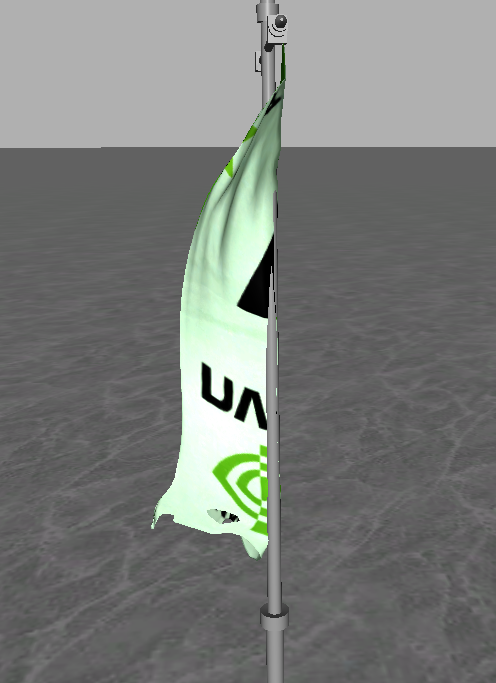
 Once that done, you can then import your mesh and work with it. In this demostration, I'm going to use a
 Medieval Flag model, made by Sousinho
To get it working, you need to at least assign weight to any bone for the cloth simulation part. You can create new bone for it.
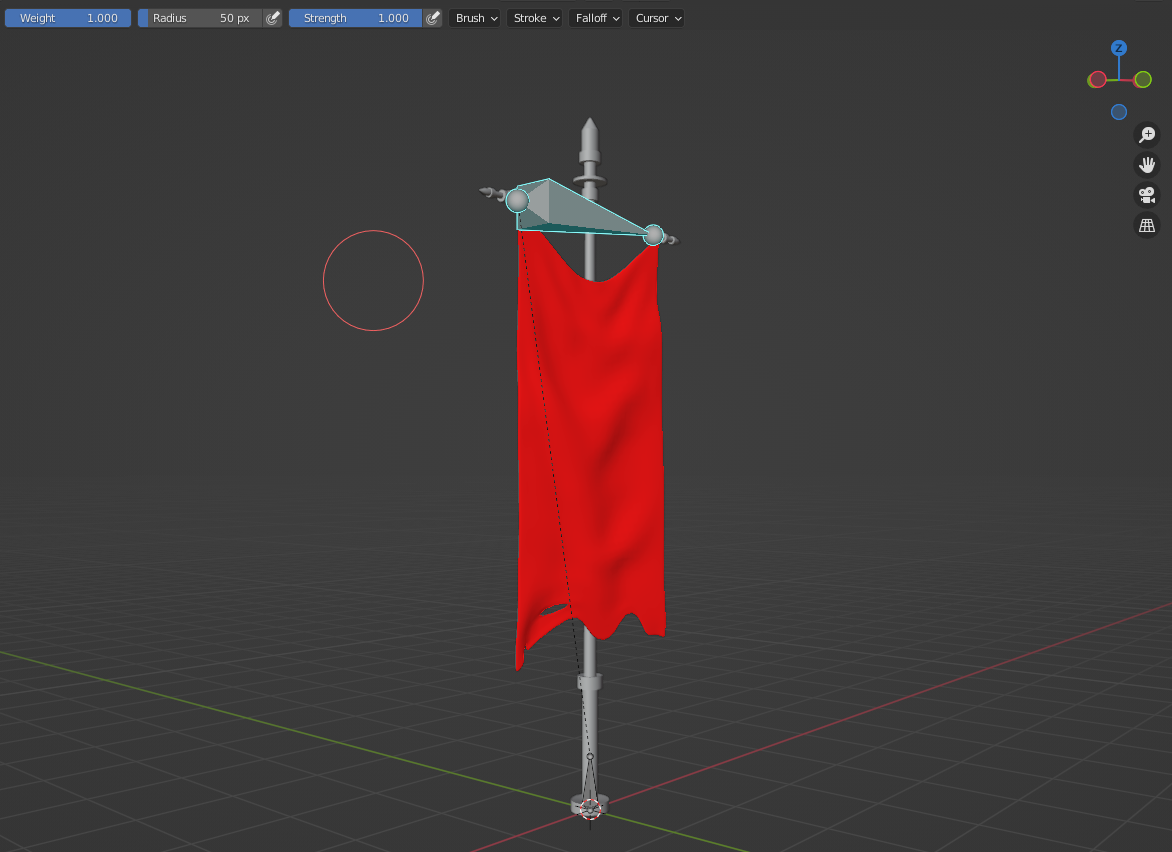 Make sure that your bone doesn't have ANY _L, _R and .00x suffix, otherwise you will have to fix it later on Apex part.
You should assign the cloth to different material so that your job will be easier in the future.
Make sure that your bone doesn't have ANY _L, _R and .00x suffix, otherwise you will have to fix it later on Apex part.
You should assign the cloth to different material so that your job will be easier in the future.
If your cloth model has extra thickness, be sure to join any separated vertices. They will be sliced off out of each other in the simulation if you don't do so.
Once you're done setting up the cloth, export with the correct settings:
 The scale MUST be exported at 1.00 so make sure that you've applied all transform before exporting.
For the armature section, it depends on what kind of armature you're using. Credit to Ludenous.
The scale MUST be exported at 1.00 so make sure that you've applied all transform before exporting.
For the armature section, it depends on what kind of armature you're using. Credit to Ludenous.
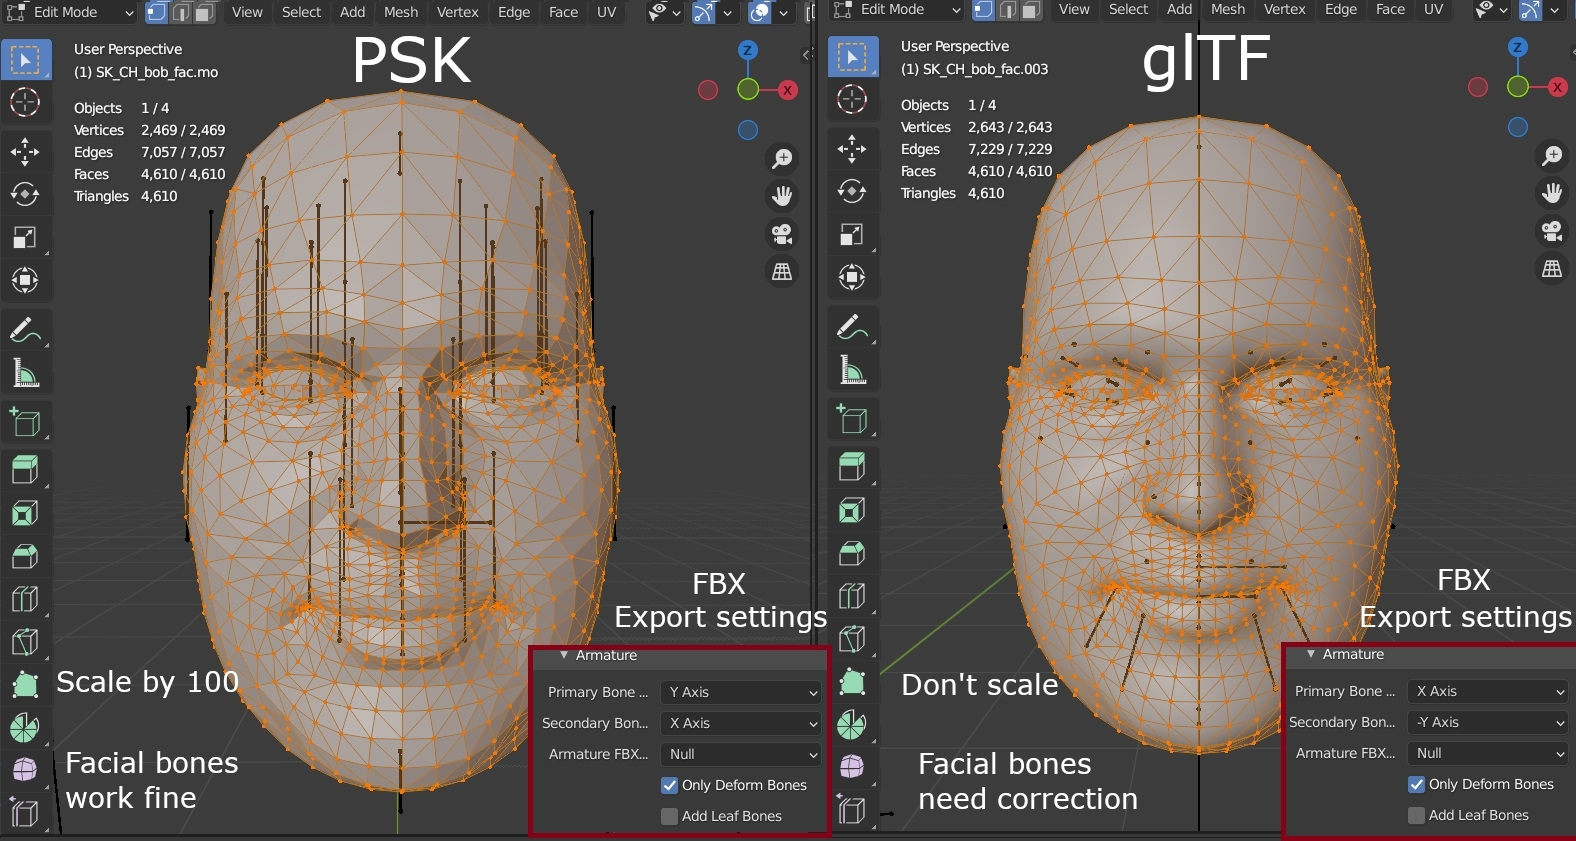 If you're using armature from
 Bone Roll Fix Guide, follow the left settings. Ignore the scale part. The scale must be exactly same as glTF otherwise it will be broken.
Working with APEX
Before you download APEX SDK, if you're an NVIDIA user you want to do this first For NVIDIA users, whenever you tryna simulate the cloth, it will give this error:
unknown error: CudaKernelWrangler.cpp:104: Could not find CUDA module containing function '_Z14simulateClothsv'.
Go to NVIDIA Control Panel then change the PhysX to make it use your CPU instead
First you need to download the APEX SDK from the Prerequisites section.
Once you done that, run the exe file and select the path to get the archive output
![]() Extract it to wherever you want.
Extract it to wherever you want.
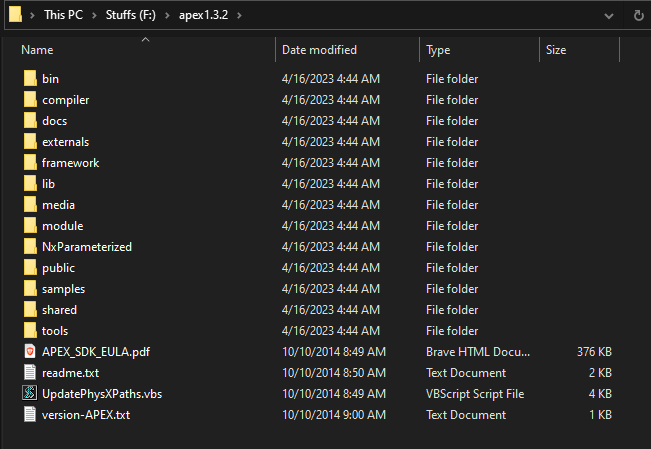 Navigate to
 bin\vc10win32-PhysX_3.3 and run ClothingToolPROFILE.exe
Go to File -> Load Mesh... then select your exported FBX
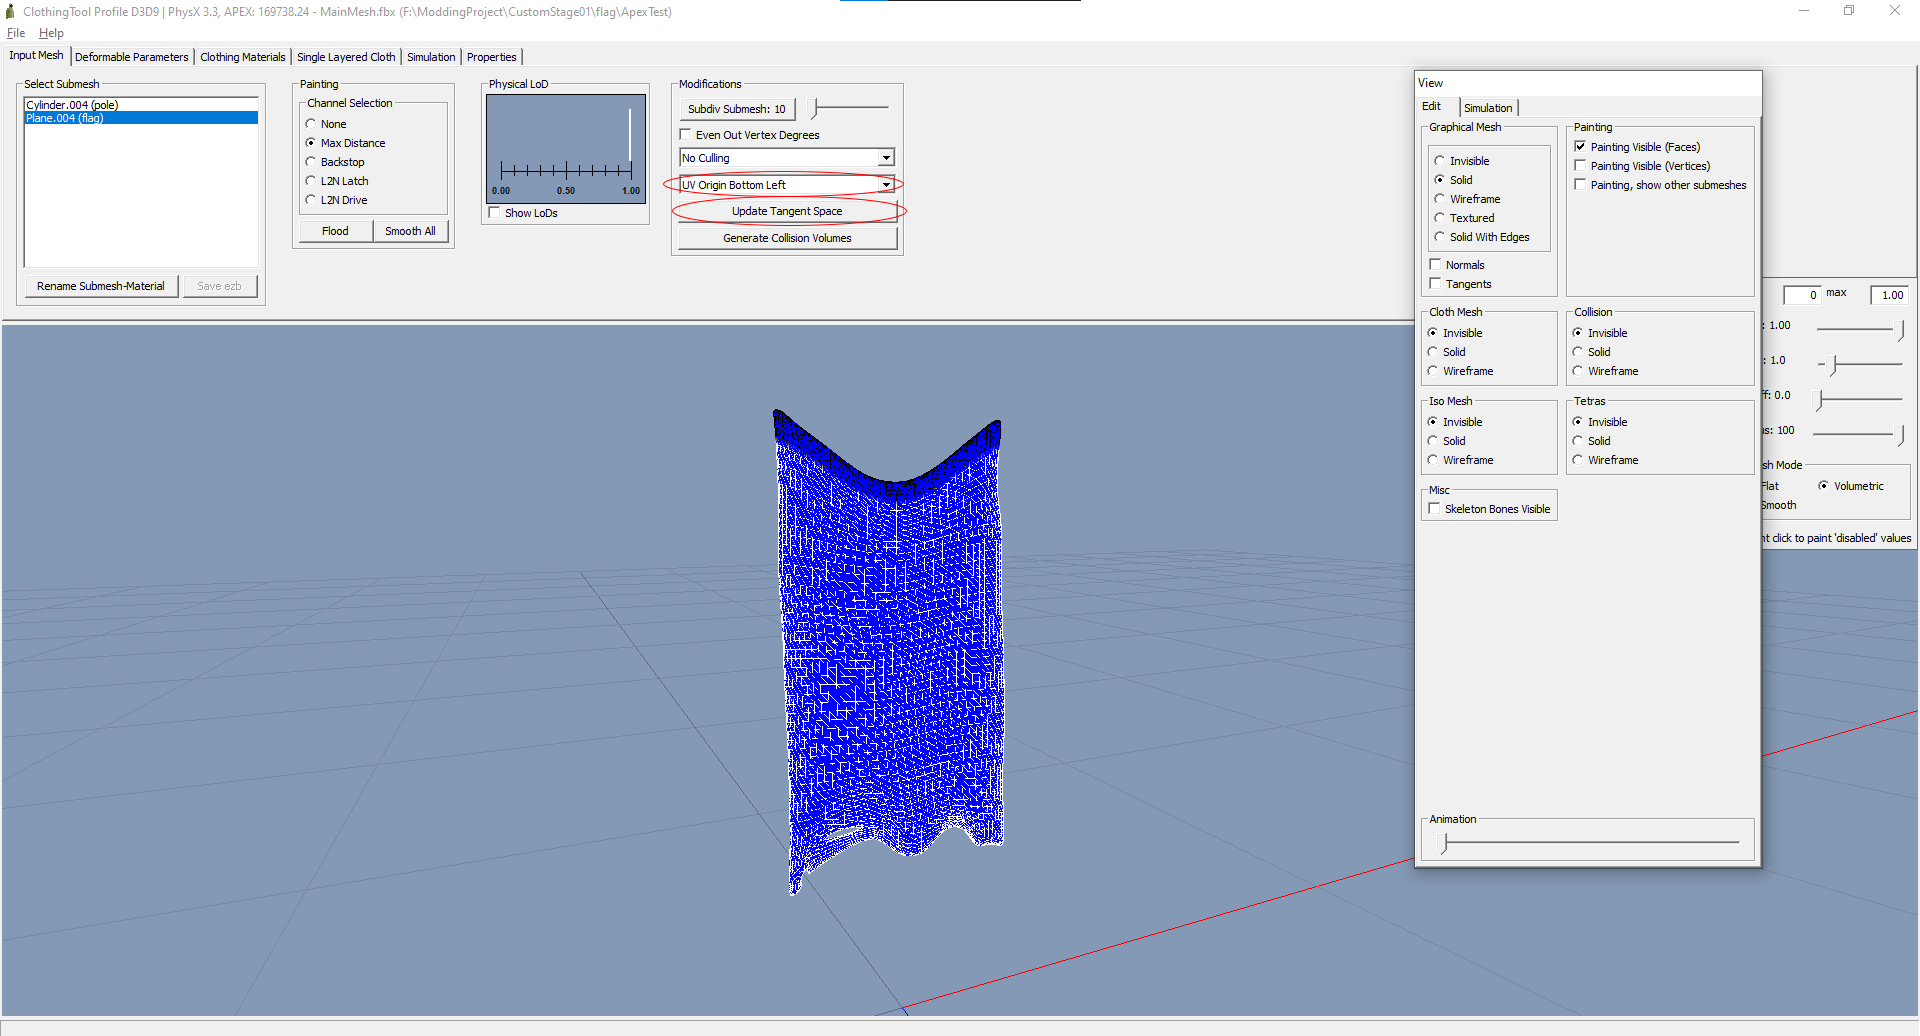 Then you need to make sure that the UV is set to
 UV Origin Bottom Left, otherwise the UV will break on import.
Click on Generate Tangent Space to prevent the mesh having the incorrect and broken shade on APEX import.
Select the submesh and besure that you're selecting the cloth part and not the other, then you're ready to work.
You can also set up the collision volumes by clicking on Generate Collision Volumes to work with collision so that it won't clip with your body parts.
Apex Cloth collision is completely SEPARATED from Physics Asset on UE4, so do mind that.
Now with the explanation for each parts of ClothingToolPROFILE
Painting Channel
Max Distance: Determines which part of cloth will have a simulation. The higher the value is, the further distance of the physics can go. I recommend to set the value to 1 for clothes in general. Unless if you want it to be limited. Backstop: Limits your cloth movement. Don't paint the negative values. L2N Latch: Back part of the cloth. Prevents front and back part of the cloth from clipping into each other. If your mesh has extra thickness like mine, paint the back of it. L2N Drive: Front part of the cloth. It will be automatically painted depends on L2N Latch.
Tips on Painting
- When you're painting Max Distance, you should select the Volumetric mode so that you can paint both front and back part of the mesh.
- You mustn't leave any part of the cloth in the Max Distance completely pink. It's known to have issue so to disable the root from moving, so paint them with value 0.
Deformable Parameters
On this section, you should pay attention to this specific part; Thickness.
It will determine how thick of the material of the cloth is. I recommend to set it to atleast 0.10 so that it reduces the clipping on simulation.
Here's an example on how will it look like if the thickness is too low
Clothing Materials
This part is self-explanatory, you need to mess around with the config by yourself. For me, I have them set up like this

Single Layered Cloth
This is where you can make the simulation happen. You don't have to click to generate Cloth Mesh to get it working, but you can also do it if you want. Click on Start Simulation to see the preview, debunking it back and forth between each until you get the satisfied result. Do mind that every time you have made a change on the cloth, you need to click on Start Simulation again to see the result. You can also mess around with wind on the PhysX Runtime Parameters section to get the glimpse to how well they can collide in-game.
Once you're done with everything, click on Save Asset, you can save it to either APX (XML Asset) or APB (Binary Asset), they don't actually matter.
For more information about APEX, check out NVIDIA's official documentation right here
Importing APEX Clothing to Unreal Engine 4
First import it as you would do. Make sure that your Normal Import Method is set to Import Normal and Tangents
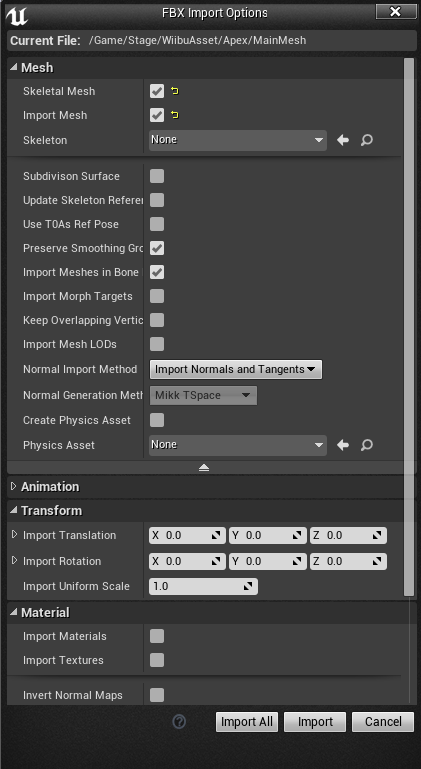 I didn't choose any skeleton as this will be a unique one for stage in my case.
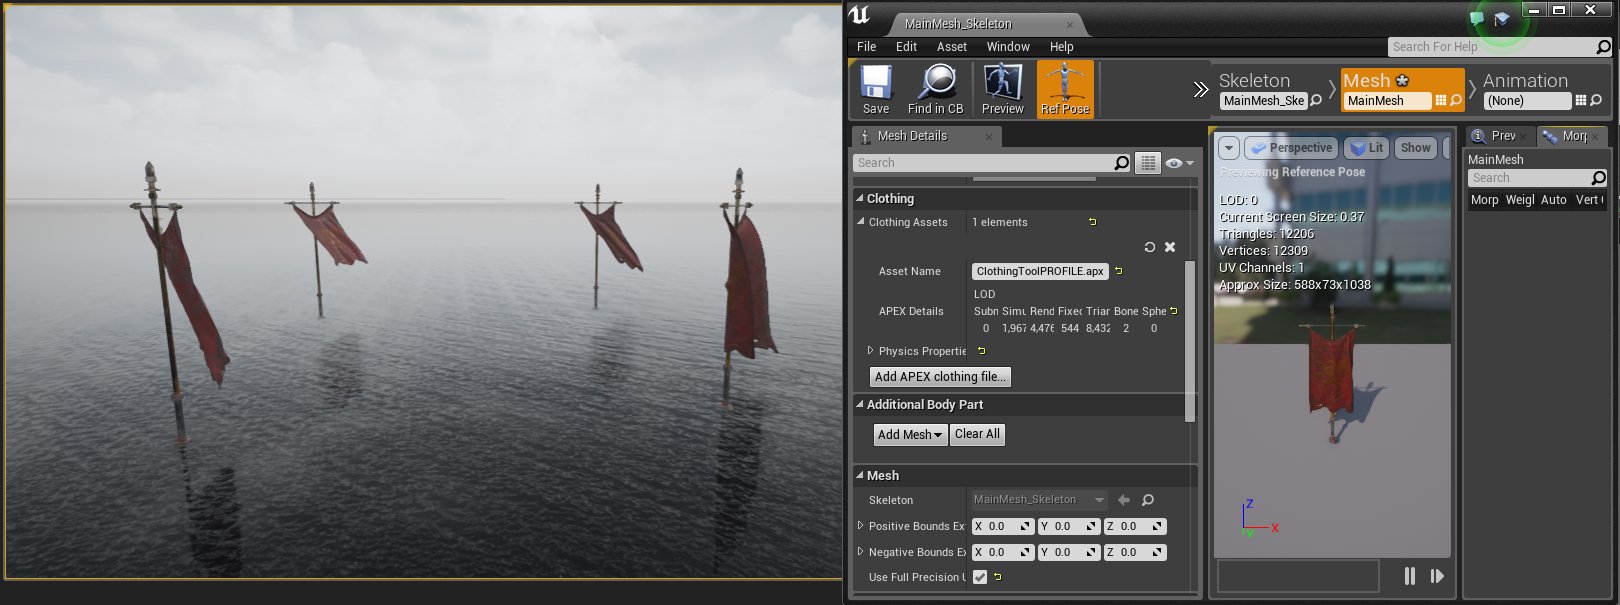
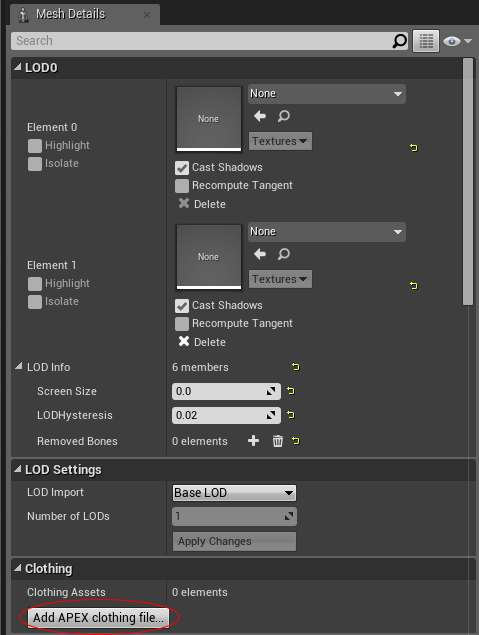
Next, open your mesh, scroll down and click on Add APEX clothing file...
 You can then assign it on the LOD0 section. If they don't explode, you're on the right track and good to go!
If not, you must've screwed something up on Blender and make sure that you actually changed the Unit settings before you did anything on Blender.
Also make sure that you actually applied all transforms on the mesh before working on APEX.
You can then assign it on the LOD0 section. If they don't explode, you're on the right track and good to go!
If not, you must've screwed something up on Blender and make sure that you actually changed the Unit settings before you did anything on Blender.
Also make sure that you actually applied all transforms on the mesh before working on APEX.
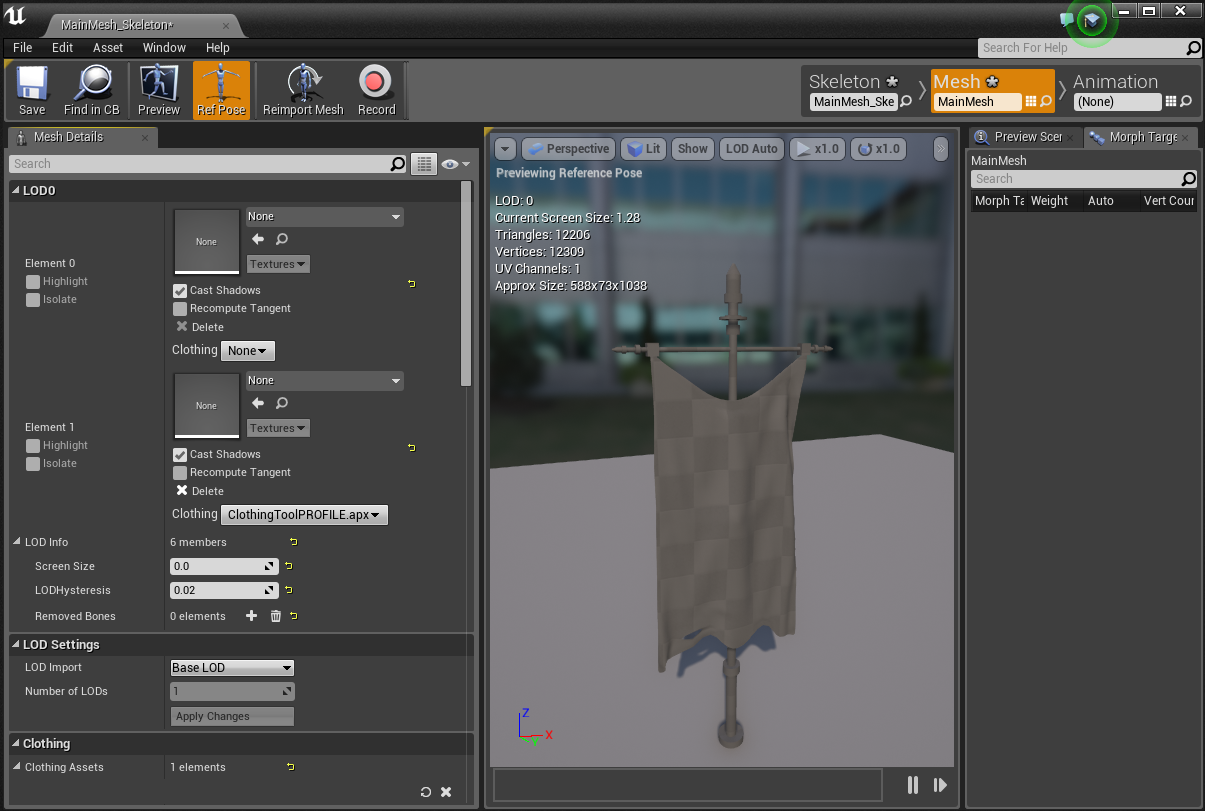 Finally, assign your materials. Make sure that they're actually compatible with APEX (has the
 Used with Clothing flag), otherwise it won't work
Now test it in-game and see the result of your hard, yet low-effort needed amount of work!
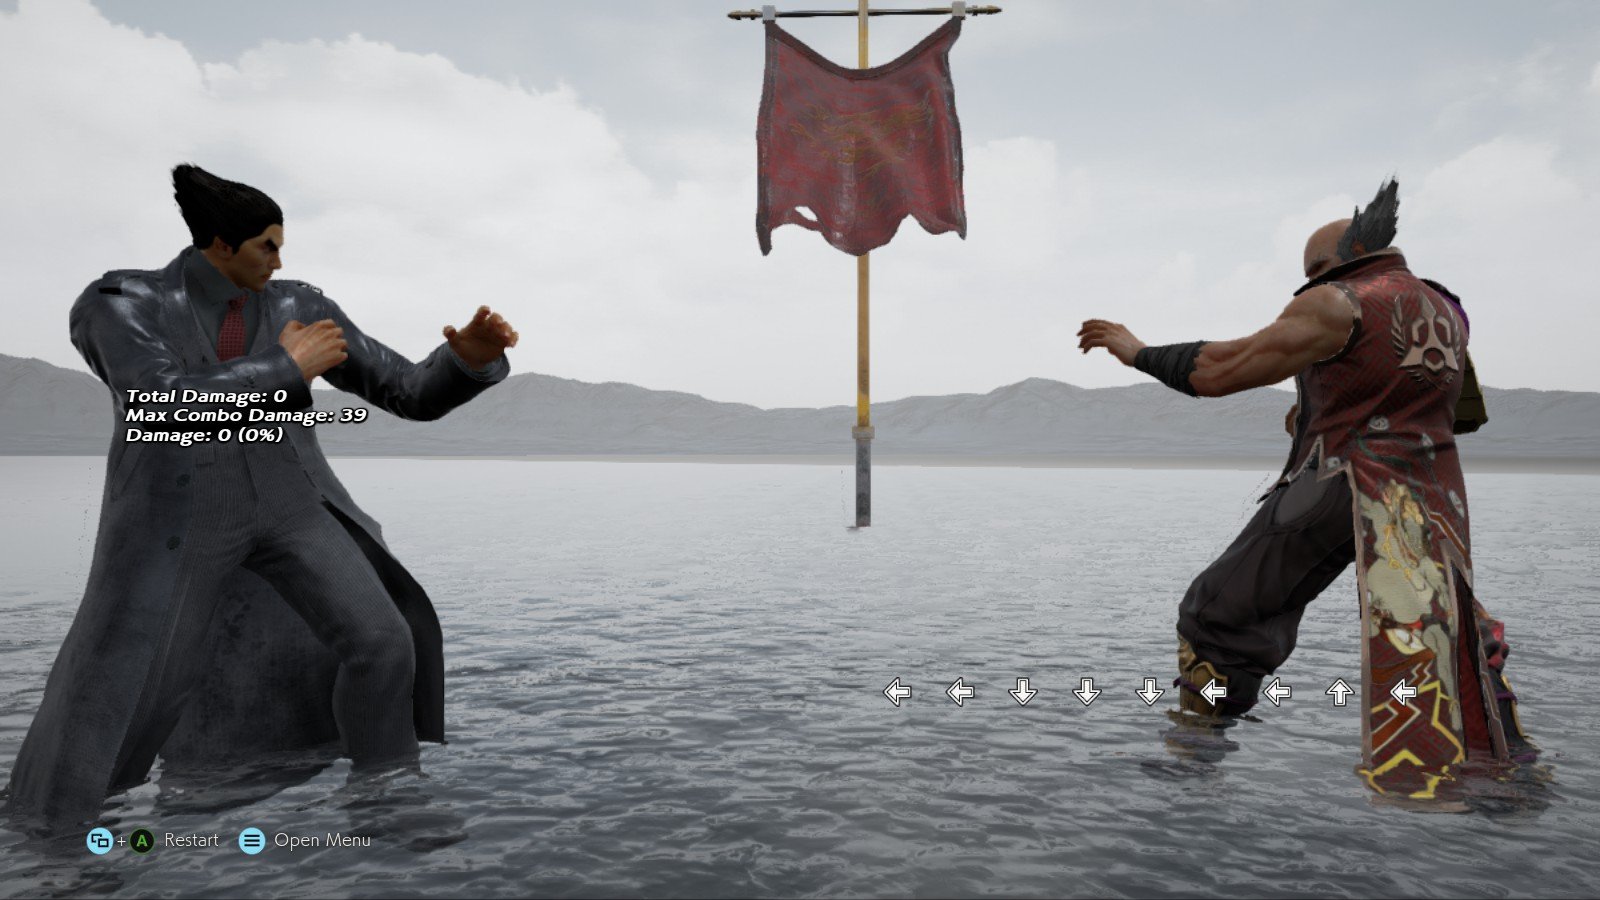
Bonus tip: You can enable Use Full Precision UVs to make the mesh use more accurate UV. Works especially great with APEX Clothing.
Troubleshooting
This troubleshoot section will be updated depends on the problem that has been occurred and resolved during time being
Mapping failed bones when trying to assign APEX Cloth on the mesh part
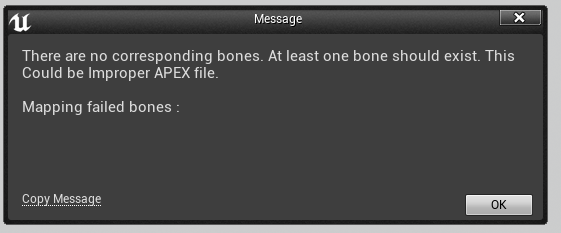 Solution: Try to assign weight to 4 bones instead
And that's all I have for this guide. If you have any questions, feel free to ask me in Modding Zaibatsu discord, and happy modding!